

The $20 Wedding Makeup Secret: How a Texas Bride Did Her Own Bridal Glam
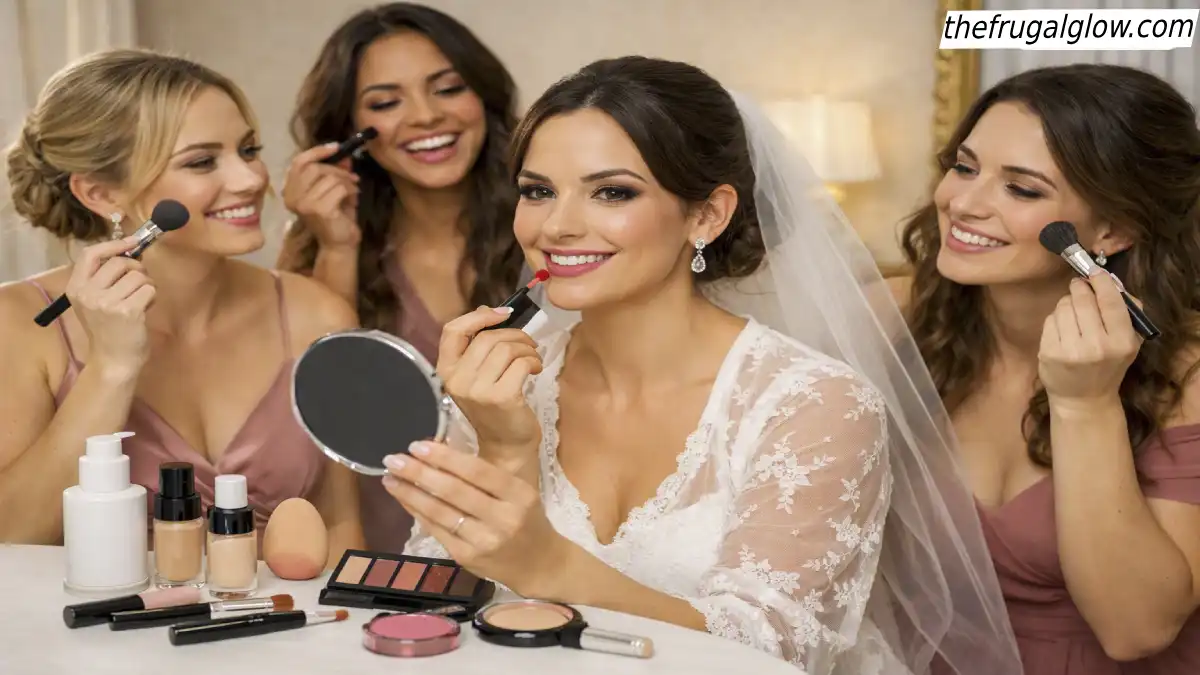
Wedding budgets have a way of ballooning fast, and the makeup line item is one of the sneakiest culprits. A professional bridal makeup artist commonly runs anywhere from $100 to $500 or more depending on your market, and that’s before a trial run, which often adds another full service fee on top. For one budget-minded Texas bride determined to put that money toward literally anything else on the wedding list, the solution was a full DIY glam routine built almost entirely from drugstore shelves, landing at right around $20 total.
The catch that made this actually work wasn’t luck — it was knowing exactly which cheap products genuinely perform under wedding-day conditions (tears, sweat, hours of photos) and which ones to skip entirely. Here’s the full breakdown of how a legitimately long-lasting, camera-ready bridal look comes together on a $20 budget, step by step.
Jump Links
- Why DIY Bridal Makeup Is Having a Moment
- The Golden Rule: Long-Wear and Waterproof Only
- The Full $20 Product List
- Budget Breakdown Table
- The Step-by-Step Routine
- Practice Timeline: What to Do Before the Big Day
- Weather-Specific Adjustments
- DIY vs. Professional Bridal Makeup Table
- Common DIY Bridal Makeup Mistakes
- What to Skip Spending On
- FAQ
- The Bottom Line
Why DIY Bridal Makeup Is Having a Moment
Part of what’s driving this shift is simple economics — wedding costs have climbed across nearly every category, and makeup is one of the more flexible line items to trim without sacrificing how a bride actually looks on her big day. But it’s also a shift in what’s actually available at the drugstore. Formulas have genuinely improved over the past several years, and even professional bridal makeup artists are increasingly candid about reaching for budget products in their own kits. As one celebrity and bridal makeup artist put it in an interview about her go-to products, drugstore items show up in her kit more often than people might expect, and the deciding factor for whether something makes the cut isn’t the price tag — it’s whether the product is genuinely tried-and-true and performs reliably under lights, cameras, and a full day of wear.
That’s the exact mindset behind a successful $20 bridal look: this isn’t about buying the cheapest version of everything indiscriminately. It’s about being selective, prioritizing performance in the categories that matter most (base makeup, mascara, lip color), and skipping the categories where cheap really is just cheap.
The Golden Rule: Long-Wear and Waterproof Only
Every single product decision in a DIY bridal routine must pass through one non-negotiable filter: will this formula survive 12+ hours of emotion, sweat, endless hugging, Texas heat, and high-definition photography?
When you’re doing your own makeup on a $20 budget, you cannot afford formulas that slide, crease, or melt away mid-reception. Long-wear formulations are the ultimate equalizers—they bridges the gap between affordable drugstore makeup and high-end luxury products.
- Waterproof vs. Water-Resistant: For eye products (mascara, eyeliner, and brow gels), standard “water-resistant” won’t cut it. Happy tears, humidity, and emotion require strict waterproof formulas to prevent smudging and raccoon eyes before the first dance.
- Transfer-Resistant Lip & Base Products: Bridal makeup involves constant cheek kisses, champagne toasts, and photo ops. Prioritizing transfer-proof matte or satin finishes ensures your coverage stays locked in place without needing non-stop touch-ups.
- Zero Testing on Wedding Day: The golden rule extends to timing. Never test a new product on the wedding morning—no matter how cheap or highly rated it is. Stick strictly to tested formulas your skin tolerates well to avoid sudden allergic reactions or flash-back issues under flash photography.
Why This Filter Makes Budget Makeup Look Luxury
Longevity is what actually makes makeup look “expensive” in person and on camera. A $6 drugstore waterproof mascara that stays crisp through the vows will look infinitely better in final photos than a $35 luxury non-waterproof mascara that bleeds into fine lines two hours into the reception.
By applying this strict filter to every step, you eliminate product failure and ensure camera-ready endurance without overspending.
The Full $20 Product List
This list sticks almost entirely to ultra-affordable drugstore lines (with e.l.f., NYX, Maybelline, and L’Oréal being the most common go-tos in this price range), chosen specifically for long-wear performance rather than just the lowest possible price tag.
- Hydrating primer — smooths the skin and helps foundation grip and last longer through the day.
- Long-wear, buildable foundation or tinted moisturizer — the base of the whole look; look specifically for “long-wear” or “24-hour” on the label.
- Concealer — for under-eyes and any spot coverage, ideally a long-wear formula that won’t crease under photography lights.
- Translucent setting powder — locks the base in place and controls shine through hours of hugging and dancing.
- Cream or powder blush — adds a natural flush that photographs well.
- Neutral eyeshadow (single pan or mini palette) — a soft, universally flattering shade that won’t need touch-ups.
- Waterproof eyeliner — for definition that survives happy tears.
- Waterproof mascara — non-negotiable for a wedding, since this is the single product most likely to smudge from emotion.
- Long-wear lip color — a shade close to your natural lip tone that won’t need constant reapplication.
- Setting spray — the final lock-in step that extends the wear of every product underneath it.
Budget Breakdown Table
| Product | Estimated Price | Notes |
|---|---|---|
| Hydrating primer | $3–$4 | Drugstore mini or full-size on sale |
| Long-wear foundation/tinted moisturizer | $6–$8 | Prioritize “long-wear” or “24hr” labeling |
| Concealer | $2–$3 | Budget concealer sticks work well for spot coverage |
| Setting powder | $1–$2 | A little goes a long way |
| Cream/powder blush | $1–$2 | Dollar-store and budget lines both work fine here |
| Neutral eyeshadow | $1–$2 | Single-pan or small palette |
| Waterproof eyeliner | $1–$2 | Pencil or gel formula |
| Waterproof mascara | $5–$7 | Worth prioritizing budget here for reliability |
| Long-wear lip color | $2–$3 | Liquid lip or long-wear lipstick |
| Setting spray | $3–$5 | The final lock-in step |
| Estimated Total | ~$25–$38 at full retail, ~$18–$22 with sales/dollar-store subs | Hitting the true $20 mark usually requires a mix of dollar-store basics and a couple of strategic drugstore splurges |
Landing right around $20 typically means leaning on dollar-store or ultra-budget versions for the lower-stakes categories (setting powder, blush, eyeshadow) while spending slightly more on the two products where performance genuinely matters most: mascara and foundation.
The Step-by-Step Routine
1. Prep the skin first.
Start with a clean, moisturized face at least 20–30 minutes before applying any makeup, giving moisturizer time to fully absorb so foundation doesn’t sit on top of a greasy layer.
2. Apply primer.
Focus on areas prone to oil or where makeup tends to break down first, like the T-zone. This creates a smoother surface and genuinely extends wear time.
3. Apply foundation in thin layers.
Build coverage gradually rather than applying one thick layer, which tends to look heavier and less natural in photos. A damp makeup sponge helps blend a thin, even layer that photographs well.
4. Conceal strategically.
Focus concealer only where genuinely needed (under-eyes, any redness or blemishes) rather than applying it all over, which can create a heavier, cakier finish under wedding photography lighting.
5. Set with powder.
A light dusting of translucent powder, focused on the T-zone and any areas prone to shine, locks the base in place for hours.
6. Add blush for a natural flush.
Apply to the apples of the cheeks and blend upward toward the temples for a soft, lifted look that reads well in both close-up and wide wedding photos.
7. Apply a soft, neutral eyeshadow.
A single warm neutral shade swept across the lid creates definition without looking overdone, and it won’t need touch-ups throughout the day the way a bolder, more complex eye look might.
8. Line with waterproof eyeliner.
A thin line along the upper lash line adds definition; keep it soft and natural rather than a dramatic wing if you’re not confident applying one, since simplicity photographs more reliably.
9. Apply several coats of waterproof mascara.
This is the step to genuinely take your time on, since well-applied mascara does more to open up the eyes in photos than almost any other single product.
10. Finish lips with a long-wear color.
A shade close to your natural lip tone tends to photograph the most timelessly and requires the least mid-day touch-up.
11. Lock everything in with setting spray.
A generous, even mist over the entire face is what genuinely extends wear through hours of hugging, dancing, and any happy tears.
Practice Timeline: What to Do Before the Big Day
Doing your own bridal makeup requires practice runs. Skipping this phase is the single biggest mistake DIY brides make. A structured timeline eliminates wedding-day anxiety and ensures zero surprises when the cameras start rolling.
- 4–6 Weeks Before (The Full Dress Rehearsal & Flash Test): Complete a full practice application from start to finish. Wear the makeup for at least 8 hours to test real-world longevity. Take high-resolution photos in natural daylight, indoor warm light, and—most importantly—with direct camera flash to test for flashback or chalky casting.
- 2–3 Weeks Before (Refinement & Wear-Test Adjustments): Analyze your practice photos. Adjust anything that looked washed out on camera, altered in color, or creased after a few hours. If your bronzer faded fast or your concealer creased under flash, tweak your setting spray or powder technique now.
- 1 Week Before (Speed & Timing Run): Do a final practice run specifically focused on timing yourself. Time every step from skin prep to final setting spray so you know your exact baseline duration. Use this week to freeze your product lineup—do not swap or test any new formulas from this point forward.
- Wedding Day (The Buffer Zone): Give yourself significantly more time than you think you need. While professional MUAs budget around 90 minutes for bridal glam, plan for a full 2 to 2.5 hours. Building in an intentional 30-minute cushion prevents rushed application, allows setting sprays to dry completely between layers, and keeps your wedding morning stress-free.
Weather-Specific Adjustments
No matter how budget-friendly or long-wearing your products are, extreme weather will test your makeup’s limits. Tailoring your application to the environment ensures your look holds up from the morning vows to the final exit.
- Hot & Outdoor Venues (Heat & Sweat Control):
High temperatures and humidity break down oil-based formulas fast. Apply a light layer of mattifying primer exclusively to your T-zone (forehead, nose, and chin). Use the “sandwich technique”: mist your face with setting spray before foundation, and lock everything in with a second layer of setting spray after setting powder. - Humid Climates (Moisture Proofing):
Humidity prevents makeup from fully drying down and settling, leading to sliding or patchiness. Stick to strictly oil-free, water-based, or matte-finish base products. Keep a translucent pressing powder or blotting papers in your touch-up kit rather than adding thick liquid layers mid-day. - Cold-Weather & Dry Conditions (Flakiness Prevention):
Cold air and indoor heating strip moisture, causing foundation to cling to dry patches or settle into fine lines. Double down on skin hydration 15 minutes before makeup application using a barrier-supporting moisturizer. Opt for hydrating or satin-finish base products, and rely on cream blushes over heavy powders. - Rain & High-Humidity Risks (Waterproof Lock):
If there is any chance of drizzle or tears during outdoor photos, waterproof eye products are non-negotiable. Swap standard formulas for tubular or waterproof mascaras, use a gel-based waterproof eyeliner, and seal your final base with a high-performance continuous setting mist.
DIY vs. Professional Bridal Makeup Table
| Factor | DIY ($20 Budget Route) | Professional Makeup Artist |
|---|---|---|
| Cost | ~$20–$25 | $100–$500+ |
| Trial run cost | $0 (self-practiced) | Often a separate paid session |
| Familiarity with your own face/skin | High (you know your skin best) | Requires communication and trust |
| Time investment | Multiple practice sessions required | Minimal personal time investment |
| Risk of last-minute stress | Higher if under-practiced | Lower, handled by a professional |
| Customization control | Full control | Shared with the artist’s input |
| Best for | Budget-conscious brides comfortable with makeup | Brides wanting a hands-off, guaranteed result |
Common DIY Bridal Makeup Mistakes
- Trying a brand-new product for the first time on the wedding day itself. Any new product should be tested well in advance to rule out unexpected reactions or performance issues.
- Skipping the setting spray step. This is genuinely the difference between makeup that survives eight hours of a wedding and makeup that starts fading by the ceremony’s end.
- Not accounting for wedding photography lighting. Makeup that looks great in a bathroom mirror can look different under flash photography or outdoor golden-hour light; practicing in multiple lighting conditions helps catch this in advance.
- Underestimating application time on the actual day. Nerves and excitement genuinely slow down application speed; budgeting extra time prevents a rushed, stressed final result.
- Choosing a bold, trend-driven look instead of a timeless one. Wedding photos last a lifetime; a soft, classic look tends to age much better in photographs than a heavily trend-based one.
What to Skip Spending On
Not every category needs a splurge, and knowing where to cut helps a $20 budget stretch as far as possible:
- Individual eyeshadow shades — a small multi-shade palette or even a single versatile shade covers most bridal looks without needing a large collection.
- High-end setting powder — a basic translucent powder does the job just as effectively as a pricier version for most skin types.
- Multiple blush shades — one versatile, natural-looking shade is genuinely enough for a full bridal look.
- Specialty brushes — a small, basic brush set (or even fingers and a makeup sponge for several steps) works fine for this kind of simple, natural bridal application.
📌 YOU MIGHT ALSO LIKE:
How a Florida Mom Built a Luxury ‘Outdoor Oasis’ Using Only Thrifted Finds & Spray Paint
FAQ
Is it really possible to do full bridal makeup for around $20?
Yes, with careful product selection focused on long-wear, waterproof formulas in the categories that matter most, especially mascara and foundation, while sticking to ultra-budget options for lower-stakes categories like blush and setting powder.
Which product is most important to not skimp on in a budget bridal routine?
Waterproof mascara is widely considered the single most important splurge-worthy category, since it’s the product most likely to visibly fail from tears, sweat, or hugging throughout the day.
How many practice runs should I do before my wedding day?
Most DIY bridal makeup guidance recommends at least two to three full practice runs in the weeks leading up to the wedding, ideally photographed in different lighting conditions to see how the look actually holds up on camera.
Do drugstore products really hold up as well as professional ones for a full wedding day?
Many professional makeup artists themselves use drugstore products for specific categories in their kits, prioritizing performance and reliability over price. With the right long-wear, waterproof formulas, drugstore products can absolutely hold up through a full wedding day.
How much time should I budget for doing my own wedding makeup?
Professional artists typically budget 1.5 to 2 hours for a full bridal look; anyone less experienced with makeup application should budget closer to 2 to 3 hours to avoid feeling rushed on the day itself.
What’s the biggest risk of doing DIY bridal makeup instead of hiring a professional?
The biggest risks are under-practicing (leading to a rushed or uneven application on the actual day) and using untested products that might not perform as expected under real wedding-day conditions like tears, heat, or extended wear time.
The Bottom Line
A full bridal glam look doesn’t require a $300 makeup artist invoice to look polished, camera-ready, and genuinely you on your wedding day. With a handful of long-wear, waterproof drugstore products, a few solid practice runs, and a routine built around performance rather than price tags, a $20 makeup kit can absolutely hold its own through the ceremony, the reception, the happy tears, and every photo in between.
For more budget beauty guides and DIY glam routines, check out more posts over at The Frugal Glow.