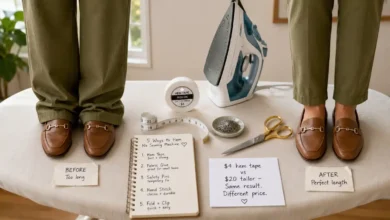
How to Turn Your Grandma’s Vintage Scarves Into a $60 ‘Reformation’ Style Halter Top
Let me tell you about the $68 halter top I almost bought.
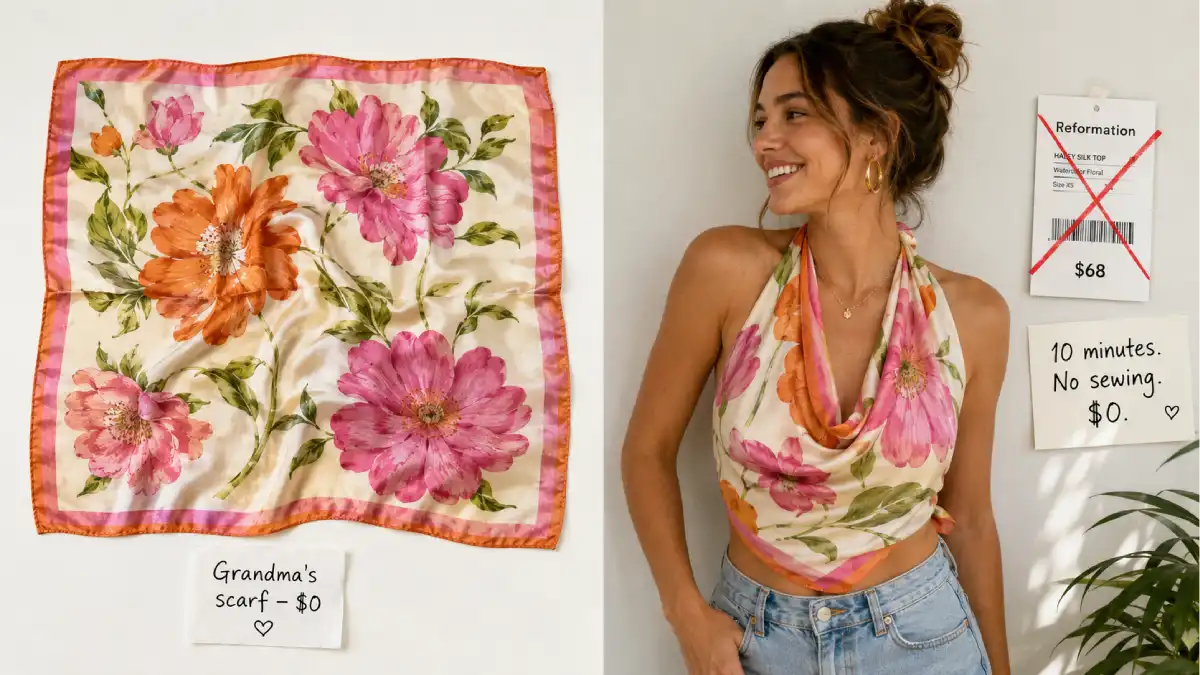
It was from Reformation. A beautiful silk scarf top. The kind you tie around your neck and it drapes perfectly. I had it in my cart. I was about to click “checkout.”
Then I saw the material. 100% silk. The same material as the vintage scarves sitting in my grandma’s old dresser. The scarves I had been ignoring for years because I didn’t know what to do with them.
I closed my laptop. I went to the dresser. I pulled out a bright floral silk scarf. It was 36 inches square. It had been my grandmother’s. She wore it as a headscarf in the 1960s.
I googled “DIY scarf top.” I found a video. Ten minutes long. No sewing. No cutting. Just folding, knotting, and tying.
I followed the steps. Five minutes later, I had a halter top. The same style as the $68 Reformation top. Made from my grandmother’s scarf. Cost? $0. (The scarf was free. The technique was free. The time was ten minutes.)
I wore it to a summer party. People complimented me all night. No one believed it was a scarf.
That was three years ago. I’ve made dozens of scarf tops since. I’ve bought vintage scarves at thrift stores for $2-5. I’ve transformed them into tops that look like they cost $60-100. I’ve given them as gifts. I’ve taught friends how to do it.
Today, I’m sharing the exact technique. No sewing machine required. No cutting. No special tools. Just a square scarf, two safety pins, and ten minutes.
Let’s get into it.
Jump Links
- The $68 Reformation Top That Sent Me to My Grandma’s Dresser
- Why Vintage Silk Scarves Are Perfect for This (And Where to Find Them)
- What You Need (The $0 Tool Kit)
- The Basic Halter Top (10 Minutes, No Sewing)
- The Back-Tie Halter (For a Different Vibe)
- The Knot-Front Top (Cropped and Cute)
- How to Style Your Scarf Top (From Beach to Brunch)
- How to Care for Vintage Silk (So It Lasts)
- Where to Find Vintage Scarves on a Budget
- The Math: What I Saved in Three Years
- Frequently Asked Questions (FAQ)
- Final Thoughts: Grandma Knew What She Was Doing
The $68 Reformation Top That Sent Me to My Grandma’s Dresser
I need to describe that moment of realization.
I was scrolling through the Reformation website. I had a gift card burning a hole in my digital wallet. I found a beautiful halter top made from printed silk. It was $68. I put it in my cart.
Then I looked at the material. 100% silk. Square-shaped. Tie closure at the neck and back.
I stared at the screen. I had seen that shape before. It was the same shape as my grandmother’s silk scarves. The ones she wore in the 1960s. The ones sitting in her old dresser in my guest room.
I walked to the dresser. I opened the drawer. There were a dozen scarves. Silk. Bright colors. Floral prints. Geometric patterns. Some still had the tags on.
I held one up. It was 36 inches square. The same size as the Reformation top laid flat. I googled “how to turn a scarf into a halter top.” Thousands of videos. Thousands of tutorials.
I watched one. Ten minutes. No sewing. No cutting. Just folding and knotting.
I tried it. It worked. The top looked exactly like the $68 version. Actually, it looked better. The vintage silk had a weight and drape that new silk doesn’t have.
That night, I wore it to a barbecue. My friend asked where I bought it. I told her it was my grandmother’s scarf. She didn’t believe me. She thought I was joking.
I’ve made dozens of scarf tops since then. I’ve bought vintage scarves at thrift stores for $2-5. I’ve made them into tops, dresses, and even a swimsuit cover-up. I’ve saved hundreds of dollars.
And every time I wear one, I think of my grandmother. She would have loved this.
Why Vintage Silk Scarves Are Perfect for This (And Where to Find Them)
Let me explain why vintage scarves work so well for this project.
The material is already perfect.
Silk is lightweight, breathable, and drapes beautifully. It doesn’t wrinkle much. It feels expensive because it is expensive. A new silk scarf of the same size would cost $30-50. Vintage scarves cost $2-10.
The size is standardized.
Most vintage silk scarves are 22-36 inches square. That’s the perfect size for a halter top on most bodies. The scarf wraps around your torso and ties at the neck and back.
The prints are unique.
Vintage scarves have prints you won’t find anywhere else. Bold florals, geometric patterns, abstract designs, paisleys. Your top will be one of a kind.
The quality is better than new.
Vintage silk was made before companies started cutting corners. The fabric is thicker. The edges are hand-rolled. The colors are richer. A vintage silk scarf from the 1960s will outlast a new silk top from a fast fashion brand.
Where to find vintage silk scarves:
| Source | Price Range | Best For |
|---|---|---|
| Grandma’s attic (free) | $0 | Sentimental value, best quality |
| Thrift stores (Goodwill, Salvation Army) | $2-5 | Everyday finds, large selection |
| Estate sales | $3-10 | High-end brands (Hermès, Givenchy) |
| eBay | $5-20 | Specific patterns, search by brand |
| Etsy | $10-30 | Curated vintage, ready-to-wear condition |
| Facebook Marketplace | $2-8 | Local finds, no shipping cost |
What to look for:
- Square shape (22-36 inches)
- Silk (not polyester – you can tell by the feel; silk is cool and smooth, polyester is slippery and plasticky)
- No stains or holes (small stains can sometimes be spot-cleaned)
- Bold prints (they look better as clothing)
What to avoid:
- Polyester scarves (they don’t drape the same)
- Scarves with frayed edges (the edges will unravel)
- Very small scarves (under 22 inches won’t cover you)
What You Need (The $0 Tool Kit)
You probably already have everything you need.
Essential items (cost: $0 if you already own them):
| Item | Purpose | Where to Find |
|---|---|---|
| Square silk scarf (22-36 inches) | The main material | Grandma’s attic, thrift store, estate sale |
| Two safety pins | Securing the back (optional, for some styles) | Any desk drawer |
| Your hands | Folding, knotting, tying | Already attached |
| A mirror | Seeing what you’re doing | Your bathroom |
Optional but helpful:
| Item | Purpose | Cost |
|---|---|---|
| Camisole or bandeau | Worn underneath for modesty (if scarf is thin) | Already own |
| Sewing needle and thread | For hemming or tacking (advanced) | $2 |
| Fabric glue | For no-sew hems | $3 |
That’s it. You don’t need scissors (you’re not cutting). You don’t need a sewing machine. You don’t need patterns.
The scarf is already a finished garment. You’re just rearranging it.
The Basic Halter Top (10 Minutes, No Sewing)
This is the style that looks exactly like the $68 Reformation top. It’s the easiest and most versatile.
Best for: 22-36 inch square scarves
What you’ll get: A halter top that ties at the back of the neck and the middle of the back. The front drapes into a soft V-neck.
Step-by-step:
- Lay the scarf flat. It should be a perfect square. Smooth out any wrinkles.
- Fold the scarf in half diagonally. You’re making a triangle. The folded edge will be the top of your top (the part that goes around your neck). The point of the triangle will hang down your back.
- Pick up the two corners of the folded edge. Hold one corner in each hand. These will be your neck ties.
- Wrap the folded edge around your neck. The folded edge should sit at the base of your neck. The point of the triangle should hang down your back.
- Tie the two corners behind your neck. Double knot. Make sure it’s secure but not choking you.
- Wrap the side corners around your waist. The two loose corners (from the sides of the triangle) should now be hanging at your sides. Bring them around to your back.
- Tie the side corners behind your back. Double knot. Adjust so the front drapes nicely.
- Adjust the drape. Pull the front fabric so it lays flat. The V-neck should fall naturally. If the top is too low, tie the side corners higher (around your ribcage, not your waist).
Pro tip: If the scarf is very large (over 32 inches), tie the side corners under your bust instead of at your waist. This creates a cropped, empire-waist look.
Modesty hack: If the scarf is thin or slightly sheer, wear a camisole or bandeau underneath in a matching color. Nude works with everything.
The Back-Tie Halter (For a Different Vibe)
This style ties at the back of the neck and the back of the waist. It’s slightly more secure and great for larger scarves.
Best for: 30-36 inch square scarves
What you’ll get: A halter top where the front is smooth and the back has a dramatic drape.
Step-by-step:
- Lay the scarf flat. Smooth out wrinkles.
- Fold the scarf in half diagonally. You’re making a triangle.
- Pick up the two corners of the folded edge. These will be your neck ties.
- Wrap the folded edge around your neck. The folded edge sits at the base of your neck. The point of the triangle hangs down your back.
- Tie the two corners behind your neck. Double knot.
- Take the two side corners (the ends of the triangle’s base). Bring them around to your back.
- Cross them behind your back. Bring them back to the front.
- Tie them in a bow or knot at your waist or under your bust.
The difference from the basic halter: The side ties cross behind your back before tying in front. This creates a different drape and can feel more secure for larger busts.
Pro tip: For a crop top look, tie the side ties under your bust instead of at your waist. The excess fabric will hang down like a peplum.
The Knot-Front Top (Cropped and Cute)
This style is perfect for high-waisted pants or skirts. It shows a little skin but not too much.
Best for: 22-28 inch square scarves
What you’ll get: A cropped top that ties in a knot at the front. The back is open.
Step-by-step:
- Lay the scarf flat.
- Fold the scarf in half diagonally. Triangle shape.
- Pick up the two corners of the folded edge. These will be your neck ties.
- Wrap the folded edge around your neck. The folded edge sits at the base of your neck. The point of the triangle hangs down your front.
- Tie the two corners behind your neck. Double knot.
- Take the two side corners. Bring them to the front.
- Tie them in a knot at your sternum (between your breasts). Not too tight. Leave a little drape.
- Adjust. The point of the triangle should hang below the knot, creating a soft drape.
What this looks like: The front has a knot with fabric draping below. The back is open (just the neck tie). This style is very flattering and shows off your back.
Pro tip: Wear this with high-waisted pants or a skirt. The crop is intentional, not accidental.
How to Style Your Scarf Top (From Beach to Brunch)
One scarf top can be styled for many occasions.
For the beach:
- Wear the basic halter with high-waisted shorts
- Add a wide-brim hat and sandals
- Use a larger scarf (36 inches) as a swimsuit cover-up – just don’t tie it as tight
For brunch:
- Wear the back-tie halter with white jeans
- Add a denim jacket (unbuttoned) over the top
- Wear with wedges or strappy sandals
For a summer party:
- Wear the knot-front top with a maxi skirt or wide-leg trousers
- Add statement earrings and heeled sandals
- The silk elevates the look; it’s appropriate for dressy casual
For a date night:
- Wear the basic halter tucked into a high-waisted midi skirt
- Add a clutch and delicate jewelry
- The silk looks expensive; you don’t need much else
For work (if your office is casual):
- Wear the basic halter under a blazer (the blazer covers the open back)
- Pair with tailored trousers
- Keep jewelry minimal
Layering tip: Silk scarf tops are thin. They layer beautifully under cardigans, blazers, and even chunky sweaters (just the collar peeking out).
How to Care for Vintage Silk (So It Lasts)
Vintage silk is delicate. Treat it well, and it will last another 50 years.
Washing:
- Hand wash only. Never machine wash silk.
- Use cold water and a mild detergent (Woolite, baby shampoo, or specialized silk wash).
- Gently swish the scarf. Don’t wring or twist.
- Rinse with cold water until the soap is gone.
Drying:
- Never put silk in the dryer. The heat damages the fibers.
- Lay flat on a clean towel. Roll up the towel to squeeze out excess water.
- Unroll and lay flat on a drying rack. Keep away from direct sunlight (which fades colors).
Ironing:
- Iron silk when it’s still slightly damp.
- Use a low heat setting. Test on a small area first.
- Iron on the reverse side (inside out) to protect the print.
Stain removal:
- Blot stains immediately with a clean cloth. Don’t rub.
- For oil stains, use cornstarch (see my other guide!). Let it sit for an hour, then brush off.
- For ink stains, dab with rubbing alcohol (test first).
Storage:
- Fold scarves (don’t hang them – hanging stretches the silk).
- Store in a drawer or box away from direct sunlight.
- Avoid plastic bags (they trap moisture). Use cotton or muslin storage bags.
What NOT to do:
- Don’t use bleach (it dissolves silk).
- Don’t use fabric softener (coats fibers, ruins drape).
- Don’t spray perfume directly on the scarf (alcohol damages silk).
Where to Find Vintage Scarves on a Budget
You don’t need to inherit scarves. You can find them everywhere.
Thrift stores (Goodwill, Salvation Army, local shops):
- Price: $2-5 each
- Pro tip: Look in the accessories section (not just the scarf rack – sometimes scarves end up with belts or hats). Check both men’s and women’s sections.
- What to look for: Silk feels cool and smooth. Polyester feels slippery and plastic-y. Do the “feel test.”
Estate sales:
- Price: $3-10 each (sometimes less on the last day of the sale)
- Pro tip: Go on the last day of the estate sale. Everything is 50% off. That $10 Hermès becomes $5.
- What to look for: Estate sales often have higher-end scarves (brands like Hermès, Givenchy, Dior, YSL).
eBay:
- Price: $5-20
- Pro tip: Search for “vintage silk scarf lot” – you’ll get multiple scarves for one price. Sort by “auction, ending soonest” for the best deals.
- Search terms: “vintage silk scarf,” “square silk scarf,” “Hermès silk scarf” (if you’re feeling fancy).
Facebook Marketplace:
- Price: $2-8
- Pro tip: Search for “vintage scarves” and filter by local pickup. No shipping costs.
- What to look for: Check photos carefully. Ask the seller if they’re silk or polyester.
Your family:
- Price: $0 (but ask politely)
- Pro tip: Ask older relatives if they have scarves they don’t wear anymore. They might be thrilled that you want them.
- What to say: “I’m learning to make tops out of vintage scarves. Do you have any you’d be willing to part with?”
The Math: What I Saved in Three Years
Let me break down the actual dollars.
If I had bought new tops instead of making them from scarves:
| Item | Retail Price (Reformation style) | Number Made | Total Cost |
|---|---|---|---|
| Silk halter top | $68 | 8 | $544 |
| Silk knot-front top | $58 | 4 | $232 |
| Silk back-tie top | $68 | 3 | $204 |
| Silk beach cover-up (using large scarf) | $78 | 2 | $156 |
| Total if bought new | $1,136 |
What I actually spent:
| Item | Cost |
|---|---|
| Scarves from thrift stores (15 scarves) | $45 |
| Scarves from estate sales (5 scarves) | $25 |
| Scarves from Grandma (free) | $0 |
| Safety pins (already had) | $0 |
| Camisoles for layering (already had) | $0 |
| Total spent | $70 |
Total saved over 3 years: $1,066
Cost per top: $4.67
Retail equivalent per top: $68
Savings per top: $63.33
What I did with the savings:
- Bought a higher-end vintage scarf (Hermès) for $40 (still cheaper than one Reformation top)
- Took a friend out for a nice dinner
- Put the rest into savings
And I have a collection of unique, one-of-a-kind tops that no one else owns.
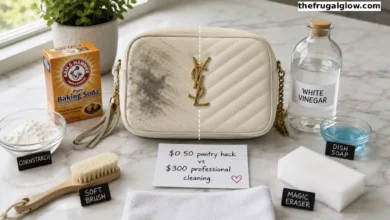
The $2 ‘Pantry’ Hack for Removing Stubborn Stains from Your Favorite Designer Bags
Frequently Asked Questions (FAQ)
1. Do I need to know how to sew to make these tops?
No. None of the styles described require sewing. They use folding, knotting, and tying. The scarf is already hemmed. The edges are finished. You’re just rearranging the fabric. If you want a more permanent fit, you can add a few stitches to tack the folds in place, but it’s not necessary.
2. How do I know if a scarf is real silk?
Do the “feel test.” Silk is cool to the touch and smooth. Polyester is slippery and plastic-y. You can also do the “burn test” (with a tiny thread from the edge): silk smells like burning hair and turns to ash; polyester smells like burning plastic and forms a hard bead. Only do this on a thread you’ve removed from the hem, not on the scarf itself.
3. What size scarf do I need for my body size?
- XS/S (size 0-4): 22-26 inches. Smaller scarves work well for petite frames.
- M (size 6-10): 26-30 inches. Standard size, works for most bodies.
- L/XL (size 12-16): 30-36 inches. Larger scarves provide more coverage.
- Plus size (18+): 36+ inches. Look for “oversized” silk scarves (they exist, but are rarer).
If you’re between sizes, size up. A larger scarf can be folded to fit. A smaller scarf can’t be stretched.
4. Can I use polyester scarves instead of silk?
You can, but the result won’t be the same. Polyester doesn’t drape like silk. It’s stiffer and doesn’t knot as nicely. It also doesn’t breathe, so you’ll get sweaty. That said, if you find a polyester scarf with a beautiful print and you’re just practicing, go for it. But for the final product, silk is worth the extra dollar or two.
5. How do I keep the top from coming untied during the day?
Double knot everything. A single knot can slip, especially with silk (which is slippery). After tying, tuck the loose ends into the folds of the scarf so they don’t flap around. If you’re really worried, add a small safety pin to secure the knot. Position the safety pin so it’s hidden under a fold of fabric.
6. Will this work with a larger bust (D+)?
Yes, with adjustments. Use a larger scarf (30-36 inches). Tie the side knots higher (under your bust instead of at your waist). This creates an empire waist that supports and flatters a larger bust. You can also wear a camisole or bralette underneath for extra support. The back-tie halter style (where the side ties cross behind your back) tends to be more secure for larger busts.
7. Can I turn a scarf into a dress instead of a top?
Yes, if you have a very large scarf (45 inches or larger). Search for “scarf dress tutorial” on YouTube. The same basic principle applies: fold, wrap, tie. A 45-inch square scarf can become a strapless dress or a halter dress. A 60-inch scarf can become a maxi dress. For most vintage scarves (which are usually 22-36 inches), a top is the best use.
Final Thoughts: Grandma Knew What She Was Doing
Here’s what I want you to take away.
I almost spent $68 on a top I could make from a scarf. A scarf that had been sitting in a drawer for fifty years. A scarf that cost nothing. A scarf that belonged to my grandmother.
That moment changed how I shop. I don’t buy what I can make. I don’t buy what I can find. I look at vintage items and see potential, not age.
Silk scarves are everywhere. Thrift stores have bins of them for $2. Estate sales have drawers full. Your grandma’s attic might have a stack. Most people see old lady accessories. I see summer tops.
The technique takes ten minutes. There’s no sewing. No cutting. No special tools. Just folding and knotting. If you can tie your shoes, you can make a scarf top.
So this weekend, go to a thrift store. Find a silk scarf for $3. Go home. Lay it on your bed. Fold it in half. Tie it around your neck. Tie it around your back. Look in the mirror.
That’s not a scarf. That’s a $68 top.
And you made it yourself.
That’s the frugal glow. And it looks fabulous on you. 💛
For more DIY fashion tutorials, upcycling ideas, and money-saving style tips, visit The Frugal Glow.