

The $15 Adjustable Dumbbell Hack: How to Make Water-Filled Weights
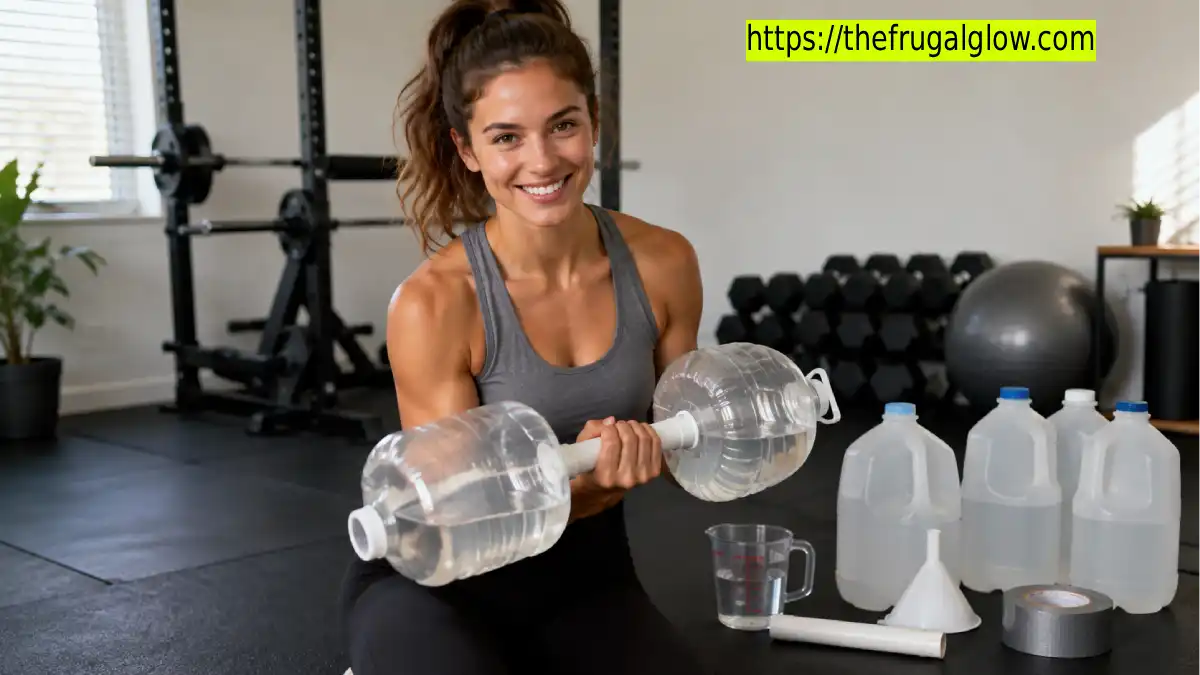
Adjustable dumbbell sets are one of the smarter home gym investments out there, letting you swap weight increments without buying a full rack of individual dumbbells. They’re also genuinely expensive — commonly running $150 to $400+ for a quality set. The workaround, and it’s a legitimately effective one, is water. Water is free, infinitely adjustable in small increments, and when paired with a few cheap containers and a simple handle setup, it becomes a genuinely functional home weight system for around $15 total.
This is the full build guide: the exact math behind how much water equals how much weight, three different DIY methods depending on how heavy you want to go, and the safety details that keep the whole setup from falling apart mid-set.
Jump Links
- The Core Math: How Much Does Water Actually Weigh
- What You’ll Need (Under $15 Total)
- Method 1: The Simple Milk Jug Dumbbell
- Method 2: The Water Bottle Barbell/Dumbbell
- Method 3: The Adjustable PVC Pipe Dumbbell
- Weight Reference Table
- Cost Breakdown Table
- Water vs. Sand: Which Filler Should You Use
- Safety Tips You Genuinely Shouldn’t Skip
- Exercises You Can Do With Water-Filled Weights
- FAQ
- The Bottom Line
The Core Math: How Much Does Water Actually Weigh
This is the entire foundation of the whole hack, and it’s refreshingly simple: 1 liter of water weighs almost exactly 1 kilogram (about 2.2 pounds), and 1 gallon of water weighs approximately 8.34 pounds. That consistent, predictable relationship is what makes water such a genuinely useful DIY weight filler — you can calculate your exact target weight before you even start pouring, rather than guessing.
This predictability is also what makes water-filled weights truly “adjustable” in a way that’s hard to replicate cheaply with other materials. Want to go up by exactly 2.5 pounds? That’s a little over a liter of water. Want to drop down slightly for a higher-rep set? Just pour some out. No plates to swap, no pins to reposition — just a measuring container and a sink.
What You’ll Need (Under $15 Total)
- Two to four sturdy plastic containers — empty gallon milk jugs, laundry detergent jugs (thoroughly cleaned), or 1–2 liter soda bottles all work well
- A wooden dowel or length of PVC pipe (for a true dumbbell-style handle, optional for the simplest jug method)
- Duct tape — for reinforcing handles and sealing lids
- A funnel (or a rolled paper cone secured with tape, as a free substitute)
- A kitchen scale or measuring container — for precise weight calibration
- Optional: foam pipe insulation or cloth — for a more comfortable grip on any DIY handle
Nearly every item on this list can be sourced from things you already have around the house (empty jugs, tape, a funnel), which is exactly why the entire build realistically costs under $15 even when buying a few components new.
Method 1: The Simple Milk Jug Dumbbell
This is the fastest, lowest-effort version — genuinely doable in under five minutes with zero tools.
Steps:
- Take two clean, empty gallon milk jugs or water jugs (matching sizes work best for balanced left/right training).
- Fill each jug with water to your desired weight level, using the conversion math above to calculate the target (a full gallon jug of water weighs roughly 8.34 pounds).
- Screw the original caps back on tightly.
- Reinforce the cap seal with a wrap of duct tape for extra security against leaks.
- Grip the jug by the built-in handle and start your workout.
This method works particularly well for exercises like farmer’s carries, goblet squats, deadlifts, and overhead presses, where a jug’s built-in handle is comfortable to grip directly.
Method 2: The Water Bottle Barbell/Dumbbell
This method creates a more traditional dumbbell shape using a central handle with weighted bottles on each end — ideal for curls, rows, and other standard dumbbell movements.
Steps:
- Take four similarly-sized water bottles (1-liter bottles work well; choose shorter, wider bottles rather than tall ones, since tall bottles can interfere with movement mechanics during exercises like curls).
- Fill all four bottles with water to the same level, checking with a kitchen scale to confirm they match in weight.
- Take a length of PVC pipe or a sturdy wooden dowel to serve as the handle.
- Tape two filled bottles securely to one end of the pipe, with the bottoms of the bottles facing each other for balance.
- Wrap tape around the connection points thoroughly, then repeat on the other end with the remaining two bottles.
- Wrap the center handle section with foam or cloth for a more comfortable grip.
This build creates a genuinely dumbbell-shaped tool with a real, gripable handle in the middle, closer in feel to a standard gym dumbbell than the simple jug method.
Method 3: The Adjustable PVC Pipe Dumbbell
This is the most genuinely “adjustable” version, since it uses screw-cap containers on a threaded design that lets you add or remove water without disassembling the entire dumbbell each time.
Steps:
- Use two wide-mouth plastic containers with secure screw-on lids (large water bottles or small jugs both work).
- Drill or cut a small, snug hole in the center of each lid, sized to fit your handle (a PVC pipe or wooden dowel).
- Thread the handle through both lids, positioning the containers symmetrically on either end.
- Secure each container firmly to the handle using strong tape or a compatible fitting, making sure there’s no wobble or play in the connection.
- Fill each container through the cap opening (before final sealing) using your funnel, checking weight with a scale as you go.
- Once both sides are calibrated to match, seal everything thoroughly with tape for stability during use.
This version takes the most setup time of the three methods, but it creates the most genuinely reusable, adjustable tool, since the containers can be refilled or partially emptied repeatedly without redoing the entire build each time.
Weight Reference Table
Use this table to quickly calculate target weights without needing to do the math yourself each time.
| Container Size | Water-Filled Weight | Sand-Filled Weight (heavier alternative) |
|---|---|---|
| 1 liter bottle | ~2.2 lbs (1 kg) | ~3.3 lbs (1.5 kg) |
| 1.5 liter bottle | ~3.3 lbs (1.5 kg) | ~5 lbs (2.3 kg) |
| 2 liter bottle | ~4.4 lbs (2 kg) | ~6.8 lbs (3.1 kg) |
| 1 gallon jug | ~8.34 lbs (3.8 kg) | ~12+ lbs (varies by sand density) |
| 5 liter container | ~11 lbs (5 kg) | ~16.9 lbs (7.65 kg) |
Cost Breakdown Table
| Item | Estimated Cost | Notes |
|---|---|---|
| 2–4 plastic jugs/bottles | $0–$4 | Often free if reusing household containers |
| PVC pipe or wooden dowel | $3–$6 | Available at any hardware store, often sold pre-cut |
| Duct tape | $3–$5 | A single roll covers multiple builds |
| Foam grip wrap (optional) | $2–$4 | Pipe insulation foam works well and is inexpensive |
| Estimated Total | ~$8–$15 | Cost drops further if reusing containers already on hand |
Water vs. Sand: Which Filler Should You Use
Both fillers work, but they suit slightly different goals. Since sand is denser than water, sand-filled containers reach a heavier weight in the same container size, which makes sand the better choice if you’re aiming for a heavier dumbbell using smaller, more manageable containers. Water, on the other hand, offers unmatched adjustability and convenience — it’s free, mess-free to portion with a measuring container, and easy to add or pour out in small, precise increments without needing a funnel or dealing with spillage.
For most home workout purposes, especially anyone newer to strength training or working with lighter-to-moderate weight ranges, water is the more practical and genuinely more “adjustable” choice. Sand becomes more useful once you’re trying to push into heavier weight ranges without needing enormous, unwieldy containers.
Safety Tips You Genuinely Shouldn’t Skip
- Use thick, leak-proof, sturdy containers, especially for anything used frequently — thin, flimsy plastic is more likely to crack or leak under repeated stress.
- Ensure there’s no empty air space left in sealed containers, since trapped air can shift the weight distribution and create instability mid-exercise.
- Double-check that both sides of any dumbbell-style build are evenly weighted using a kitchen scale, since uneven weight distribution between hands can strain the body asymmetrically over time.
- Reinforce every seam and cap with tape, and inspect your build before each use for any sign of weakening, cracking, or leaking.
- Test the dumbbell with light, controlled movements first before jumping into a full workout, to make sure the connection points hold under actual movement and load.
- Wrap handles with foam or cloth for better grip security, since a slipping handle mid-rep is a genuine injury risk.
- Keep water-filled weights away from extreme heat (like a hot car trunk), which can weaken plastic over time and increase the risk of container failure.
Exercises You Can Do With Water-Filled Weights
- Bicep curls and hammer curls — using the dumbbell-style builds (Methods 2 or 3)
- Overhead presses — a great full-body test of the build’s stability under vertical load
- Bent-over rows — targeting the back and shoulders using a horizontal pulling motion
- Goblet squats — holding a single jug (Method 1) close to the chest
- Farmer’s carries — simply walking while holding a jug in each hand, an excellent full-body and grip-strength exercise
- Deadlifts — using jugs or the barbell-style build for a hip-hinge movement pattern
- Lateral raises and front raises — lighter water-filled weights work particularly well here, since these movements don’t require heavy loads to be effective
- Weighted lunges — holding a jug in each hand at your sides while lunging
📌 YOU MIGHT ALSO LIKE:
The 30-Day ‘No-Equipment’ Challenge: Get a Toned Core with Just a Bath Towel
FAQ
How much weight can I realistically make with water-filled containers?
Using standard household containers, you can realistically reach anywhere from about 2 pounds (a small water bottle) up to roughly 11 pounds (a 5-liter container) per single container, with larger or multiple combined containers extending that range further.
Is water actually a good weight filler, or is sand always better?
Both work well for different goals. Water offers unmatched ease of adjustment and is completely free, while sand allows you to reach heavier weights using smaller containers, since sand is denser than water.
How do I make sure both dumbbells weigh exactly the same?
Use a kitchen scale to weigh each filled container before sealing, adjusting the water level in one side until both containers match as closely as possible.
Are water-filled DIY dumbbells actually safe to use regularly?
Yes, when built properly with sturdy containers, secure sealing, and reinforced tape at all connection points. Regularly inspecting the build for any signs of wear, leaking, or loosening before each use is an important ongoing safety habit.
Can I make these dumbbells heavier over time as I get stronger?
Yes, that’s actually the core appeal of this method. Simply add more water (or switch to sand for a denser fill) to increase the weight as your strength improves, without needing to buy new equipment.
Do I need any special tools to build these at home?
For the simplest jug method, no tools are required at all. The PVC pipe versions benefit from basic tools like a drill or a saw for cutting the handle to size, though many hardware stores will pre-cut PVC pipe to your specified length for free or a small fee.
The Bottom Line
A genuinely adjustable dumbbell set doesn’t have to mean a $150-plus purchase — a few clean containers, some water, a length of pipe, and a roll of duct tape can build a functional, truly adjustable home weight system for around $15 total. With the right container sizes and a kitchen scale to calibrate weight precisely, this hack scales from light beginner weights all the way up to a genuinely challenging load, using nothing more exotic than tap water.
For more budget-friendly wellness and home workout guides, check out more posts over at The Frugal Glow.