

Ditch the Sheet Masks! How to Make Reusable DIY Cotton Sheet Masks for Pennies
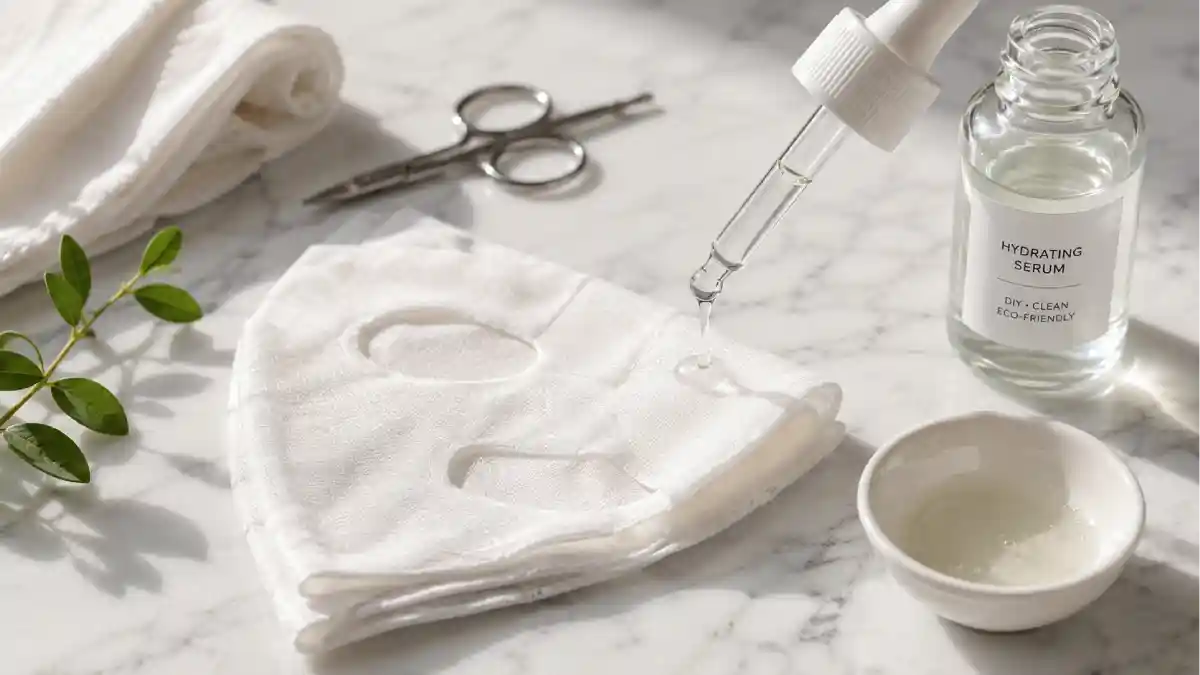
Disposable sheet masks have a genuine appeal — that satisfying, dripping-with-serum feeling, the instant glow, the ritual of it. They also have a genuine problem: at $2 to $8 per single-use mask, a regular habit adds up fast, and every single one ends up straight in the trash after just one 15-minute use. A reusable cotton sheet mask solves both issues at once, costing pennies per use after the initial cut, and it works with literally any serum, toner, or essence you already own.
This is the complete guide: exactly how to make your own reusable sheet mask from fabric you likely already have, several serum recipes to soak it in, and the care routine that keeps it hygienic and usable for months rather than a single session.
Jump Links
- Why Switch to a Reusable Sheet Mask
- What Fabric Actually Works Best
- What You’ll Need
- Method 1: The No-Sew Cut-and-Go Mask
- Method 2: The Sewn, Fray-Resistant Mask
- Fabric Comparison Table
- How to Actually Use Your Reusable Mask
- 5 Budget Serum Recipes to Soak It In
- Serum Recipe Table
- Cleaning and Storage: Keeping It Hygienic
- Cost Comparison: Disposable vs. Reusable
- Common Mistakes to Avoid
- FAQ
- The Bottom Line
Why Switch to a Reusable Sheet Mask
Beyond the obvious cost savings, a reusable sheet mask offers a genuine functional upgrade that a lot of people don’t expect: full control over exactly what’s soaking into your skin. Rather than relying on whatever essence a commercial mask happens to be pre-soaked in, you can mix and customize your own formulation based entirely on your specific skin needs at that moment — extra hydration one week, a calming, anti-inflammatory blend the next.
There’s also a genuine sustainability angle here that’s easy to overlook. Every disposable sheet mask, however thin, is a single-use product headed straight to landfill after one 15-minute session, while a well-made reusable version, properly cared for, lasts through dozens of uses before it needs replacing.
What Fabric Actually Works Best
Not every fabric is created equal for this purpose, and picking the right one significantly affects both comfort and how well it holds and releases serum against your skin.
- Muslin cloth is frequently recommended specifically because it can withstand repeated washing and reuse without breaking down quickly, making it one of the most durable choices for a mask meant to last.
- Organic cotton jersey tends not to fray easily when washed, which is a genuine practical advantage for a mask you’re cutting eye and mouth holes into and washing repeatedly.
- Old cotton bedsheets or t-shirts work perfectly well too, and repurposing fabric you already own (a stained but otherwise clean shirt, a worn-out pillowcase) adds an extra layer of budget-friendliness and zero-waste practicality to the whole project.
- Cotton-linen blends are also a solid option, offering good absorbency alongside a slightly more breathable feel against the skin.
The one general rule across all recommendations: stick with lightweight, absorbent, natural fibers. Thicker or synthetic fabrics don’t hold or release serum as effectively and can feel uncomfortably heavy or non-breathable against the face.
What You’ll Need
- A piece of lightweight, natural fabric (roughly the size of a standard sheet of paper is plenty for one mask)
- Sharp fabric scissors
- A pencil, eyebrow pencil, or fabric-safe marker
- Optional: a printed sheet mask template (many are available as free downloads from DIY beauty blogs), or you can freehand the shape directly on your face using a mirror
- Optional (for the sewn version): a sewing machine or needle and thread
Method 1: The No-Sew Cut-and-Go Mask
This is the fastest option, genuinely doable in under five minutes, though it will fray somewhat faster over repeated washes than a finished, sewn edge.
Steps:
- Lay your fabric flat and hold it up against your face (or use a printed template) to gauge the general size and shape needed.
- Using a pencil or eyebrow pencil, lightly mark where your eyes, nose, and mouth fall.
- Cut around the outer edge first, creating a general face-shaped oval or rounded rectangle slightly larger than your face.
- Cut out the eye holes, nostril openings, and a mouth slit at your marked points.
- Your mask is ready to soak and use immediately.
Method 2: The Sewn, Fray-Resistant Mask
Slightly more time investment, but it produces a noticeably more durable mask that holds up to significantly more washes before needing replacement.
Steps:
- Cut your fabric to the general mask shape as described above, leaving a small margin around the edges.
- Using a sewing machine with a zigzag stitch, or a simple hand-sewn whip stitch, sew around the entire outer edge of the mask to prevent fraying.
- Mark and lightly stitch around where you plan to cut the eye, nose, and mouth openings before cutting, which similarly helps those edges resist fraying with repeated use.
- Once all edges are reinforced, cut out the eye holes, nostril openings, and mouth slit.
- Your finished mask is ready for soaking and repeated long-term use.
Fabric Comparison Table
| Fabric | Durability Through Washing | Absorbency | Comfort | Best For |
|---|---|---|---|---|
| Muslin cloth | High | Good | Very comfortable | Long-term repeated use |
| Organic cotton jersey | High (resists fraying) | Good | Very comfortable, soft | Sensitive skin, repeated washing |
| Old cotton bedsheet/t-shirt | Moderate | Good | Comfortable | Budget/zero-waste option using items on hand |
| Cotton-linen blend | Moderate–High | Good | Breathable | Warmer climates, longer wear sessions |
How to Actually Use Your Reusable Mask
- Cleanse your face first, removing makeup and any product buildup before applying the mask.
- Apply a toner to prep the skin, if that’s part of your normal routine, before the mask step.
- Prepare your chosen serum or soaking solution (see the recipes below), making sure it’s thin and liquidy enough to fully absorb into the fabric — thick, paste-like mixtures like clay masks don’t work with this method.
- Submerge the mask fabric fully in your prepared liquid, letting it soak until thoroughly saturated.
- Gently wring out excess liquid so the mask isn’t dripping, then apply it to your face, starting at the forehead and smoothing down toward the chin.
- Leave it on for 10 to 20 minutes, resisting the urge to let it dry out completely on your skin, since a drying mask can actually pull moisture back out of the skin rather than adding it.
- Remove the mask and gently pat any remaining serum into your skin, rather than rinsing it away immediately, to maximize absorption.
- Rinse and hang the mask to air dry, or move directly into your cleaning routine (detailed below) if you’re not planning to reuse it again that same day.
5 Budget Serum Recipes to Soak It In
1. Rosewater Hydration Soak (all skin types)
- ¼ cup rosewater
- 1 teaspoon glycerin
- A few drops of your favorite hydrating serum
2. Green Tea Antioxidant Soak (dull, tired skin)
- Steep 1 green tea bag in ¼ cup hot water for 5 minutes, then let cool completely
- Add a few drops of rosewater for extra calming benefit
3. Chamomile Calming Soak (sensitive, irritated skin)
- Steep 1 chamomile tea bag in ¼ cup hot water for 5 minutes, then cool
- Add 2–3 drops of lavender essential oil, well diluted
4. Cucumber Cooling Soak (puffiness, tired eyes)
- Grate half a fresh cucumber
- Squeeze the juice through cheesecloth or a paper towel into a small bowl
- Optionally chill the liquid before soaking your mask for an extra depuffing effect
5. Hibiscus Vitamin C Soak (brightening)
- Steep 1 hibiscus tea bag in ¼ cup hot water for 5–7 minutes, letting it steep slightly longer than usual for drinking
- Cool completely before use
Serum Recipe Table
| Recipe | Key Benefit | Best For | Soak Time |
|---|---|---|---|
| Rosewater Hydration | Hydration, calming | All skin types | 10–20 minutes |
| Green Tea Antioxidant | Antioxidants, mild toning | Dull, tired skin | 15–20 minutes |
| Chamomile Calming | Anti-inflammatory, soothing | Sensitive, irritated skin | 15–30 minutes |
| Cucumber Cooling | Depuffing, cooling | Puffy or tired-looking skin | 15–20 minutes |
| Hibiscus Vitamin C | Brightening | Dull or uneven-toned skin | 15–20 minutes |
Cleaning and Storage: Keeping It Hygienic
This is the step that’s easy to skip but genuinely important, since a mask that isn’t properly cleaned between uses can introduce bacteria to your skin rather than benefiting it.
- Rinse the mask immediately after each use under running water to remove residual serum and any skin debris.
- Wash with a mild, fragrance-free soap periodically, especially after uses involving oil-based serums, to fully remove buildup that a plain water rinse might miss.
- Air dry completely before storing, ideally hung rather than folded, to prevent trapped moisture that could encourage bacterial or mold growth.
- Store in a clean, dry container or bag once fully dry, separate from other bathroom items.
- Replace the mask periodically. Even well-cared-for fabric masks have a practical lifespan; if you notice fraying, thinning, or a lingering odor that washing doesn’t resolve, it’s time to cut a fresh one — which, given the near-zero material cost, is a trivial expense compared to buying disposable masks.
- Consider having two or three masks in rotation, allowing one to fully air dry while another is in use, which also reduces wear on any single mask over time.
Cost Comparison: Disposable vs. Reusable
| Category | Disposable Sheet Masks | Reusable DIY Mask |
|---|---|---|
| Cost per single use | $2–$8 | Under $0.10 (after initial fabric cost) |
| Material for one mask | New mask each use | A reused piece of fabric, often already owned |
| Serum customization | Fixed formula pre-included | Fully customizable to your skin’s needs |
| Waste generated | New waste every single use | Essentially none after the initial cut |
| Cost for 20 uses | $40–$160 | Effectively free to a few dollars total |
Common Mistakes to Avoid
- Using a fabric that’s too thick or non-absorbent. Heavier fabrics don’t soak up or release serum efficiently, undermining the entire point of a sheet mask treatment.
- Skipping the wring-out step. A dripping-wet mask makes a genuine mess and doesn’t actually improve absorption compared to a properly wrung-out one.
- Letting the mask dry out completely on your face. A fully dried mask can start pulling moisture back out of your skin rather than continuing to deposit it, so remove the mask before it reaches that point.
- Not washing the mask between uses. Reusing a mask without cleaning it risks transferring bacteria and old product residue back onto freshly cleansed skin.
- Using thick, paste-like ingredients as a soaking solution. Clay masks or other thick formulas don’t work with this method; stick to thin, liquid serums, toners, teas, or essences.
- Cutting the eye and mouth holes too small. This makes the mask genuinely uncomfortable and harder to position correctly; sizing generously, especially around the mouth and eyes, makes the whole experience noticeably more pleasant.
📌 YOU MIGHT ALSO LIKE:
DIY Turmeric and Yogurt Spot Treatment: Say Goodbye to Acne Scars for Under $1
FAQ
What’s the best fabric to use for a reusable sheet mask?
Muslin cloth and organic cotton jersey are two of the most frequently recommended options, both chosen specifically for their durability through repeated washing and their gentle, absorbent feel against skin. An old cotton t-shirt or bedsheet works well too, especially for a zero-cost, zero-waste option.
Do I need to sew the mask, or can I just cut it?
A simple cut-and-go mask works perfectly fine and takes just a few minutes, though it will fray somewhat faster over repeated washing compared to a version with sewn, reinforced edges.
Can I use any serum or product with a reusable sheet mask?
Nearly any thin, liquid-based product works well, including serums, toners, essences, and homemade infusions like tea or floral water. Thick, paste-like products like clay masks don’t work with this method, since the fabric needs to fully absorb and release a liquid formula.
How many times can I actually reuse the same mask before replacing it?
With proper washing and air-drying between uses, a well-made mask, especially one with reinforced sewn edges, can typically last for dozens of uses over several months before showing significant wear.
Is it hygienic to reuse a fabric sheet mask?
Yes, as long as it’s properly rinsed or washed after each use and fully air-dried before storage. Skipping the cleaning step between uses is the main hygiene risk, not the reuse itself.
Can I make several masks at once to keep in rotation?
Yes, and it’s genuinely a smart approach, since having two or three masks on hand allows one to fully air dry while another is being used, extending the lifespan of each individual mask and simplifying your routine.
The Bottom Line
A reusable cotton sheet mask does everything a disposable one does — deliver a concentrated dose of serum, essence, or toner directly to your skin — for a fraction of the cost and none of the single-use waste. With one small piece of fabric, a pair of scissors, and a serum recipe tailored to whatever your skin needs that day, this simple DIY swap pays for itself after literally the first use.
For more budget beauty guides and DIY skincare projects, check out more posts over at The Frugal Glow.
Sources: