

The $3 Rosehip and Jojoba Blend: A Frugal Alternative to $80 Luxury Face Oils
The $80 face oil was sitting in my online cart. It came in a frosted glass bottle with a gold dropper. The brand promised “luxury hydration” and “visible radiance.” The reviews were glowing. The before-and-after photos were impressive. The price tag made me pause.
I did some research. I looked up the ingredient list. Rosehip seed oil. Jojoba oil. Squalane. Vitamin E. That was it. Four ingredients. All of which cost pennies per ounce when you buy them individually.
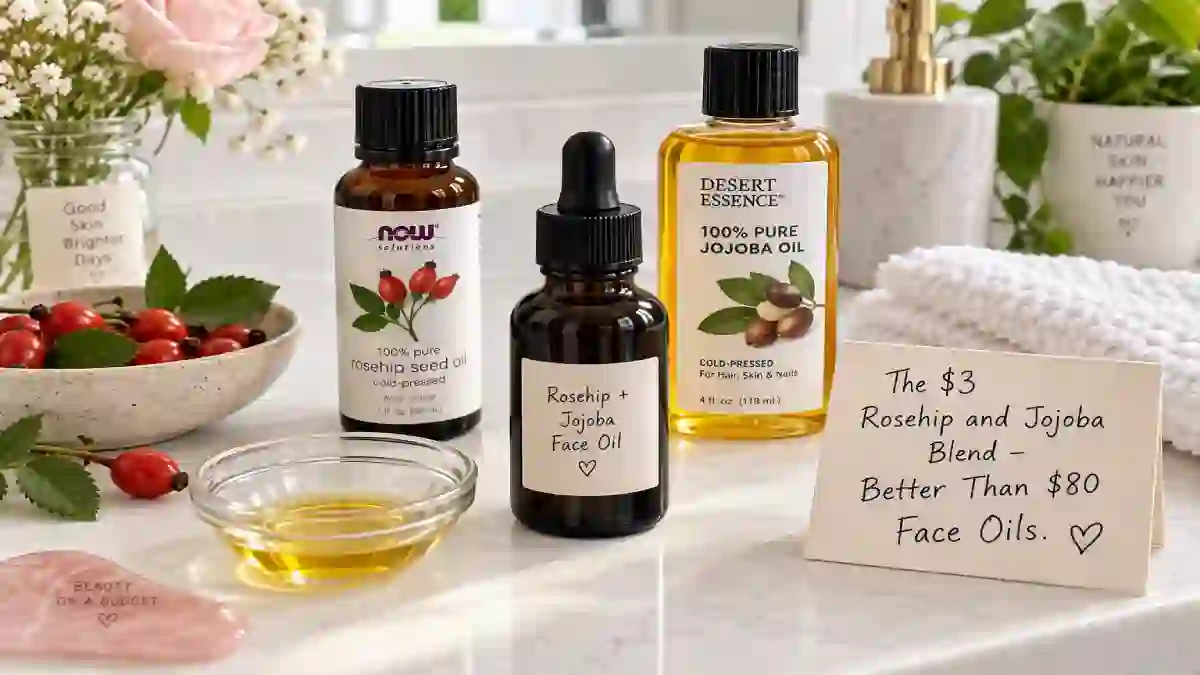
I closed the tab. I went to my local health food store. I bought a bottle of cold-pressed rosehip seed oil for $2 and a bottle of jojoba oil for $2. I went home. I mixed them together. I applied the blend to my face.
My skin looked exactly the same as it did with the $80 oil. Soft. Hydrated. Glowing. And I had just made it for about $3.
That was two years ago. I’ve been making my own face oil ever since. My skin has never looked better. And I’ve saved hundreds of dollars.
This is the complete guide to the $3 rosehip and jojoba blend. The science. The recipe. The mistakes. And why you should never, ever spend $80 on a face oil again.
Jump Links
- The $80 Face Oil That Started the Search
- Why Rosehip and Jojoba Work So Well Together
- What the Research Actually Says About These Two Oils
- Why DIY Blends Beat the $80 Bottles
- The $3 Base Recipe: Rosehip and Jojoba Face Oil
- Custom Blends for Every Skin Concern
- How to Apply Face Oil Without Looking Greasy
- How to Store Your DIY Face Oil So It Doesn’t Go Rancid
- My Biggest Mistakes (So You Don’t Make Them)
- Who Should Skip Face Oil
- The Math: What I Saved in One Year
- Frequently Asked Questions (FAQ)
- Final Thoughts: The Best Face Oil Is the One You Made Yourself
The $80 Face Oil That Started the Search
Let me describe what a typical $80 luxury face oil actually contains.
The ingredient list: Water (sometimes), rosehip seed oil, jojoba oil, squalane, vitamin E, essential oils for fragrance, preservatives. The active ingredients—the oils—are the same ones you can buy individually for a few dollars per ounce.
What you’re paying for: The packaging. The brand name. The marketing. The “experience” of using a luxury product. Maybe a slightly more refined texture or a more complex scent. But not better ingredients.
The math: A typical $80 face oil contains about 1 ounce of product. That’s $80 per ounce. A bottle of cold-pressed rosehip seed oil costs about $8-12 for 4 ounces. That’s $2-3 per ounce. A bottle of jojoba oil costs about $8-12 for 4 ounces. That’s $2-3 per ounce. When you blend them together, your cost per ounce is roughly $2-3. You’re paying 25-40 times more for the luxury version.
What a cosmetic chemist told me: “The active ingredients in face oils are the oils themselves. Rosehip, jojoba, squalane, argan—these are commodity ingredients. They cost the same whether they’re in an $80 bottle or a $10 bottle. The difference is in the packaging and the brand story.”
Why Rosehip and Jojoba Work So Well Together
This isn’t a random pairing. Rosehip and jojoba are two of the most well-researched oils for skincare. And they complement each other perfectly.
Rosehip Seed Oil: The Regenerating Oil
Rosehip seed oil is extracted from the seeds of the rosehip plant. It’s rich in essential fatty acids, antioxidants, and vitamins.
What it contains:
- Linoleic acid (omega-6): A polyunsaturated fatty acid that helps maintain the skin barrier and has anti-inflammatory properties. It’s particularly beneficial for acne-prone skin.
- Linolenic acid (omega-3): Another essential fatty acid that supports skin health and reduces inflammation.
- Vitamin C: A potent antioxidant that brightens the skin and supports collagen production.
- Vitamin A (retinol precursor): Rosehip oil contains trans-retinoic acid, a natural form of vitamin A. This is why it’s often recommended for fine lines and aging skin.
- Vitamin E: An antioxidant that protects the skin from environmental damage.
What the research says: A 2015 study published in the Journal of Cosmetic Dermatology found that rosehip oil significantly improved skin hydration, elasticity, and firmness after eight weeks of use. Another study found that rosehip oil helped reduce the appearance of scars and fine lines.
Who it’s best for: Dry, mature, and sun-damaged skin. It’s also excellent for fading hyperpigmentation and post-acne marks.
Jojoba Oil: The Balancing Oil
Jojoba oil is technically a liquid wax, not an oil. It’s extracted from the seeds of the jojoba plant, which is native to the southwestern United States and northern Mexico.
What it contains:
- Wax esters: Jojoba oil is composed almost entirely of wax esters, which are structurally very similar to the sebum produced by human skin. This is why jojoba is so well-tolerated and rarely causes irritation.
- Vitamin E: An antioxidant that protects the skin.
- Vitamin B complex: Supports skin health and repair.
- Minerals: Including zinc, copper, and selenium.
What the research says: Jojoba oil has been shown to be non-comedogenic, meaning it doesn’t clog pores. A 2012 study found that jojoba oil was effective at reducing acne lesions when applied topically. Its structure mimics natural sebum, which means it can help regulate oil production without stripping the skin.
Who it’s best for: All skin types, including oily and acne-prone skin. It’s particularly good for balancing oil production.
The Combination
When you combine rosehip and jojoba, you get the best of both:
- Rosehip provides the regenerative, brightening, and anti-aging benefits.
- Jojoba provides the balancing, moisturizing, and barrier-supporting benefits.
- Together they create a lightweight, fast-absorbing oil that works for almost all skin types.
What a dermatologist told me: “Rosehip and jojoba are two of the most versatile oils in skincare. Rosehip is excellent for regeneration and brightening. Jojoba is excellent for balancing and moisturizing. The combination is very effective for most skin types.”
What the Research Actually Says About These Two Oils
Let me give you the actual science. Because the claims around face oils are often vague.
The rosehip research: A 2015 study published in the Journal of Cosmetic Dermatology found that “rosehip oil significantly improved skin hydration, elasticity, and firmness” after eight weeks of use. Another study found that rosehip oil “helped reduce the appearance of scars and fine lines” and “improved skin tone and texture.”
The jojoba research: A 2012 study published in the Journal of Dermatological Treatment found that “jojoba oil was effective at reducing acne lesions” when applied topically. The study noted that jojoba oil’s similarity to human sebum made it “well-tolerated and non-comedogenic.”
The combination research: While there aren’t many studies on the specific combination of rosehip and jojoba, the individual benefits of each are well-documented. Both oils are commonly recommended by dermatologists for dry, mature, and acne-prone skin.
What the science shows: “Rosehip oil is one of the most studied natural oils for skincare. It’s rich in vitamin A and vitamin C, which are both important for skin health. Jojoba oil is unique because it’s structurally similar to human sebum, which makes it ideal for all skin types.”
Why DIY Blends Beat the $80 Bottles
The commercial face oil industry has exploded in the last few years. You can now buy “luxury face oil” for anywhere from $40 to $200 a bottle. Here’s why the DIY version is better.
The cost difference: A commercial bottle costs $40-200 for 1 ounce. The DIY version costs about $3 for the same amount. That’s a 90-99% savings.
The ingredient difference: Commercial face oils often contain preservatives, stabilizers, and synthetic fragrance. The DIY version contains two ingredients: rosehip and jojoba. You know exactly what’s in it.
The freshness difference: Commercial face oils can sit on a shelf for months. The DIY version is fresh and potent. You can smell and feel the difference.
The customization difference: The DIY version allows you to blend rosehip and jojoba in whatever ratio works for your skin. You can add other oils if you want. You can adjust the ratio seasonally. The commercial version doesn’t give you that flexibility.
What a DIY enthusiast told me: “I used to buy a $95 face oil every two months. Then I realized I could make the same thing at home for $3. I’ve never gone back.”
The $3 Base Recipe: Rosehip and Jojoba Face Oil
Here’s the base recipe I’ve been using for over a year. It costs about $3 per batch and makes enough face oil to last two months.
Ingredients:
| Ingredient | Amount | Cost |
|---|---|---|
| Cold-pressed rosehip seed oil | 1 tablespoon | $1.50 |
| Jojoba oil | 2 tablespoons | $1.00 |
| Vitamin E oil (optional) | 2-3 drops | $0.10 |
| Total | ~$2.60 |
Equipment:
- A small dark glass dropper bottle (1 oz)
- A small funnel
- A small bowl for mixing
Instructions:
- Measure the rosehip oil and jojoba oil into a small bowl.
- Add the vitamin E oil if using. Vitamin E acts as an antioxidant and helps preserve the oils.
- Stir gently to combine.
- Using a small funnel, transfer the mixture into a dark glass dropper bottle.
- Label the bottle with the date and contents.
- Store in a cool, dark place.
What the recipe yields: About 1 ounce of face oil. That’s enough for 2-3 months of daily use.
How to use it: Apply 2-3 drops to clean, damp skin after cleansing and before moisturizer. Massage gently into the face and neck. Use morning and night.
The cost per application: About $0.04. Compare that to $1.50 per application for the $80 oil.
Custom Blends for Every Skin Concern
The base recipe works for most skin types. But you can customize it for specific concerns.
For dry, mature skin:
- 1 tablespoon rosehip oil
- 1 tablespoon jojoba oil
- 1 tablespoon argan oil
Argan oil is rich in vitamin E and fatty acids, making it excellent for mature skin.
For oily or acne-prone skin:
- 2 tablespoons jojoba oil
- 1 tablespoon rosehip oil
- 5 drops tea tree essential oil
Jojoba is the dominant oil here because it helps balance oil production. Tea tree is antibacterial.
For sensitive or reactive skin:
- 1 tablespoon rosehip oil
- 1 tablespoon jojoba oil
- 1 tablespoon squalane
Squalane is a gentle, non-reactive oil that’s well-tolerated by sensitive skin.
For hyperpigmentation and dark spots:
- 1 tablespoon rosehip oil
- 1 tablespoon jojoba oil
- 5 drops carrot seed essential oil
Carrot seed oil is rich in antioxidants and is traditionally used for brightening.
For fine lines and wrinkles:
- 1 tablespoon rosehip oil
- 1 tablespoon jojoba oil
- 1 tablespoon pomegranate seed oil
Pomegranate seed oil is rich in punicic acid, which has been shown to support skin regeneration.
For redness and irritation:
- 1 tablespoon rosehip oil
- 1 tablespoon jojoba oil
- 5 drops chamomile essential oil
Chamomile is anti-inflammatory and soothing.
How to Apply Face Oil Without Looking Greasy
The biggest complaint about face oils is that they can look greasy. Here’s how to apply them so they absorb properly.
Step 1: Start with clean, damp skin.
Apply face oil after cleansing, while your skin is still slightly damp. The moisture helps the oil absorb more evenly.
Step 2: Use 2-3 drops.
You don’t need much. Two to three drops are enough for the entire face and neck. More oil doesn’t mean more moisture—it just means more oil sitting on your skin.
Step 3: Warm the oil in your palms.
Rub the drops between your palms to warm them. Warm oil spreads more easily and absorbs better.
Step 4: Press, don’t rub.
Gently press the oil into your skin with your palms. Don’t rub aggressively—this can cause irritation and doesn’t help absorption.
Step 5: Focus on dry areas.
Apply more oil to dry areas like cheeks and forehead. Use less on the T-zone if you’re oily there.
Step 6: Wait before applying makeup.
Give the oil 2-3 minutes to absorb before applying makeup. If you’re in a hurry, blot gently with a tissue.
The “sandwich” method: If you have very dry skin, apply moisturizer, then face oil, then another layer of moisturizer. This seals in hydration and prevents the oil from feeling greasy.
How to Store Your DIY Face Oil So It Doesn’t Go Rancid
Oils can go rancid over time. Here’s how to store your DIY face oil so it stays fresh.
Use dark glass bottles. Light degrades oils. A dark glass dropper bottle protects the oil from UV damage.
Store in a cool, dark place. A bathroom cabinet is fine, but a cool, dark closet is better. Avoid windowsills and direct sunlight.
Add vitamin E oil. Vitamin E is an antioxidant that helps preserve oils. Adding 2-3 drops to your blend extends its shelf life.
Make small batches. Don’t make more than you’ll use in 2-3 months. Fresh oil is better than old oil.
Check for rancidity. If the oil smells off (like crayons or old nuts), it’s gone rancid. Throw it out.
The refrigerator trick: If you live in a warm climate, store your face oil in the refrigerator. It extends the shelf life and feels refreshing on the skin.
What a DIY expert told me: “Oils go rancid faster than most people realize. Making small batches and storing them properly is the key to getting the most out of your DIY blends.”
My Biggest Mistakes (So You Don’t Make Them)
I made plenty of mistakes when I first started making face oils. Learn from me.
Mistake #1: Using too much oil.
My first batch was 4 drops per application. My face was a greasy mess. Use 2-3 drops. You can always add more.
Mistake #2: Applying to dry skin.
I applied oil to completely dry skin. It sat on the surface and didn’t absorb. Apply to damp skin.
Mistake #3: Not patch testing.
I applied the blend to my whole face without testing it first. I had a mild reaction. Always patch test on a small area first.
Mistake #4: Using refined oils.
I used refined rosehip oil instead of cold-pressed. It lacked the beneficial compounds. Use cold-pressed, unrefined oils.
Mistake #5: Storing in a clear bottle.
I stored my oil in a clear bottle. It went rancid within a month. Use a dark glass bottle.
Mistake #6: Mixing too many oils.
I tried to mix five different oils into one blend. It was a mess and didn’t work well. Start with two oils. Add more only if you know what you’re doing.
Mistake #7: Expecting overnight results.
I thought my skin would be transformed in a week. It took about a month of consistent use to see real results. Give it time.
Who Should Skip Face Oil
Face oil isn’t for everyone. Here are the cases where you should skip it.
If you have very oily skin. Face oil can be too heavy for very oily skin. If you want to try it, use jojoba only (it’s the lightest) and apply it at night.
If you have active acne. Some oils can aggravate acne. Jojoba is generally safe, but rosehip may be too rich for some. Patch test carefully.
If you have a nut allergy. Rosehip and jojoba are not nuts, but some people with nut allergies react to other oils. Check with your doctor first.
If you’re using prescription retinoids. Retinoids can make your skin more sensitive. Introduce face oil slowly and patch test first.
If you have a skin condition like rosacea or eczema. Consult your dermatologist before adding new oils to your routine.
What a dermatologist told me: “Face oils can be beneficial for many people, but they’re not for everyone. If you have oily or acne-prone skin, proceed with caution. If you have a skin condition, talk to your dermatologist first.”
The Math: What I Saved in One Year
Let me break down the actual dollars.
If I bought the $80 face oil:
| Item | Cost | How Often | Annual Cost |
|---|---|---|---|
| Luxury face oil | $80 | Every 2 months | $480 |
What I actually spend:
| Item | Cost | How Often | Annual Cost |
|---|---|---|---|
| Rosehip oil | $8 | Every 4 months | $24 |
| Jojoba oil | $8 | Every 4 months | $24 |
| Vitamin E oil (optional) | $6 | Every 6 months | $12 |
| Total | ~$60 |
Annual savings: $420
Over 5 years: $2,100
And my skin looks just as good as it did with the expensive oil.
📌 YOU MIGHT ALSO LIKE:
Why I Stopped Buying $40 Scalp Scrubs and Made This $2 Sea Salt Alternative
Ditch the Sheet Masks! How to Make Reusable DIY Cotton Sheet Masks for Pennies
Frequently Asked Questions (FAQ)
1. Can I use this face oil if I have oily skin?
Yes, but use jojoba as the dominant oil. Jojoba is the lightest oil and is structurally similar to human sebum, so it helps balance oil production without clogging pores. Use it sparingly and at night.
2. How often should I apply face oil?
Twice daily is ideal for dry skin. Once daily (at night) is enough for normal or combination skin. Listen to your skin—if it feels greasy, reduce the frequency.
3. Can I mix rosehip and jojoba with other oils?
Yes. You can add argan, squalane, pomegranate, or other oils. Just start with the base recipe and add one oil at a time to see how your skin responds.
4. How long does DIY face oil last?
Stored in a dark glass bottle in a cool, dark place, it lasts 2-3 months. Adding vitamin E extends the shelf life. If it smells off, throw it out.
5. Can I use this face oil under makeup?
Yes. Apply 2-3 drops, wait 2-3 minutes for it to absorb, then apply makeup. If your skin feels greasy, blot gently with a tissue before applying makeup.
6. Will this face oil clog my pores?
Jojoba oil is non-comedogenic. Rosehip oil is generally well-tolerated. If you’re prone to clogged pores, patch test first and start with a small amount.
7. Can I use this face oil if I’m pregnant?
Rosehip oil is generally considered safe during pregnancy. However, some essential oils are not. If you’re adding essential oils, consult your doctor first. The base recipe (rosehip + jojoba) is generally safe.
8. What’s the best way to apply face oil for maximum absorption?
Apply to damp skin, warm the oil in your palms, and press gently into the skin. Don’t rub. Follow with moisturizer to seal in hydration.
Final Thoughts: The Best Face Oil Is the One You Made Yourself
The $80 face oil is sitting on a shelf somewhere. My $3 DIY blend is on my bathroom counter. My skin is soft, hydrated, and glowing. And I’ve saved over $400.
The $3 routine:
- Mix 1 tablespoon rosehip oil with 2 tablespoons jojoba oil
- Add 2-3 drops of vitamin E oil
- Transfer to a dark glass dropper bottle
- Apply 2-3 drops to damp skin morning and night
- Store in a cool, dark place
That’s it. A complete face oil routine for less than the price of a coffee.
I’ve been using this blend for over a year. My skin is healthier, my wallet is happier, and I’ve saved hundreds of dollars.
That’s not cheap. That’s smart.
That’s the frugal glow. And it’s waiting for you in your kitchen. 🌹💛
*For more DIY skincare recipes, budget beauty strategies, and money-saving wellness advice, visit The Frugal Glow.*