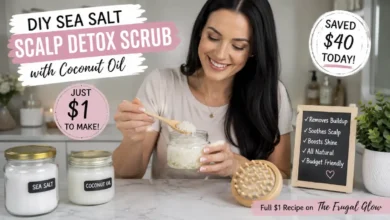
How to Make Your Own ‘Lush’ Style Bath Bombs for Under $1 Each
Let me tell you about the $12 bath bomb that made me rethink expensive self-care.
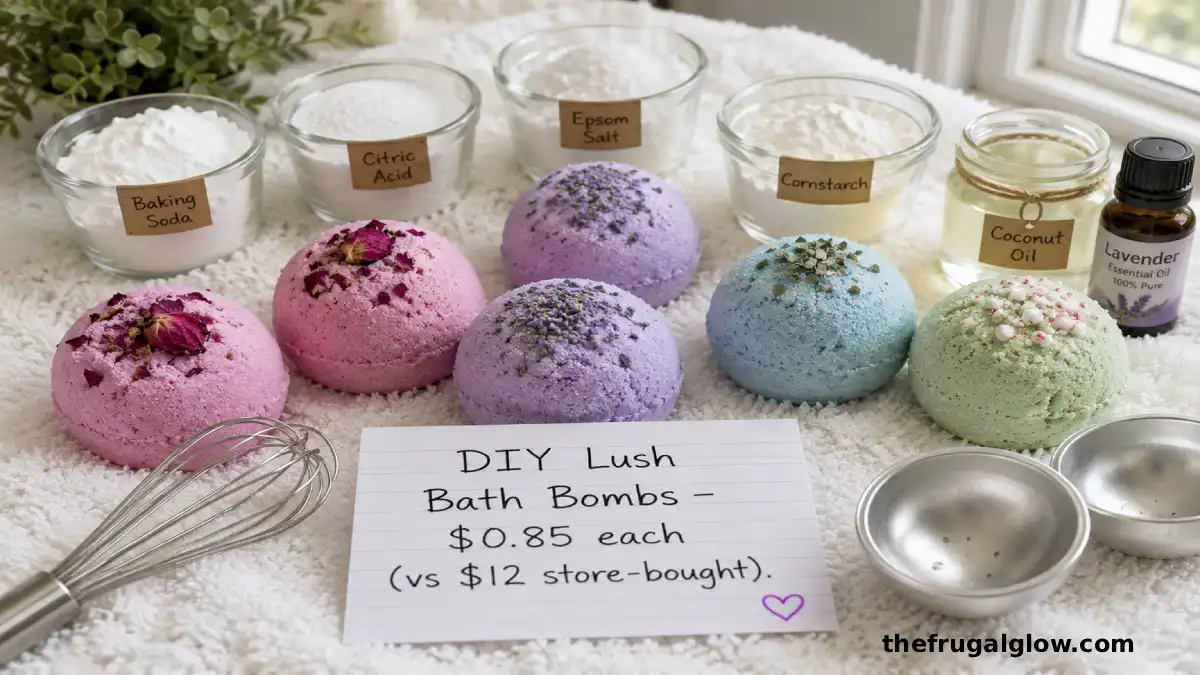
It looked amazing, smelled incredible, and fizzed beautifully—but after one bath, my sore muscles felt exactly the same. Then I checked the ingredient list: baking soda, citric acid, Epsom salt, cornstarch, and essential oils. Nothing fancy. I had just paid $12 for ingredients worth about $1.
So, I bought the supplies, experimented with a few batches, and eventually figured out how to make bath bombs that look, smell, and feel just as luxurious for a fraction of the price.
Today, I’m sharing my go-to recipe, the tips that made all the difference, and how you can enjoy spa-worthy bath bombs at home without spending $12 every time.
Jump Links
- The $12 Bath Bomb That Changed Everything
- What’s Actually Inside a Luxury Bath Bomb? (The Cheap Truth)
- The Under $1 DIY Recipe (Exact Measurements)
- Step-by-Step: How to Make Perfect Bath Bombs Every Time
- My Biggest Mistakes (So You Don’t Make Them)
- How to Customize Your Bath Bombs (Scents, Colors, Add-Ins)
- No Molds? No Problem (Use What You Have)
- How to Store Bath Bombs So They Last
- The Math: What I Saved in One Year
- Frequently Asked Questions (FAQ)
- Final Thoughts: Your Bath Deserves Better Than a $12 Tax
The $12 Bath Bomb That Changed Everything
I need to describe that moment in my bathroom.
I was tired. My back hurt from sitting at a desk all day. I wanted to relax. I had been saving a “special” Lush bath bomb for months. It was a limited edition. It cost $12. It smelled incredible in the package.
I ran a hot bath. I dropped the bomb. It fizzed and swirled. The water turned a beautiful deep purple. I got in.
Ten minutes later, the color had faded. The scent was gone. My back still hurt. I was sitting in lukewarm purple water wondering where my $12 went.
I picked up the empty package. I read the ingredients. Sodium bicarbonate (baking soda). Citric acid. Magnesium sulfate (Epsom salt). Zea mays (cornstarch). Parfum. Colorant.
That’s it. Nothing magical. Nothing expensive. The same baking soda I buy at the grocery store. The same Epsom salt I use for sore muscles. The same cornstarch I use for thickening gravy.
I went to my pantry. I had baking soda. I had cornstarch. I had coconut oil. I had essential oils. I was only missing one thing: citric acid. I bought a bag on Amazon for $8. It made dozens of bath bombs.
My first attempt was ugly. The bomb split in half. It didn’t fizz much. I was disappointed. But I tried again. And again. By the third batch, I had perfect little spheres that fizzed and smelled amazing.
I haven’t bought a Lush bath bomb since. I’ve saved hundreds of dollars. And my bath bombs are customized exactly how I like them – less color, more Epsom salt, double the lavender.
What’s Actually Inside a Luxury Bath Bomb? (The Cheap Truth)
Let me break down the ingredients of a $12 Lush bath bomb and show you what they actually cost.
The Ingredient List (simplified):
| Ingredient | What It Does | DIY Cost (per bath bomb) | Lush Markup |
|---|---|---|---|
| Baking soda (sodium bicarbonate) | Creates fizz when mixed with citric acid | $0.10 | 100x+ |
| Citric acid | Reacts with baking soda to create carbon dioxide bubbles | $0.20 | 60x+ |
| Epsom salt (magnesium sulfate) | Soothes muscles, softens skin | $0.10 | 120x+ |
| Cornstarch | Adds silky texture, helps bomb hold shape | $0.05 | 240x+ |
| Coconut oil (or other carrier oil) | Moisturizes skin, binds dry ingredients | $0.15 | 80x+ |
| Essential oils | Provides scent and therapeutic benefits | $0.20 | 60x+ |
| Colorant (optional) | Makes the water pretty | $0.05 | 240x+ |
| Total DIY cost | $0.85 | ||
| Lush retail price | $12.00 | ||
| Markup | 1,400% |
That’s not a typo. A 1,400% markup. You are paying $11.15 for the shape, the brand name, and the experience of shopping at Lush.
The truth about “natural” ingredients:
Baking soda is baking soda. It doesn’t matter if you buy it from Lush or from Arm & Hammer. Citric acid is citric acid. The $8 bag from Amazon is the same chemical as the one in your $12 bath bomb.
The only thing you’re paying for: Convenience. Pretty packaging. A store with nice lighting. That’s it.
What you get from DIY:
- Control over ingredients (add more Epsom salt for muscle relief)
- Control over scent (make it stronger or weaker)
- Control over color (or skip it entirely if you have sensitive skin)
- A fraction of the price
What you DON’T get: The cute wrapping. The Lush label. The Instagram-worthy packaging. But are those worth $11? Not to me.
The Under $1 DIY Recipe (Exact Measurements)
Here’s the exact recipe I use. It makes one standard-sized bath bomb (about 2.5 inches in diameter). Cost: approximately $0.85-0.95 per bomb.
Ingredients (per bath bomb):
| Ingredient | Amount | Cost |
|---|---|---|
| Baking soda | 1 cup | $0.10 |
| Citric acid | 1/2 cup | $0.20 |
| Epsom salt | 1/2 cup | $0.10 |
| Cornstarch | 1/4 cup | $0.05 |
| Coconut oil (melted) | 2 tablespoons | $0.15 |
| Essential oil of choice | 10-15 drops | $0.20 |
| Water (in a spray bottle) | a few spritzes | $0.00 |
| Colorant (optional) | 1-2 drops | $0.05 |
Total cost per bomb: $0.85
Bulk batch (12 bath bombs):
| Ingredient | Amount | Cost |
|---|---|---|
| Baking soda | 12 cups (about 3 lbs) | $1.50 |
| Citric acid | 6 cups (about 2 lbs) | $4.00 |
| Epsom salt | 6 cups (about 2 lbs) | $1.50 |
| Cornstarch | 3 cups | $0.60 |
| Coconut oil | 1.5 cups | $2.00 |
| Essential oil | 1 small bottle | $5.00 |
| Colorant | small amount | $0.50 |
| Total for 12 bombs | $15.10 | |
| Cost per bomb | $1.26 |
Where to buy ingredients:
- Baking soda, Epsom salt, cornstarch, coconut oil: Walmart, Target, grocery store ($2-5 each)
- Citric acid: Amazon ($8-10 for a 2-3 lb bag), canning section of grocery stores
- Essential oils: Amazon, health food stores, online ($5-8 per bottle)
- Colorant: Soap-making stores, Amazon, or use natural alternatives (beet powder, turmeric, spirulina)
Total starter kit cost: $20-25 for ingredients that will make 20-30 bath bombs.
Step-by-Step: How to Make Perfect Bath Bombs Every Time
Here’s my exact process. I’ve made dozens of batches. This works.
Step 1: Set up your workspace (5 minutes)
- Cover your counter with newspaper or a towel (it gets messy)
- Get out a large mixing bowl (not plastic – metal or glass is best)
- Have a spray bottle filled with plain water nearby
- Put on rubber gloves (optional, but keeps your hands from getting dyed)
Step 2: Mix dry ingredients (5 minutes)
- Add baking soda, citric acid, Epsom salt, and cornstarch to your bowl
- Whisk or stir with your hands (wear gloves) until fully combined
- Break up any clumps with your fingers
- The mixture should look uniform – no white spots, no yellow spots
Step 3: Add wet ingredients (3 minutes)
- Melt the coconut oil in the microwave (15-20 seconds)
- Add essential oils to the melted coconut oil
- If using colorant, add it to the oil mixture
- Pour the oil mixture into the dry mixture
- Stir immediately and quickly. The citric acid will start reacting with any liquid, so work fast.
Step 4: The “spray and mix” technique (5 minutes)
- Lightly spray the mixture with 1-2 spritzes of water
- Stir immediately (the water activates the fizz – that’s normal)
- Squeeze a handful of mixture in your palm. If it holds together, you’re done. If it crumbles, spritz again and stir.
- The goal is “damp sand” consistency – like sand you’d use to build a sandcastle.
Step 5: Pack the molds (5 minutes)
- Pack the mixture firmly into each half of your bath bomb mold (or use a round mold like a silicone muffin tin)
- Overfill slightly, then press the two halves together very firmly
- Twist slightly to compress
- Gently tap the mold to release the bomb
Step 6: Dry (24-48 hours)
- Place bath bombs on a towel or drying rack
- Let them dry in a cool, dry place away from humidity
- Do not touch them for 24 hours. They are fragile when wet.
- After 24 hours, gently flip them to dry the other side.
Step 7: Use or store
- Your bath bombs are now ready to use
- Drop one in warm water and watch it fizz
Pro tip: If your bomb crumbles when you remove it from the mold, the mixture is too dry. Spritz with more water next time. If it expands and cracks while drying, the mixture is too wet. Use less water next time.
My Biggest Mistakes (So You Don’t Make Them)
I made a lot of mistakes. Learn from me.
Mistake #1: Skipping the cornstarch
My first batch had no cornstarch. The bombs were too hard. They didn’t fizz well. Cornstarch is essential for the right texture. Don’t skip it.
Mistake #2: Adding too much water
I got excited and sprayed too much. The mixture started fizzing in the bowl. The bombs expanded and cracked while drying. Use the “damp sand” test. A little goes a long way.
Mistake #3: Using the wrong mold
I tried using a plastic Easter egg. The seams leaked. The bombs were misshapen. Buy proper bath bomb molds (two-part metal or plastic spheres) for $5-10. Worth it.
Mistake #4: Not packing firmly enough
I gently pressed the mixture into the mold. The bomb fell apart when I removed it. Pack it firmly. Really press. Overfill slightly. Squeeze hard.
Mistake #5: Using cheap essential oils
I bought $2 essential oil from a discount store. It smelled like chemicals. My bath smelled like a cleaning product. Spend $5-8 on quality essential oils. You’ll use them for dozens of bombs.
Mistake #6: Drying in the bathroom
I left my bombs to dry on the bathroom counter. The humidity from the shower made them soft and crumbly. Dry them in a closet or a bedroom. Away from moisture.
Mistake #7: Expecting perfection on the first try
My first batch was ugly. My second batch was better. My third batch was perfect. Give yourself grace. The bombs will still fizz even if they’re ugly.
How to Customize Your Bath Bombs (Scents, Colors, Add-Ins)
This is where DIY really shines. You can make exactly what you want.
Essential oil blends (drop counts per bomb):
| Mood | Essential Oils | Drops |
|---|---|---|
| Relax & Sleep | Lavender + Chamomile | 10 lavender, 5 chamomile |
| Wake Up | Peppermint + Eucalyptus | 8 peppermint, 7 eucalyptus |
| Stress Relief | Lavender + Bergamot | 8 lavender, 7 bergamot |
| Muscle Soak | Peppermint + Rosemary | 10 peppermint, 5 rosemary |
| Floral | Rose + Ylang Ylang | 10 rose, 5 ylang ylang |
| Citrus Burst | Orange + Lemon + Grapefruit | 6 of each |
Natural colorants (no synthetic dyes):
| Color | Natural Ingredient | How Much |
|---|---|---|
| Pink | Beetroot powder | 1 teaspoon |
| Yellow | Turmeric powder | 1/2 teaspoon |
| Green | Spirulina powder or matcha | 1 teaspoon |
| Purple | Purple clay or blueberry powder | 1 tablespoon |
| Brown | Cocoa powder (adds chocolate scent!) | 1 tablespoon |
| Blue | Butterfly pea flower powder | 1 tablespoon |
Add-ins for extra luxury:
| Add-In | What It Does | How Much |
|---|---|---|
| Dried rose petals | Looks beautiful, gentle exfoliation | 1 teaspoon |
| Lavender buds | Adds texture, extra scent | 1 teaspoon |
| Cocoa butter | Extra moisturizing (melt with coconut oil) | 1 tablespoon |
| Shea butter | Deep hydration (melt with coconut oil) | 1 tablespoon |
| Oatmeal powder | Soothing for sensitive skin | 1 tablespoon |
| Epsom salt crystals | Extra muscle relief (use coarse salt) | 2 tablespoons |
What NOT to add:
- Fresh flowers or herbs (they rot in the water)
- Large chunks (can clog your drain)
- Glitter (bad for the environment – use biodegradable glitter if you must)
No Molds? No Problem (Use What You Have)
You don’t need fancy molds to start. Use what’s in your kitchen.
Option 1: Muffin tin
Press the mixture into a greased muffin tin. Pack firmly. Let dry for 24 hours. Pop out with a knife. Makes “puck” shaped bath bombs.
Option 2: Ice cube tray
Use a silicone ice cube tray (the large, round ones work best). Press mixture in. Freeze for 30 minutes to help them hold shape. Pop out and let dry.
Option 3: Yogurt container lids
The round lids from large yogurt containers work well. Press mixture in, smooth the top, and carefully pop out.
Option 4: By hand (freeform)
Press the mixture firmly into your hands. Shape into a ball. Place on a towel to dry. They won’t be perfect spheres, but they’ll still fizz beautifully.
Option 5: DIY from recycled items
Cut the bottom off a plastic bottle, use a ping pong ball as a form, or use measuring spoons (1/4 cup size). Get creative.
My recommendation: Spend $5-10 on a proper two-part bath bomb mold from Amazon. It’s worth it for the perfect sphere. But you can absolutely start with what you have.
How to Store Bath Bombs So They Last
Bath bombs are sensitive to moisture. Store them wrong, and they’ll fizz prematurely.
Good storage:
- Airtight container (glass jar with a lid, plastic container with a seal)
- Ziploc bag with air squeezed out (add a silica gel packet to absorb moisture)
- Cellophane bags wrapped tightly (great for gifts)
- Cool, dry place (closet, bedroom drawer – not the bathroom)
Bad storage:
- Bathroom cabinet (humidity from showers)
- Open bowl (exposed to air)
- Near a window (temperature changes)
- In the fridge (too much moisture)
How long do they last?
- Properly stored: 6-12 months
- Stored in bathroom: 2-4 weeks
- After they start fizzing on their own: throw them away (or use them immediately)
Pro tip: Add a silica gel packet (from a shoe box or vitamin bottle) to your storage container. It absorbs excess moisture and keeps your bombs dry for months.
The Math: What I Saved in One Year
Let me break down the actual dollars.
Before (buying Lush or similar bath bombs):
- Cost per bomb: $8-12 (average $10)
- Baths per week: 2 (104 baths per year)
- Annual cost: $1,040
After (DIY bath bombs):
- Cost per bomb: $0.85-1.25 (I’ll use $1.00)
- Baths per week: 2 (104 baths per year)
- Annual cost: $104
Annual savings: $936
Over 5 years: $4,680
What I did with the savings:
- Bought a beautiful bathtub tray ($25)
- Upgraded my towels to plush organic cotton ($50)
- Took a weekend trip to a hot springs ($300)
- Put the rest into savings
And I have a cabinet full of bath bombs in my favorite scents, ready whenever I need them.
DIY Oatmeal & Honey Face Wash: The Gentle $2 Cleanser for Sensitive Skin
Frequently Asked Questions (FAQ)
1. Why aren’t my bath bombs fizzing?
Three possible reasons. First, the mixture was too wet. The citric acid and baking soda reacted before you put the bomb in the bath. Second, your citric acid is old or expired. Citric acid loses potency over time. Third, you didn’t pack the mold firmly enough. The bomb needs to be compressed for the reaction to happen properly.
2. My bath bombs are cracking while drying. What went wrong?
Too much moisture. The water in the mixture is reacting with the citric acid and baking soda, creating gas that expands and cracks the bomb. Use less water next time. The mixture should feel like damp sand – it holds together when squeezed but doesn’t feel wet.
3. Can I use a different oil instead of coconut oil?
Yes. Any carrier oil works: almond oil, jojoba oil, olive oil, sunflower oil, or melted shea butter. Coconut oil is popular because it’s solid at room temperature, which helps the bomb hold its shape. If you use a liquid oil, use slightly less (1.5 tablespoons instead of 2) and expect the bombs to be softer.
4. Are DIY bath bombs safe for sensitive skin?
Yes, because you control the ingredients. Skip the colorant (some people react to dyes). Use gentle essential oils (lavender, chamomile) instead of strong ones (peppermint, citrus). Omit essential oils entirely for a fragrance-free bomb. Do a patch test with the oil mixture on your inner arm before using a full bath bomb.
5. Why use citric acid? Can I substitute something else?
Citric acid is essential for the fizz. It reacts with baking soda to create carbon dioxide bubbles. There is no good substitute. Cream of tartar doesn’t fizz. Vinegar is liquid (will cause premature reaction). Buy citric acid online or in the canning section of grocery stores. A $8 bag lasts for dozens of bath bombs.
6. How do I get my bath bombs to be more strongly scented?
Increase essential oils to 20-25 drops per bomb. Use a stronger oil (peppermint, eucalyptus, tea tree). Or add a fixative like arrowroot powder or kaolin clay (1 tablespoon) to help the scent last longer. Remember that essential oils evaporate – your bombs will lose some scent over time.
7. Can kids help make bath bombs?
Yes, with supervision. Younger kids can measure dry ingredients and pack molds. Older kids can spray water and mix (wear gloves for colorant). Keep citric acid away from eyes. This is a fun weekend project that also teaches basic chemistry (acid-base reactions).
8. Can I sell my homemade bath bombs?
Yes, but check local regulations. You may need a license, insurance, and a registered kitchen. Label ingredients clearly. List potential allergens (essential oils, coconut oil). Start by giving them as gifts to test the market. Many people start small at craft fairs or Etsy.
Final Thoughts: Your Bath Deserves Better Than a $12 Tax
Here’s what I want you to take away.
That $12 Lush bath bomb isn’t magic. It’s baking soda, citric acid, and Epsom salt. The same things you can buy at the grocery store for pocket change. The only difference is the shape, the packaging, and the brand name.
Are those things worth 1,400% markup? Not to me.
I make my own bath bombs now. They cost me less than a dollar each. They smell exactly how I want them to. They soothe my muscles and soften my skin. And I don’t feel guilty dropping one in the tub on a Tuesday night.
The first few will be ugly. They’ll crack. They won’t fizz perfectly. That’s fine. You’re learning. By the third batch, you’ll have perfect little spheres that rival anything from Lush.
So this weekend, spend $20 on ingredients. Invite a friend over. Put on music. Make a mess. Make a dozen bath bombs.
Drop one in your tub. Watch it fizz. Smell the lavender. Feel the Epsom salt work on your tired muscles.
Then smile at the $11 you just saved.
That’s the frugal glow. And it smells amazing. 🛁💛
For more DIY beauty recipes, frugal self-care tips, and money-saving living strategies, visit The Frugal Glow.