

How to Polish Tarnished Silver-Plated Jewelry Using Only Baking Soda and Foil
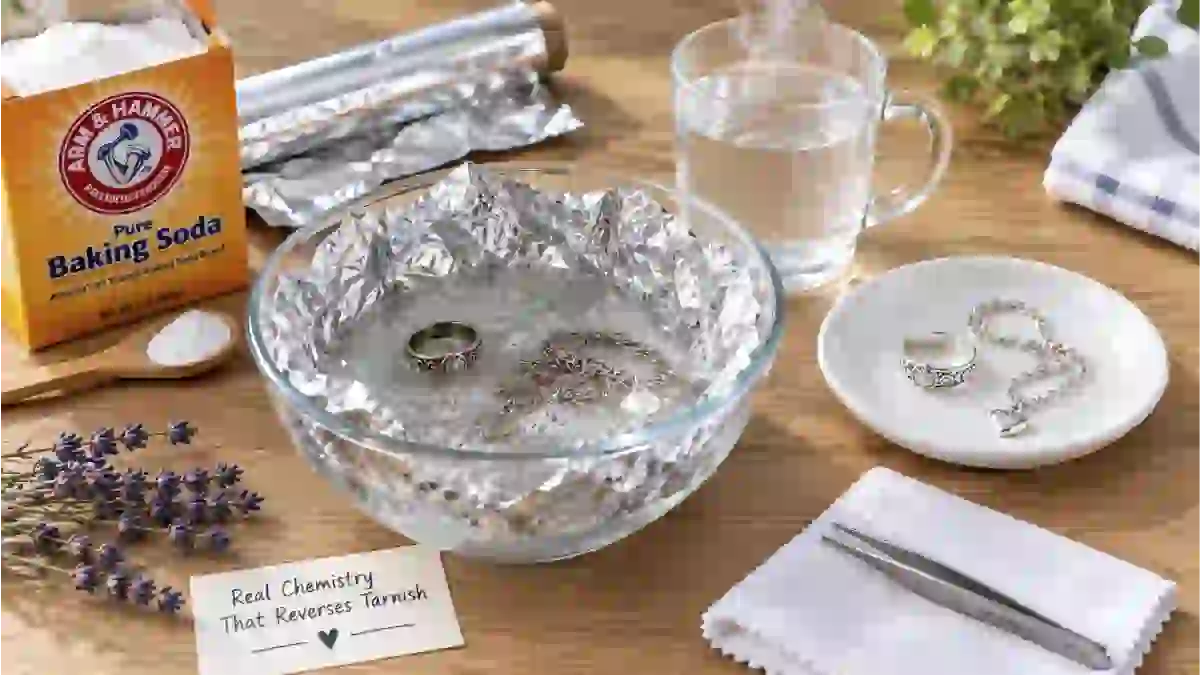
That dark, dull, sometimes almost black film on tarnished silver jewelry looks like grime, but it’s actually a chemical compound — silver sulfide, formed when silver reacts with sulfur compounds naturally present in the air. Traditional polishing removes this the hard way: physical abrasion, scrubbing away a microscopic layer of the tarnished surface along with whatever silver comes with it. The baking soda and foil method does something genuinely different and, frankly, more interesting: it uses real chemistry to reverse the tarnish reaction itself, converting the silver sulfide back into metallic silver without a single stroke of a polishing cloth.
This is the full breakdown: exactly how the electrochemical reaction works, the step-by-step method, and — critically for silver-plated jewelry specifically — the real risks and precautions that don’t get emphasized enough in most versions of this popular hack.
Jump Links
- The Actual Chemistry Behind This Method
- Why Silver-Plated Jewelry Needs Extra Caution
- What You’ll Need
- The Full Step-by-Step Method
- Adjusting the Method Specifically for Plated Jewelry
- What NOT to Clean With This Method
- Signs the Reaction Is Working
- Comparison Table: This Method vs. Traditional Polishing
- Common Mistakes to Avoid
- Preventing Tarnish From Coming Back
- FAQ
- The Bottom Line
The Actual Chemistry Behind This Method
Understanding what’s actually happening here isn’t just interesting trivia — it’s genuinely useful for knowing when this method is appropriate and when it isn’t. Tarnish forms when silver reacts with sulfur compounds in the air to create silver sulfide, the dark, dull layer you see building up over time. When you place tarnished silver in contact with aluminum foil inside a solution of hot water, baking soda, and salt, a real electrochemical reaction takes place: the baking soda and salt dissolve into the water to create an electrolyte solution, which allows ions to flow between the aluminum and the silver, similar to how a basic battery works.
Aluminum is a more reactive metal than silver, meaning it more readily gives up electrons. When silver touches the aluminum foil within this electrolyte bath, the aluminum donates electrons into the silver sulfide, breaking the chemical bond between the silver and sulfur atoms and converting the silver sulfide back into pure, metallic silver. The freed sulfur atoms transfer onto the aluminum foil instead, which is exactly why the foil often develops a visible yellowish or darkened film, and why a faint sulfur smell sometimes accompanies the reaction. This is a genuinely different process from ordinary scrubbing or polishing — it’s chemically reversing the tarnish reaction rather than physically wearing away a dark surface layer.
Why Silver-Plated Jewelry Needs Extra Caution
This is the section most tutorials for this technique gloss over, and it’s genuinely important specifically for the jewelry type this article is about. Silver-plated jewelry has only a thin layer of actual silver applied over another base metal underneath, unlike solid sterling silver, which is silver all the way through. Because this reaction happens at the surface where the tarnish sits, it’s generally considered safe for the thin silver layer on plated items — but repeated, frequent, or overly aggressive use of this method can gradually wear down that thin plating over time, eventually exposing the base metal underneath.
This doesn’t mean the method is unsafe for plated jewelry entirely — it’s widely used successfully on plated pieces — but it does mean plated jewelry specifically calls for a gentler touch (shorter soak times, less frequent repeat treatments) compared to solid sterling silver, which has much more material depth to work with and can tolerate more repeated use over the years.
What You’ll Need
- A non-metal bowl, dish, or container (glass or ceramic, not metal, since a metal container itself could interfere with the reaction)
- Aluminum foil
- Baking soda
- Table salt
- Hot water (near boiling works fastest, though very hot tap water also works)
- Tongs or rubber gloves, for safely removing jewelry from the hot solution
- A soft, clean cloth for drying and buffing
The Full Step-by-Step Method
1. Line your bowl with aluminum foil, shiny side facing up.
Make sure the foil covers the bottom of the container completely, since direct contact between the silver and the foil is what makes the electrochemical reaction possible.
2. Place your tarnished silver-plated jewelry directly on top of the foil.
Ensure each piece is making genuine physical contact with the foil, not just sitting in the water above it, since the reaction specifically requires that direct silver-to-aluminum contact.
3. Sprinkle baking soda and salt evenly over the jewelry and foil.
A common ratio is about 1 tablespoon each of baking soda and salt per cup of water you plan to use, scaling up proportionally for a larger container (roughly ½ cup each for a full gallon of water).
4. Boil water and carefully pour it over the jewelry.
Pour enough hot water into the container to fully submerge every piece of jewelry completely.
5. Let it sit for a shorter time than you would for solid sterling silver.
For silver-plated jewelry specifically, start with just 2 to 5 minutes rather than the longer 10-to-15-minute soak times sometimes recommended for solid sterling pieces, given the thinner plating layer’s lower tolerance for extended exposure.
6. Watch for fizzing, bubbling, and a faint sulfur smell.
This is a normal sign that the reaction is actively working — the hydrogen sulfide byproduct forming as sulfur transfers from the silver to the aluminum foil.
7. Carefully remove the jewelry using tongs or gloves.
Avoid direct contact with the hot water, and lift pieces out carefully rather than pouring the solution out with the jewelry still inside.
8. Rinse thoroughly under cool, clean water.
This removes any remaining baking soda or salt residue from the jewelry’s surface and settings.
9. Dry and buff with a soft, clean cloth.
Gently pat dry, then buff lightly for extra shine. There’s typically little to no residue left once properly rinsed and dried.
10. Check the result and repeat only if genuinely necessary.
If tarnish remains, a second short round is reasonable for stubborn cases, but avoid repeating this process excessively on plated jewelry specifically, given the plating thickness concern discussed above.
Adjusting the Method Specifically for Plated Jewelry
A few modifications specifically worth making when working with plated (rather than solid sterling) pieces:
- Shorter soak times. Start conservative (2–5 minutes) and check the result before extending the soak further, rather than defaulting to the longer times sometimes recommended for solid silver.
- Use warm-to-hot rather than boiling water. While boiling water speeds up the reaction, a slightly less intense heat gives you more control and reduces risk for a thinner, more delicate plated surface.
- Avoid repeating the treatment frequently. Reserve this method for genuinely tarnished pieces rather than making it a routine, frequent cleaning method, since repeated exposure is the main mechanism by which plating can gradually thin over time.
- Inspect the piece closely afterward. Check for any dulling, unevenness, or exposed base metal at edges or high-wear points, which would indicate the plating is thinning and this method should be discontinued on that specific piece going forward.
What NOT to Clean With This Method
- Antique or vintage silver with an intentional aged patina. This reaction doesn’t distinguish between unwanted tarnish and factory-applied darkening (called niello or antiquing) used to highlight decorative details on older pieces; stripping this can permanently reduce a genuine antique’s value and character.
- Jewelry with glued-in gemstones or components. The heat and moisture involved can weaken certain adhesives, potentially loosening stones or decorative elements.
- Pieces with soft or porous gemstones (pearls, opals, turquoise, and similar stones) which can be damaged by prolonged water exposure or the chemical reaction itself.
- Mixed-material jewelry combining silver with other metals that could react differently, or unpredictably, to the same electrolyte bath.
- Any piece where you’re unsure of the base metal or plating quality, particularly older, unmarked, or inherited jewelry where testing on a small hidden area first is a reasonable precaution.
Signs the Reaction Is Working
- Fizzing or light bubbling around the jewelry as it sits in the solution.
- A faint sulfur smell, sometimes described as similar to rotten eggs, indicating hydrogen sulfide gas forming as sulfur transfers from the silver to the foil.
- The foil itself darkening or developing a yellowish film, which is the sulfur that’s been pulled off the silver and deposited onto the aluminum.
- Visible brightening of the silver even before you remove it from the solution, particularly on lightly to moderately tarnished pieces.
Comparison Table: This Method vs. Traditional Polishing
| Factor | Baking Soda & Foil Method | Traditional Polish/Cloth |
|---|---|---|
| Mechanism | Electrochemical reaction (reverses tarnish) | Physical abrasion (wears away tarnish layer) |
| Effort required | Minimal (mostly passive soaking) | Manual scrubbing/rubbing |
| Risk to thin plating | Moderate with frequent/repeated use | Lower risk of stripping, but can still thin plating with aggressive rubbing |
| Best for | Solid sterling silver, moderately tarnished plated pieces | Detailed engraved areas, spot touch-ups |
| Cost | Pennies (household items) | $5–$15 for polish or polishing cloths |
| Speed | Minutes | Can take longer for heavy tarnish |
Common Mistakes to Avoid
- Using boiling water on delicate plated pieces without shortening the soak time. Full-intensity heat combined with a long soak increases the risk of over-treating thinner plating.
- Not ensuring direct contact between the jewelry and the foil. The reaction specifically requires this contact; jewelry sitting only in the water above the foil won’t clean as effectively.
- Repeating the treatment too frequently on the same plated piece. This is the main risk factor for gradually thinning plating over time; reserve it for genuinely tarnished pieces rather than routine maintenance cleaning.
- Using this method on antique silver or pieces with sentimental, collectible value without researching first. As covered above, this reaction can strip intentional aged patina that contributes to a genuine antique’s value.
- Forgetting to rinse thoroughly afterward. Leftover baking soda or salt residue can affect the jewelry’s appearance or feel if not properly rinsed away.
- Using a metal container instead of glass or ceramic. This can interfere with or complicate the intended electrochemical reaction between the silver and the foil specifically.
Preventing Tarnish From Coming Back
- Store silver-plated jewelry in an airtight bag or container when not in use, minimizing ongoing exposure to air and the sulfur compounds that cause tarnish in the first place.
- Add an anti-tarnish strip or a piece of chalk to your jewelry storage, both of which help absorb the moisture and airborne compounds that accelerate tarnishing.
- Avoid storing jewelry in humid environments like bathrooms, where moisture speeds up the tarnishing process significantly.
- Wear jewelry regularly rather than leaving it in storage long-term. Interestingly, the natural oils from skin contact can actually help slow tarnish formation on frequently worn pieces compared to jewelry left untouched in storage for extended periods.
📌 YOU MIGHT ALSO LIKE:
The $5 Walmart Secret: The Best Cheap Lip Mask That Outperforms Laneige Overnight
The 50-Cent Kitchen Miracle: DIY Oatmeal Mask for Instant Sensitive Skin Soothing
FAQ
Is this method actually safe for silver-plated jewelry, or only solid sterling silver?
It’s generally considered safe for plated jewelry when done with appropriate caution — shorter soak times and less frequent repetition — since the reaction happens at the tarnished surface. However, because plating is only a thin layer over a base metal, repeated or overly aggressive use can gradually wear it down over time in a way that isn’t a concern for solid sterling silver.
Why does the foil turn dark or yellow during this process?
That’s the actual sulfur being transferred from the tarnished silver onto the aluminum foil during the electrochemical reaction, which is direct visual evidence that the process is working as intended.
Can I use this method on antique or vintage silver jewelry?
It’s not recommended for genuinely antique pieces, particularly those with an intentional aged patina or decorative darkening, since this reaction can strip that finish permanently and potentially reduce the piece’s value and character.
How long should I soak silver-plated jewelry in this solution?
Start with a shorter soak of 2 to 5 minutes for plated jewelry specifically, checking the result before extending further if needed, rather than defaulting to the longer soak times sometimes used for solid sterling silver.
What’s that smell during the cleaning process?
A faint sulfur smell, sometimes compared to rotten eggs, is normal and indicates hydrogen sulfide gas forming as part of the electrochemical reaction transferring sulfur from the silver to the foil.
Is it okay to use this method on jewelry with gemstones?
It depends on the specific gemstone. Hard, non-porous stones are generally more tolerant, while soft or porous stones like pearls, opals, and turquoise can be damaged by the water exposure or chemical reaction, and jewelry with glued-in stones carries some risk of the adhesive weakening from heat and moisture.
The Bottom Line
The baking soda and foil method is genuine, real chemistry — an electrochemical reaction that reverses tarnish rather than just physically scrubbing it away — and it works remarkably well on silver-plated jewelry when used with the right precautions. Keep soak times shorter, avoid repeating the treatment too frequently on the same piece, and steer clear of antique or gemstone-set jewelry where the reaction could cause unintended damage, and this household trick will keep your silver-plated pieces looking genuinely polished without a single dollar spent on commercial silver polish.
For more budget-friendly jewelry care guides and DIY cleaning tricks, check out more posts over at The Frugal Glow.
Sources: