

Ditch the Salon Blowout: 5 Smart Roller Techniques for Maximum Volume Under $5
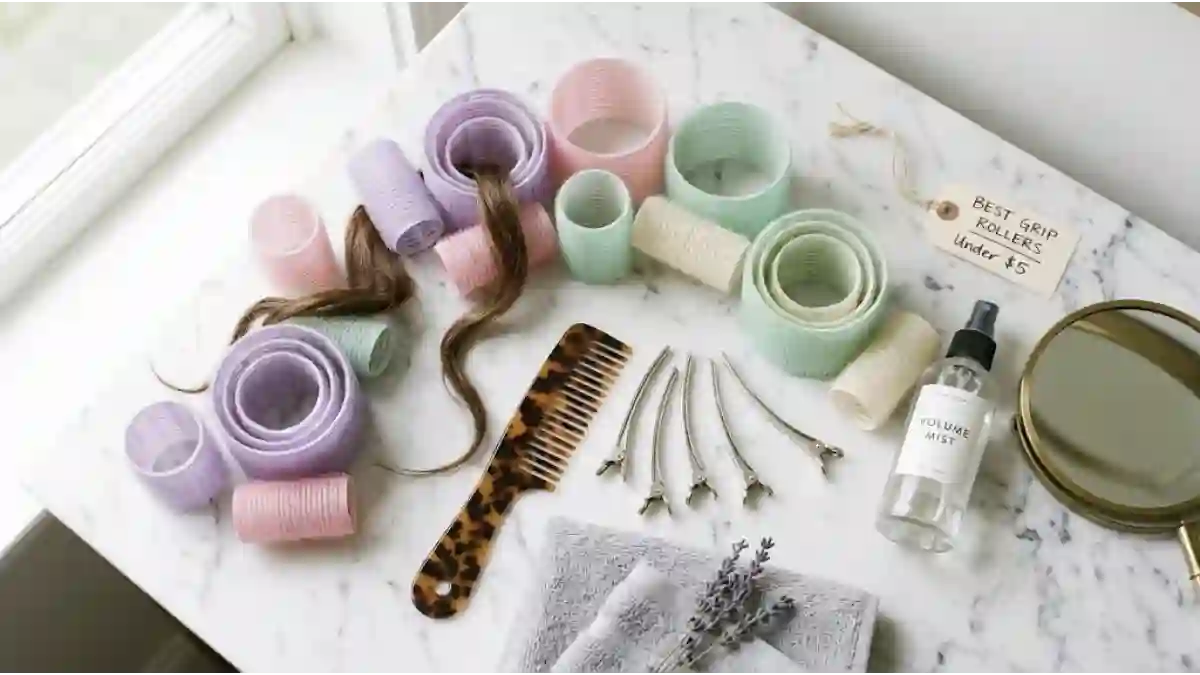
A salon blowout does one thing better than almost any other hair service: it makes hair look like it has body, lift, and movement from the very first inch off the scalp. It also takes an hour of your time, a decent chunk of your budget, and a repeat appointment every time the volume deflates. The surprising truth is that most of what makes a blowout look expensive comes down to one simple principle, which is setting the hair in a lifted shape while it dries and cools. Rollers do that job beautifully, and a small set costs about as much as a coffee.
This guide covers what “under $5” realistically gets you, why rollers create volume in the first place, and five specific techniques that separate a flat, lopsided result from a bouncy, professional-looking one. Everything here is based on techniques stylists commonly recommend for self-grip (Velcro-style) rollers, which are the easiest and cheapest option for beginners.
Jump Links
- What “Under $5” Really Looks Like
- Why Rollers Create Volume
- Choosing Roller Sizes
- Prep: The Step Most People Skip
- Technique 1: The Over-Direction Root Roll
- Technique 2: The Crown Map
- Technique 3: The Heat-and-Cool Set
- Technique 4: The Smooth-and-Wrap
- Technique 5: The Frame-and-Release
- Roller Placement Map Table
- Adjusting for Your Hair Type
- The Full 30-Minute Routine
- The Heatless Variation
- Troubleshooting Table
- Caring for Your Rollers
- Cost Comparison
- FAQ
- The Bottom Line
What “Under $5” Really Looks Like
Let’s be upfront about the budget, because it shapes the whole strategy. Full-head kits of 24 to 31 self-grip rollers usually cost more than five dollars. Many retail listings for those larger sets run roughly $6 to $14, and branded packs of four to six rollers can run closer to $9 to $13. A bargain multi-pack, like a 31-piece volumizing set, has shown up for around $6 to $7, which is a great value but still a bit over the line.
The good news is that you don’t need a full head of rollers to get a big, bouncy blowout. Volume is made almost entirely at the roots, the crown, and the front of the hair, so a small pack of large rollers does most of the heavy lifting. Small two-to-six piece self-grip sets have been listed for around $4 to $5, and that’s enough to cover the crown and front hairline, which is where a blowout actually earns its reputation. Foam rollers are another option, with an eight-count pack of large foam rollers listed at around $6, and many local dollar and discount stores carry small packs of rollers too, so it’s worth checking your nearest store.
So the realistic version of this plan is a small set of large rollers for roughly five dollars or less, used with the techniques below, plus a blow dryer and styling product you probably already own. If your budget stretches a few dollars further, a larger multi-pack gives you more flexibility, but it isn’t required.
Prices are approximate and may change at any time depending on the store, brand, and current sales.
Why Rollers Create Volume
Hair holds onto the shape it’s in while it dries and cools. When you wrap a damp section around a roller, you’re training that section to lift away from your scalp and curve into a soft bend. Once the hair dries (or cools after heat) and the roller comes out, it keeps a good portion of that shape for hours.
Stylists describe the key to maximum volume as how the hair is directed at the root. A section of hair that’s wrapped and then pressed against the scalp at a lifted angle sets with lift built in, while the same section dried flat sets flat. Rollers also leave your hair mostly free of direct heat, since self-grip rollers don’t use any heat themselves unless you add a blow dryer, which means you can avoid heat damage by letting hair dry naturally if you prefer.
The result is volume that comes from the structure of the set, not from teasing or heavy product, which is why it tends to look soft and natural rather than stiff.
Choosing Roller Sizes
Roller size is the biggest lever you have. In general, the bigger the roller, the more volume and softer the wave, and the smaller the roller, the tighter the curl. Stylists commonly point to the 1½-inch to 2½-inch range as the sweet spot for voluminous, bouncy curls, with the largest rollers reserved for the top of the head when maximum lift is the goal.
For a budget set, prioritize large and jumbo sizes. Self-grip rollers in the 2½-inch (about 63 mm) jumbo size are marketed specifically for maximum lift at the roots, and smaller sizes can be a nice extra for the sides or back but aren’t necessary for a volume-focused look. If you only buy one size, choose large.
Prep: The Step Most People Skip
Good rollers can’t rescue poorly prepared hair. A few quick prep steps make every technique below work better.
- Start clean and detangled. Wash and condition as usual, then comb out every knot. Tangles that go onto a roller come out as bigger tangles.
- Dry hair to about 90%. Stylists commonly recommend working with slightly damp hair, meaning mostly dry with just a hint of moisture left. Soaking wet hair takes forever to set and won’t hold a shape, while completely dry hair holds less of the set unless you add product or heat.
- Apply a heat protectant if you plan to use a blow dryer. A light mist applied before heat helps protect your strands.
- Work mousse or a volumizing product through from roots to ends. Mousse gives the hair grip and body so the set lasts.
- Section with a comb. Clean, even sections are the foundation of every technique that follows.
Technique 1: The Over-Direction Root Roll
This is the single most important technique for maximum volume, and it’s the one that separates a lifted blowout from a loose curl at the ends.
The idea: Over-direction means pulling the section of hair in an exaggerated direction before you roll it, so the hair sets with a much stronger lift at the root than it would if you simply rolled it straight down. Stylists describe pulling the section forward and then rolling it back toward the scalp starting at the ends, so the root is trained to stand up.
How to do it:
- Take a horizontal section at the crown that’s about the same width as your roller, or slightly narrower. A section that’s wider than the roller lets hair spill off the sides and loses lift.
- Comb the section smooth, then pull it forward over the front of your head, exaggerating the angle.
- Place the roller at the very ends of the hair.
- Roll the roller down toward your scalp with firm, even tension, keeping the hair taut.
- Press the roller against your scalp so the Velcro grips and the roller sits right at the root. If you have thick hair, add a clip for extra hold.
- Repeat for two to three sections across the crown.
Best for: Flat roots, fine hair, and anyone who wants maximum lift at the top of the head.
Common mistake: Rolling the hair down and under at the root, which tucks the root flat instead of lifting it.
Technique 2: The Crown Map
Where you place each roller matters as much as how you roll it. The crown map is a simple strategy for assigning your largest rollers to the places that give the most visual volume.
The idea: Stylists consistently recommend putting the largest rollers on the top section of the hair, close to the roots, and using smaller rollers where you want tighter curl or where hair is shorter, such as around the face if you have short layers. If you only have a handful of rollers, the crown and front hairline are where they should go.
How to do it with a small set (4 to 6 rollers):
- Place one large roller at the front hairline, rolled up and away from the forehead.
- Place two or three large rollers in a row across the crown, behind the front roller.
- If you have extra rollers, use one on each side, rolled away from the face.
- Skip the back and nape sections entirely. Hair there doesn’t contribute much to overall volume, and you can finish it with your fingers.
Best for: Anyone working with a small budget set, since it concentrates your rollers where they do the most good.
Technique 3: The Heat-and-Cool Set
This technique uses the blow dryer you already own to lock in the lift, and it’s a major reason a roller set can look like a professional blowout.
The idea: Hair sets in the shape it’s in when it cools. Using a blow dryer on the hair while it’s wrapped around a roller, focusing the warm air at the root, helps dry the hair in its lifted position, and letting it cool completely before you remove the roller helps lock that shape in. Stylists note that rollers work better with heat, and that the roller needs to be snug enough to lift hair off the root while it dries and cools.
How to do it:
- Roll your sections using Technique 1 while the hair is slightly damp.
- Apply heat protectant if you haven’t already.
- Use a blow dryer on a medium heat setting, aiming warm air at the root area under each roller, then work down the length.
- Switch to the cool setting if your dryer has one, or simply wait a few minutes.
- Let the rollers sit until your hair is completely dry and cool to the touch. Taking them out while the hair is still warm lets the shape drop.
Best for: Stick-straight hair or hair that doesn’t hold a style well.
A note for stick-straight hair: Hair that’s very straight tends to lack natural “memory,” so stylists suggest roughing it dry and using a volumizing primer first, which builds in some hold before you roll.
Technique 4: The Smooth-and-Wrap
Sloppy sections are the number one reason a home roller set looks uneven. This technique focuses on clean sectioning and even tension, which gives you consistent volume across the whole style.
The idea: Each section of hair should be about as wide as the roller or a little narrower so the hair wraps neatly instead of spilling over the sides. Many stylists also recommend using the roller itself like a brush, sliding it along the section from mid-lengths to ends to smooth the hair before you wrap it.
How to do it:
- Use a comb to separate a section that matches the width of your roller.
- Hold the section taut, placing the roller underneath at the very ends.
- Glide the roller through the hair to smooth it, then wrap the ends neatly around the roller so no strands are bent or sticking out.
- Roll toward the scalp with steady, even tension. The hair should feel snug but not painful.
- Check that the hair is lying flat against the roller with no bunches or twists.
- Secure the roller at the root.
Best for: Thick or long hair, and anyone who struggles with uneven, lopsided results.
Common mistake: Bending the ends when you start the wrap, which leaves kinks or creases in the finished style.
Technique 5: The Frame-and-Release
The final technique covers the two moments that make or break the finished look: how you place the front sections, and how you take the rollers out.
The idea: For the hair at the front of your head, stylists recommend rolling the hair up and away from the forehead, which frames the face and gives the top of the style extra lift. Then, how you remove the rollers matters just as much as how you put them in.
How to do it:
- For front pieces, roll up and away from your forehead instead of down and under.
- When the hair is completely dry and cool, remove the rollers in the same order you put them in.
- Unroll each roller slowly at the root first, then as you reach the midpoint, turn the roller down and ease it out gently. Rushing can cause tangles and drop the volume you just created. If you have fine hair, avoid pulling downward as you remove the rollers.
- Once every roller is out, tip your head upside down, shake the hair out, and finger-comb it into place instead of using a brush, which can flatten the lift.
- Finish with a light mist of hairspray or texturizing spray at the roots if you want extra hold.
Best for: Everyone, since it’s the finishing technique that protects all the work you did earlier.
Roller Placement Map Table
| Zone | Roller Size | Direction | Purpose |
|---|---|---|---|
| Front hairline | Large | Up and away from forehead | Face-framing lift |
| Crown | Largest available | Over-directed forward, rolled to root | Maximum volume |
| Sides | Medium or large | Away from the face | Soft width and shape |
| Back | Medium (optional) | Straight down or slightly angled | Even body and bounce |
| Short layers near face | Smaller | Rolled toward scalp | Tighter curl and control |
Adjusting for Your Hair Type
| Hair type | Best approach | Extra tip |
|---|---|---|
| Fine or thin | Medium to large rollers focused at the root | Remove rollers gently and avoid pulling downward |
| Thick or long | Add more rollers or jumbo sizes, use clips | Allow longer for hair to set completely |
| Stick-straight | Rough dry and use a volumizing primer before rolling | Use the heat-and-cool method for better hold |
| Naturally textured or curly | Blow out your hair first, then roll | Makes rollers easier to apply and reduces tangling |
| Short hair | Velcro rollers work best here | Use smaller rollers near the face where layers are short |
Stylists note that self-grip rollers work for every hair type, but that they give the most effective results on short-to-mid-length hair, so longer hair may need more rollers or a larger size to see the same effect.
The Full 30-Minute Routine
Stylists suggest a roller blowout can come together in about half an hour, plus time for your hair to cool and set.
- Prep (5 minutes): Wash, condition, detangle, and rough-dry to about 90% dry. Apply heat protectant and mousse.
- Section (2 minutes): Part your hair and clip away sections you’ll roll later.
- Crown rollers (5 minutes): Use Technique 1 and Technique 4 to roll two or three sections across the crown.
- Front and sides (5 minutes): Roll the front pieces up and away from your face and add side rollers if you have them.
- Heat and cool (10 minutes): Use Technique 3 to dry the hair under the rollers, then let everything cool completely.
- Release and finish (3 minutes): Use Technique 5 to take out the rollers, flip your head, shake, and finger-comb.
The Heatless Variation
If you’d rather skip the blow dryer entirely, you can use the same techniques with a heatless approach. Roll slightly damp hair using the over-direction method and leave the rollers in until your hair has dried completely, which commonly takes at least an hour, though many people schedule it around other tasks like getting dressed or having breakfast. Stylists also note that with proper over-direction, rollers can be left in for roughly 15 to 30 minutes to create a lifted look on hair that’s only slightly damp.
Some people like to sleep in rollers for an overnight set, but self-grip rollers can be uncomfortable for that, so if you want an overnight option, a softer roller may be more comfortable.
Troubleshooting Table
| Problem | Likely cause | Fix |
|---|---|---|
| Volume falls flat within a few hours | Rollers removed while hair was still warm or damp | Let hair cool completely and dry fully before removing |
| Dents or creases in the hair | Bent ends or overly tight clips | Wrap ends flat and use clips only on the roller, not over the hair |
| Frizz after removal | Pulling rollers out too fast or brushing afterward | Unroll slowly and finger-comb |
| Tangles in the rollers | Hair wasn’t detangled or sections were too wide | Detangle first and match sections to roller width |
| Uneven or lopsided volume | Inconsistent section sizes or tension | Use a comb to section evenly and wrap with consistent tension |
| Roots look lifted but ends look limp | Hair wasn’t wrapped all the way to the ends | Place the roller at the very ends before rolling |
Caring for Your Rollers
Self-grip rollers keep working well for years if you give them basic care. After each use, remove any hair that’s caught in the Velcro surface, since built-up hair weakens the grip and makes rollers harder to use. Wipe them down occasionally to remove product buildup, let them dry completely, and store them somewhere they won’t get crushed. If you use heat, let the rollers cool before you handle or store them.
Cost Comparison
| Option | Approx. cost | Notes |
|---|---|---|
| Small self-grip roller set (2–6 large rollers) | ~$4–$5 | Enough for the crown and front, which is where volume comes from |
| Large multi-pack (24–31 rollers) | ~$6–$14 | More flexibility, but not required for a volume-focused look |
| Foam roller pack (8 large) | ~$6 | A soft alternative |
| Mousse, heat protectant, blow dryer | Often already owned | No new cost for most people |
| Salon blowout | Commonly $40 or more, varies widely by city and salon | A per-visit cost that repeats every time |
Prices are approximate and may change at any time depending on the store, brand, and current sales.
Here’s a quick way to look at it: a $4 to $5 set used 50 times works out to under 10 cents per use, while a single salon blowout often costs many times the price of the entire roller set. Even if you buy a larger pack, the cost per use quickly drops to a few cents.
📌 YOU MIGHT ALSO LIKE:
Stop Wasting Money on Professional Gloss Treatments: The $5 At-Home Clear Shine Secret
How to Cut Your Own Long Layers at Home: The Frugal Step-by-Step Ponytail Method
FAQ
Can I really get salon-style volume with only a few rollers?
Yes. Most of the visible volume in a blowout comes from the roots, the crown, and the front hairline, so a handful of large rollers placed in those areas can deliver most of the effect. A larger set gives you more flexibility, but it isn’t necessary.
Should I roll damp or dry hair?
Slightly damp hair, meaning about 90% dry, is what many stylists recommend. Soaking wet hair takes too long to set and doesn’t hold its shape, while fully dry hair holds less of the set unless you add product or a little heat.
How long should I leave the rollers in?
It depends on your method. With a blow dryer, leave them in until your hair is completely dry and cool. With a heatless set, leave them in until your hair is fully dry, which usually takes at least an hour, though a quicker set of around 15 to 30 minutes can work on slightly damp hair with strong over-direction.
Do self-grip rollers damage hair?
The rollers themselves don’t use heat, so you can avoid heat damage by letting your hair dry naturally. They can snag or tangle hair, especially if it’s fine, long, or textured, so it helps to detangle first, avoid sections wider than the roller, and remove the rollers gently.
What size should I buy for maximum volume?
The largest size is your best friend for maximum volume, especially at the crown. A range of about 1½ to 2½ inches is a popular sweet spot for voluminous curls, and jumbo 2½-inch rollers are marketed specifically for maximum lift at the roots.
Can I sleep in self-grip rollers?
Some people do, but self-grip rollers can be uncomfortable for overnight use. If you want an overnight set, consider a softer, more sleep-friendly roller, and remember that the key to a lasting set is letting your hair dry completely, not necessarily sleeping in rollers.
The Bottom Line
You don’t need a full salon appointment or a drawer full of hot tools to get a bouncy, voluminous blowout. A small set of large rollers, a few minutes of prep, and five simple techniques, over-direction at the roots, smart placement at the crown, a heat-and-cool set, clean sectioning, and a gentle release, are enough to create volume that lasts through the day. With a budget of about five dollars and half an hour, you can skip the salon chair and still walk out the door with hair that looks professionally done.
For more budget-friendly beauty guides and hair tips, check out more posts over at The Frugal Glow.
Sources: