

Digital Detox: 3 Secret Phone Settings That Reclaim 2 Hours of Your Life Daily
Let me tell you about the day I realized I had a problem.
I was sitting on my couch, scrolling through Instagram, when I looked up and noticed it was dark outside. I had gotten home from work at 6 PM. It was now 9 PM. I had spent three hours on my phone. Three hours. I couldn’t tell you a single thing I had looked at. Just an endless blur of videos, photos, and ads.
I checked my screen time. Average daily screen time: 6 hours and 42 minutes. That’s not including my work computer. That’s just my phone. Tapping, scrolling, swiping.
I did the math. 6.7 hours per day × 365 days = 2,445 hours per year. That’s 102 entire days. I was spending nearly one-third of my waking hours staring at a screen.
The worst part? I didn’t even enjoy most of it. I wasn’t learning anything. I wasn’t connecting with anyone. I was just… consuming. Mindlessly.
That night, I decided to change. I went into my phone settings and started digging. I found three features I had never used before. Three secret weapons against mindless scrolling. I turned them on.
The next day, my screen time dropped by two hours. Not because I had more willpower. Because my phone was no longer designed to trap me.
These settings are free. They take five minutes to set up. And they will give you back hours of your life every single day.
Here’s exactly how to do it.
Jump Links
- The Three-Hour Black Hole That Changed Everything
- Why Your Phone Is Designed to Be Addictive (Briefly)
- Secret Setting #1: Grayscale Mode (The Dopamine Killer)
- Secret Setting #2: App Timers (The Hard Cutoff)
- Secret Setting #3: Notification Batching (The Focus Saver)
- How to Set Up All Three (Step-by-Step)
- What Happened When I Turned Them On (Real Results)
- The Hidden Benefit: Better Sleep (And What That’s Worth)
- The Math: 2 Hours a Day x 365 Days
- Bonus Tips to Go Even Further
- Frequently Asked Questions (FAQ)
- Final Thoughts: Your Attention Is Worth More Than Their Ads
The Three-Hour Black Hole That Changed Everything
I need to be honest about that three-hour Instagram spiral.
It wasn’t the first time. It wasn’t even the hundredth time. But it was the first time I actually looked at the clock and felt genuine shame. I had sacrificed an entire evening to content I didn’t care about, from people I didn’t know, advertising products I didn’t want.
I checked my screen time report. Instagram: 2 hours 15 minutes. TikTok: 1 hour 10 minutes. YouTube: 1 hour. Reddit: 45 minutes. Twitter: 30 minutes. The rest: random.
I was spending over 5 hours a day on social media alone. Five hours. That’s a part-time job. I was working a second job for free, and my payment was anxiety and FOMO.
I started researching phone addiction. I learned that apps are designed to be addictive. The infinite scroll. The variable rewards (will this next video be good?). The notifications designed to interrupt your day. The red badges that trigger your anxiety.
It’s not an accident. It’s a business model. Your attention is the product. The longer you scroll, the more ads you see, the more money they make.
I decided to fight back. Not by deleting my apps (I still use social media). But by changing the environment. Making my phone less appealing. Removing the triggers.
The three settings I found changed everything.
Why Your Phone Is Designed to Be Addictive (Briefly)
Let me explain the psychology quickly. Understanding why these settings work will help you stick with them.
The Dopamine Loop:
Every time you get a notification, like, or comment, your brain releases a tiny amount of dopamine. Dopamine feels good. Your brain wants more. So you check your phone again. And again. And again.
Variable Rewards:
Slot machines work because you never know when you’ll win. Social media works the same way. You scroll because the next video might be funny. The next post might be interesting. The next notification might be from someone you like. Not knowing keeps you scrolling.
The Infinite Scroll:
There is no natural stopping point. On a website, you click a link and then you decide to click another link. On an app, you just keep scrolling. Forever. No decision required. No end in sight.
Notification Anxiety:
That red badge on your app icon triggers a mild stress response. Your brain wants to resolve the anxiety by checking the notification. Even if the notification is useless.
The three settings I’m about to share break these loops. Not completely. But enough to take back control.
Secret Setting #1: Grayscale Mode (The Dopamine Killer)
What it does: Turns your entire phone screen black and white. No colors. No bright red notifications. No satisfying blues and greens.
Why it works: Colors trigger emotional responses. Red means urgent. Green means good. Blue means calming. App designers use colors to manipulate your attention. Grayscale removes all of that. Your phone becomes boring. Less appealing. Easier to put down.
The first time I turned it on: I unlocked my phone and literally said “ew” out loud. My home screen looked sad. Instagram looked gray and uninteresting. I scrolled for about 30 seconds and then put my phone down. Without the colors, the dopamine hit was gone.
Does it completely stop you from using your phone? No. But it breaks the visual appeal. You use your phone for what you need (texting, email, maps, etc.) and then you put it down. You don’t get lost in the color-soaked scroll.
What it won’t do: Stop you from using apps you genuinely need. If you need to check Instagram for work or family, you still can. It just won’t be as fun.
Pro tip: Some phones let you set a shortcut (triple-click the power button) to toggle grayscale on and off. Use this for when you genuinely need color (watching a video, looking at photos, using maps with color-coded traffic). Set it and forget it.
Secret Setting #2: App Timers (The Hard Cutoff)
What it does: You set a time limit for specific apps (like 30 minutes for Instagram). When you reach the limit, your phone locks you out. You can’t open the app until the next day (or you can override with a password – but don’t).
Why it works: Willpower is finite. You can resist scrolling for a while, but eventually you’ll give in. App timers remove the decision. Your phone makes the choice for you. No more “just five more minutes.”
The first time I turned it on: I set 30 minutes for Instagram and 30 minutes for TikTok. I hit my limit at 2 PM. I tried to open Instagram. It showed a gray screen that said “Time is up.” I couldn’t override because I asked my friend to set the password and not tell me. I was annoyed for about 10 minutes. Then I went for a walk.
Does it work for everyone? Only if you can’t override it. If you set the password yourself, you’ll just type it in when you hit the limit. Have a friend or partner set the password. Or use the “lock after limit” option that some phones have.
What to set for each app:
- Social media (Instagram, TikTok, Facebook, Twitter): 20-30 minutes each
- YouTube: 30-45 minutes
- News apps: 15 minutes
- Games: 30 minutes
- Shopping apps (Amazon, Target, etc.): 15 minutes
Be realistic. If you’re currently spending 3 hours on Instagram, don’t set a 10-minute limit. You’ll just turn it off. Start with 45 minutes. Reduce by 5 minutes each week.
Secret Setting #3: Notification Batching (The Focus Saver)
What it does: Turns off all notifications except the essentials. Then delivers the non-essential ones in batches (e.g., at 9 AM, 12 PM, 5 PM, and 9 PM).
Why it works: Every notification is an interruption. It takes about 23 minutes to fully refocus after an interruption. If you get 50 notifications per day, that’s nearly 1,200 minutes (20 hours) of lost focus per week.
The first time I turned it on: I turned off all notifications except texts and phone calls. Everything else – Instagram likes, TikTok comments, news alerts, game invites – went into a “scheduled summary” that delivered at 9 AM, 12 PM, 5 PM, and 9 PM. The first day, I felt anxious. I kept checking my phone for notifications that weren’t there. By day three, I felt free. I wasn’t jumping at every buzz.
What notifications to keep:
- Phone calls (from anyone – family, work, emergencies)
- Text messages (from contacts – you can filter unknown senders)
- Calendar alerts (for appointments)
- Delivery apps (for when your food arrives)
What notifications to batch:
- Social media (likes, comments, new followers, DMs from non-contacts)
- News alerts (nothing is that urgent)
- Email (check it when YOU want, not when they tell you)
- Game invites
- Shopping alerts (sales, price drops, etc.)
What to turn off completely:
- App recommendations (“Try this new feature!”)
- “Your friend posted for the first time in a while” (manipulative garbage)
- “Trending” alerts
- Any notification that doesn’t require a response
Pro tip: On iPhone, this is called “Scheduled Summary.” On Android, look for “Notification Batching” or use an app like Daywise.
How to Set Up All Three (Step-by-Step)
Here’s exactly how to do this on each phone.
iPhone (iOS)
Grayscale Mode:
- Go to Settings > Accessibility > Display & Text Size
- Tap Color Filters
- Turn on Color Filters
- Select “Grayscale”
- (Optional) Set shortcut: Settings > Accessibility > Accessibility Shortcut > Color Filters. Now triple-click power button to toggle.
App Timers:
- Go to Settings > Screen Time
- Tap “Turn On Screen Time” (if not already on)
- Tap “App Limits”
- Tap “Add Limit”
- Select the app categories (Social, Games, etc.)
- Set time limit (e.g., 30 minutes)
- Tap “Add”
- For password: Settings > Screen Time > Use Screen Time Passcode. Have a friend set it.
Notification Batching:
- Go to Settings > Notifications > Scheduled Summary
- Turn on Scheduled Summary
- Select which apps to include
- Set schedule (e.g., 9 AM, 12 PM, 5 PM, 9 PM)
Android (varies by phone – Samsung, Pixel, etc.)
Grayscale Mode:
- Go to Settings > Digital Wellbeing & Parental Controls
- Tap Wind Down (or Bedtime mode)
- Turn on Grayscale (may be called “Grayscale” or “Black and white”)
- For shortcut: Some Androids have “Extra Dim” or “Reading mode” shortcut in quick settings
App Timers:
- Go to Settings > Digital Wellbeing & Parental Controls
- Tap Dashboard
- Find the app you want to limit
- Tap the hourglass icon
- Set time limit (e.g., 30 minutes)
- Tap “Set”
Notification Batching:
- Go to Settings > Notifications
- Tap “Notification reminders” or “Snooze notifications” (varies)
- Or use the “Do Not Disturb” schedule and allow only essential apps
- For advanced batching, download “Daywise” or “Briefly” from Play Store
What Happened When I Turned Them On (Real Results)
I’ve been using these settings for over a year. Here’s what changed.
Week 1:
- Grayscale felt weird. My phone looked broken.
- I kept checking for notifications out of habit.
- I hit my app limits and felt bored.
- I slept better (less blue light from scrolling at night).
Week 2:
- Grayscale started feeling normal. Colorful screens now looked overwhelming.
- I stopped checking my phone every few minutes.
- I hit my app limits less often (I was using my phone more intentionally).
- I read two books.
Week 3:
- I stopped missing notifications. Nothing important was lost.
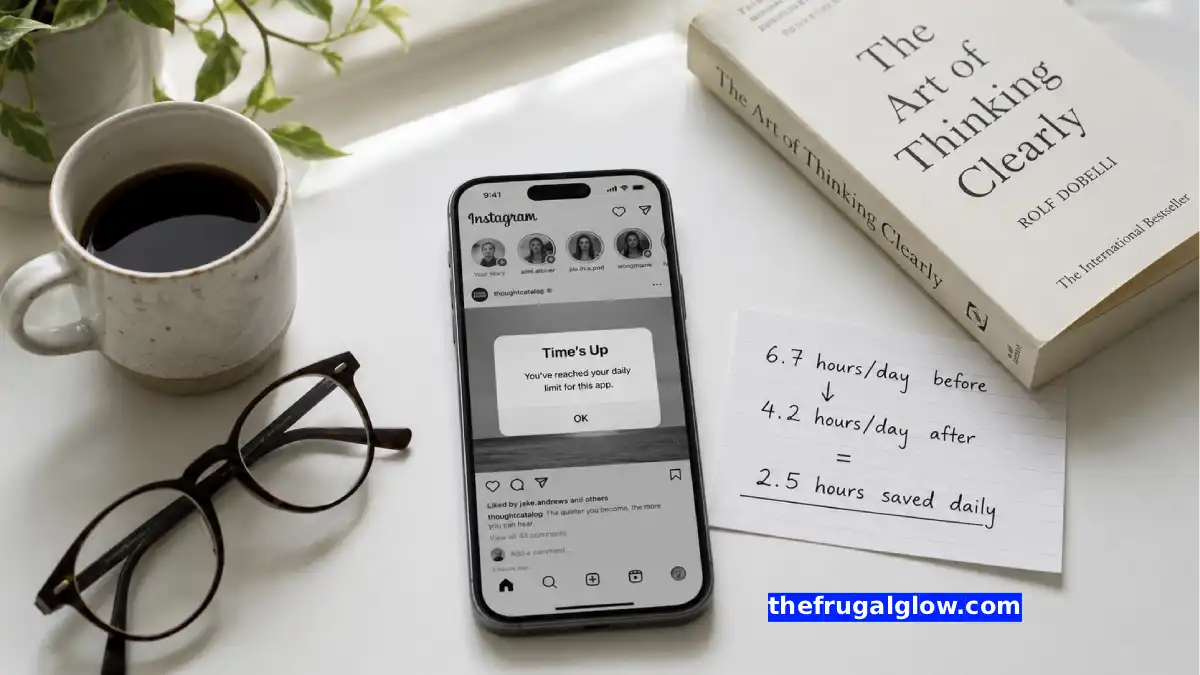
- My average screen time dropped from 6.7 hours to 4.2 hours.
- I felt less anxious. Less FOMO. More present.
One month in:
- Screen time: 3.8 hours per day
- I had read four books, started a new hobby (watercolor), and was going to bed earlier.
- I still used social media. I just used it on my terms.
Now (one year later):
- Screen time: 3.2 hours per day (still a 50%+ reduction from 6.7)
- I don’t use app timers anymore because I don’t need them. My habits changed.
- I keep grayscale on permanently. Color screens look aggressive to me now.
- I have never missed a single important notification.
The best part? I got back about two hours every day. That’s 730 hours per year. Thirty full days. An entire month of my life returned.
The Hidden Benefit: Better Sleep (And What That’s Worth)
One unexpected side effect: I started sleeping better.
Blue light from phones suppresses melatonin production. That’s the hormone that tells your body it’s time to sleep. Scrolling before bed literally makes it harder to fall asleep and reduces sleep quality.
My sleep before:
- 7 hours in bed
- 45 minutes to fall asleep
- Woke up 2-3 times per night
- Felt tired every morning
My sleep after (with grayscale and no notifications at night):
- 7.5 hours in bed
- 15 minutes to fall asleep
- Woke up 0-1 times per night
- Felt rested in the morning
Better sleep has a dollar value. People with poor sleep have higher healthcare costs (diabetes, heart disease, mental health issues). They’re less productive at work. They get sick more often.
Conservative estimate of sleep improvement value:
- 4 fewer sick days per year: $200-400 (depending on your hourly wage)
- Better focus/productivity: $1,000-2,000 per year
- Lower long-term health risk: hard to quantify, but significant
That’s not even counting the quality of life improvement. Waking up rested is priceless.
The Math: 2 Hours a Day x 365 Days
Let me put this into numbers.
Time reclaimed:
- 2 hours per day (conservative estimate – many people reclaim more)
- 14 hours per week
- 60 hours per month
- 730 hours per year
What can you do with 730 hours?
- Learn a new language (600 hours to basic fluency)
- Train for a marathon (200 hours)
- Read 60 books (12 hours per book)
- Start a side business (evenings and weekends)
- Spend time with family (every dinner + bedtime)
- Exercise (1 hour per day, every day of the year)
- Sleep more (2 extra hours of sleep per night)
What is 730 hours worth?
If you value your free time at $15 per hour (minimum wage), that’s $10,950 per year. If you value it at $30 per hour (average US wage), that’s $21,900 per year.
Your time is worth something. Probably more than you think.
What I did with my reclaimed time:
- Started exercising consistently (30 minutes per day)
- Read 22 books (more than I’d read in the previous 5 years combined)
- Called my parents weekly (instead of monthly)
- Learned to cook three new recipes
- Slept an extra 30 minutes each night
None of that cost money. All of it improved my life.
Bonus Tips to Go Even Further
These three settings are the foundation. Once you’ve mastered them, try these bonus tips.
Delete apps, not accounts:
You don’t need to delete your Instagram account. Delete the app from your phone. Access it through your browser (Safari, Chrome). The browser version is clunky and less addictive. You’ll use it for 5 minutes and then close it.
Turn off “Hey Siri” / “Okay Google”:
Having a voice assistant always listening is convenient. It also means your phone is always paying attention. Turn it off. Use the button instead.
Move distracting apps off your home screen:
Put Instagram, TikTok, YouTube, and other time-wasters in a folder on your second or third screen. Out of sight, out of mind. You’ll open them less often.
Use grayscale + black wallpaper:
A bright, colorful wallpaper draws your eye. Use a plain black wallpaper. It’s less appealing and saves battery (on OLED screens).
Set a “phone parking spot” at home:
Choose a spot (a drawer, a shelf, a charging station). When you’re not actively using your phone, it goes in the spot. Not in your pocket. Not on the couch. Not on the dinner table.
Download a “mindfulness when unlocking” app:
Apps like “One Sec” or “Present” make you wait 3-5 seconds before opening certain apps. That small delay is often enough to make you realize you don’t actually want to open the app.
The $2 ‘Epsom Salt’ Miracle: How to Create a Luxury Detox Bath at Home
Frequently Asked Questions (FAQ)
1. Will grayscale mode make it hard to use my phone for normal tasks?
For most tasks, no. Reading text, sending messages, checking email, using maps – all work fine without color. The only challenges are tasks that rely on color-coding: traffic on Google Maps (red/yellow/green), photo editing, watching videos (though you can toggle grayscale off for videos). Set a shortcut (triple-click power button) to toggle grayscale on and off in one second.
2. What if I miss an important notification because I turned them off?
You won’t. Keep phone calls and text messages from contacts turned on. Those are the only notifications that might contain urgent information. Everything else – social media likes, news alerts, game invites – can wait. No one has ever had an emergency that required them to see an Instagram like immediately.
3. I tried app timers before and just ignored them. How do I make them stick?
Have someone else set the password. Ask a friend or partner to set your Screen Time password and not tell you. Now you can’t override the limit even if you want to. This is uncomfortable for a few days. Then you adjust. After a few weeks, you won’t miss the apps.
4. Will these settings work on my work phone or company device?
Maybe. Some companies restrict access to settings like Screen Time on managed devices. If you can’t change them, focus on what you can control: grayscale (usually allowed), notification batching (usually allowed), and your own habits (always allowed).
5. I’m worried about missing social media for work or networking.
That’s valid. Keep your app timers higher (60-90 minutes) and schedule your social media use (e.g., 30 minutes in the morning, 30 minutes at lunch). Use grayscale to reduce the addictive pull while still allowing you to do what you need to do.
6. How long does it take to adjust to grayscale mode?
About 3-5 days. The first day, your phone will look ugly and you’ll want to turn it off. Push through. By day three, you won’t notice it. By day seven, color screens will look overwhelming and chaotic. It’s a small adjustment for a massive return.
7. Can I use these settings on my computer too?
Yes. For Mac: Settings > Accessibility > Display > Color Filters > Grayscale. For Windows: Settings > Ease of Access > Color Filters > Turn on color filters > Grayscale. For browsers: Install “Deluminate” or “Dark Reader” extension to reduce visual stimulation.
8. Is this really worth it? It sounds like a lot of effort.
Five minutes of setup. That’s it. Five minutes to reclaim two hours every single day. That’s a 2,400% return on your time investment. There is almost no other change you can make that gives you that much back for that little effort. Yes. It’s worth it.
Final Thoughts: Your Attention Is Worth More Than Their Ads
Here’s what I want you to take away.
Your phone is not your friend. It’s a tool. A very powerful tool that has been weaponized by companies who want your attention. Not because they care about you. Because your attention is worth money.
Every minute you spend scrolling is a minute they sell to advertisers.
The three settings I shared won’t solve phone addiction completely. But they will break the cycle. They will make your phone less appealing. They will give you back the choice of what to do with your time.
Grayscale removes the dopamine trigger. App timers enforce boundaries. Notification batching protects your focus.
Five minutes of setup. Two hours per day returned. Over seven hundred hours per year.
That’s not just time. That’s your life.
So this week, try it. Turn on grayscale. Set your app timers. Batch your notifications. See how it feels.
You might be surprised how much you don’t miss the scroll.
That’s the frugal glow. And it’s not about saving money. It’s about saving what matters most.
Now put your phone down and go do something real. 📱🚫💛
For more digital wellness tips, productivity strategies, and intentional living advice, visit The Frugal Glow.