

The Secret Safety Pin Method: How to Resize Big Jeans Without a Belt or Sewing
Jump Links
- Why Big Jeans Are a Wardrobe Problem (And a Thrift Store Goldmine)
- The Safety Pin Method: Your No-Sew Solution
- What You’ll Need (Under $5)
- Step-by-Step: How to Resize Jeans with Safety Pins
- Step 1: Choose Your Jeans (The Right Fit)
- Step 2: Put on the Jeans and Pinch the Waistband
- Step 3: Fold the Fabric into a Dart
- Step 4: Secure with Safety Pins
- Step 5: The Invisible Pin Trick (Optional)
- Why This Works Better Than a Belt
- How to Style Your Resized Jeans
- The Math: What I Saved in One Year
- Frequently Asked Questions (FAQ)
- Final Thoughts: The Best Fit Is the One You Create
The $80 pair of jeans was sitting in my online cart. Then I remembered the $6 pair I found at the thrift store last week. They were a size too big, but the color was perfect. I bought them anyway.
I tried them on at home. They were too loose. I looked like I was wearing a bag. I almost returned them.
Then I remembered an old stylist trick: safety pins. I had a pack in my drawer. I pinched the waistband, folded the excess fabric, and secured it with a safety pin. The jeans fit perfectly. No belt. No sewing. No tailor.
I wore them the next day. People complimented my outfit. They had no idea I was holding my jeans together with a $0.50 safety pin.
That was the day I learned that the best fit isn’t bought—it’s created.
Today, I’m sharing the secret safety pin method that resizes big jeans without a belt or sewing. No tailor. No sewing machine. Just a safety pin and 60 seconds.
Why Big Jeans Are a Wardrobe Problem (And a Thrift Store Goldmine)
Thrift stores are full of jeans that are almost perfect. The color is right. The style is right. The price is right. But they’re one size too big.
Most people walk right past them. They want a perfect fit off the rack. But the thrift store doesn’t work like that. You take what you find and make it work.
The problem? A waistband that’s too big. You can’t just wear a belt. Belts add bulk. They make the fabric bunch up. They don’t fix the fit issue.
The solution? Safety pins. They pull in the excess fabric, creating a custom fit that looks like it was tailored.
The Safety Pin Method: Your No-Sew Solution
This method is simple. It takes less than 60 seconds. It’s completely reversible. And it costs pennies.
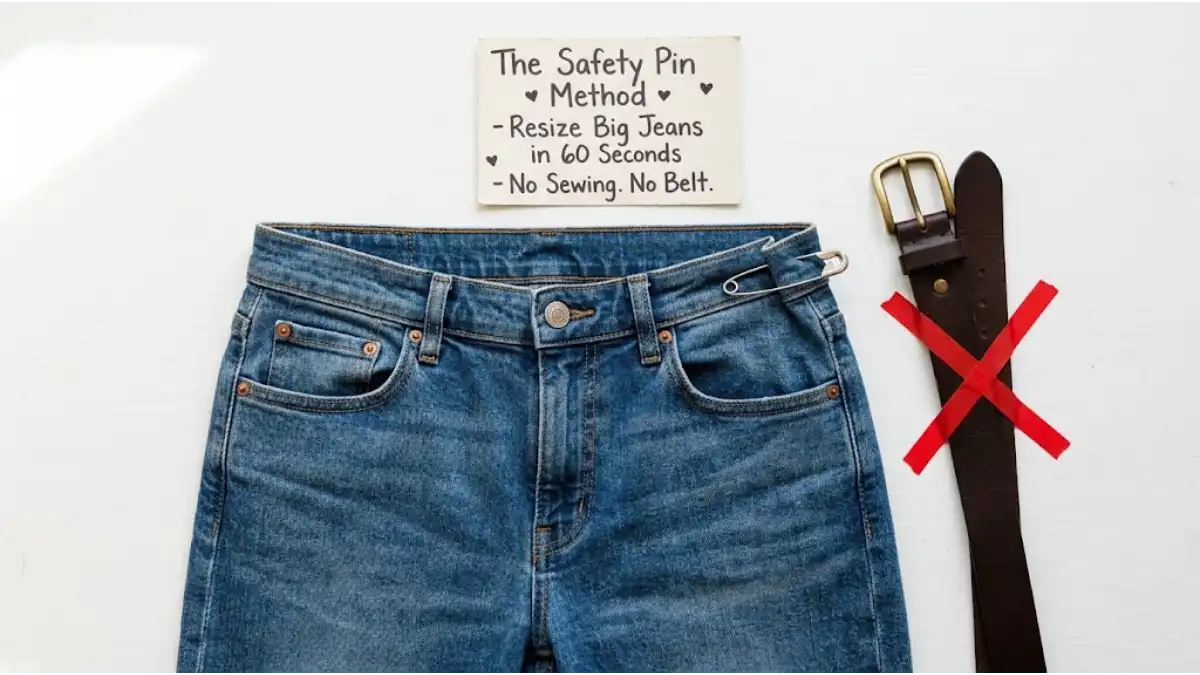
The principle: You pinch the excess fabric on the side seams of the waistband. You fold it into a small dart. You secure it with one or two safety pins. The pins are hidden by the fabric, so they’re invisible when you’re wearing the jeans.
The result: The waistband fits perfectly. The jeans sit where they’re supposed to. No bunching. No belt. No bulk.
The beauty: This method works on any denim. It works on any size. It works for women and men. It’s universal.
What You’ll Need (Under $5)
You probably already have everything you need.
Essential items:
| Item | Cost |
|---|---|
| Big jeans (thrifted) | $5-10 |
| Safety pins | $0.50 (already have) |
| Total cost: $5.50-10.50 |
Optional items:
| Item | Cost |
|---|---|
| Needle and thread (for permanent fix) | $0 (already have) |
| Iron (to press the dart) | $0 (already have) |
Total cost for the method: $0.50 or less.
Compare that to a tailor ($15-25) or a new pair of jeans ($40-80). You’re saving at least $15 per pair.
Step-by-Step: How to Resize Jeans with Safety Pins
Here is the exact, fail-proof process to take your oversized denim from sloppy to tailored in under two minutes. While the execution takes only 60 seconds once you get the hang of it, paying attention to these detailed micro-steps ensures comfort, durability, and a clean finish.
Step 1: Choose Your Jeans (The Right Fit)
Not all oversized jeans are created equal. Before grabbing your safety pins, evaluate the structural baseline of your denim:
- The Size Threshold: This method works best on jeans that are 1 to 2 sizes too large at the waist. If your jeans are 3+ sizes too big, taking in only the waistband can cause the hips and crotch area to buckle or balloon awkwardly.
- Fabric Weight & Stretch:
- Stretchy Denim (Elastane blends): Extremely forgiving. The fabric molds easily around the safety pin without creating harsh creases.
- Rigid/100% Cotton Denim: Highly durable but stiffer. You will need heavy-duty, medium-to-large safety pins to comfortably pierce through thick seams without bending the metal.
- Rise Consideration: High-rise jeans benefit the most from this trick because the waistband sits at the narrowest part of your torso, creating an immediate hourglass or structured silhouette. Mid and low-rise jeans still work, but ensure you pin them while standing naturally so the pins don’t dig in when you sit.
Step 2: Put on the Jeans and Pinch the Waistband
Don’t guess while the jeans are laying flat on a bed. You must wear them to get an accurate, anatomical measurement.
- Fasten the Jeans: Button and zip your jeans completely.
- Locate the Side Seams: Align the waist where you naturally want it to rest on your torso.
- The Double-Pinch Rule: Reach for the side seams directly above your hips. Pinch equal amounts of excess fabric on both the left and right sides.
Crucial Tip: Always divide the excess fabric equally between both side seams (e.g., 1 inch on the left, 1 inch on the right). Pinching all the extra fabric on just one side will pull your fly and back pockets off-center, ruining the alignment of your jeans.
Step 3: Fold the Fabric into a Dart
Now that you have isolated the excess material, you need to structure it into a clean, lay-flat fold (a dart).
- Create the Fold: Take the pinched fabric at the side seam and fold it backward (toward your back pockets) or forward (toward your front pockets). Folding backward usually yields a cleaner front profile.
- Smooth the Transition: Taper the fold so it is widest at the top of the waistband and gently tapers off about 2 inches down into the hip area. This prevents awkward bulging at the hips.
- Check the Tension: The waistband should feel snug against your waist—comfortable enough to breathe and sit, but secure enough that it won’t slip down.
Step 4: Secure with Safety Pins
Securing the fold correctly is what keeps the pin invisible and prevents it from popping open during the day.
- Pin Placement: Open a sturdy safety pin. Pass it through the inner layer of the fold, piercing through the waistband layers from the inside out and back in.
- Horizontal Alignment: Position the pin horizontally (parallel to the top of the waistband). A horizontal placement distributes tension across the metal bar, whereas vertical placement can tear stretchy denim or pull open easily under pressure.
- Double Pinning for Heavy Denim: If you are working with thick, rigid denim or taking in more than 1.5 inches per side, use two safety pins per side placed parallel to each other about half an inch apart.
Step 5: The Invisible Pin Trick (Optional)
If you are wearing a cropped top or tucking in your shirt, you don’t want any silver metal showing on the outside of your jeans.
- The Inward Concealment: Instead of pinning through all layers to the exterior, fold the excess fabric inward toward your skin/undergarments. Secure the pin through the inside fold and only the inner layer of the waistband.
- The Belt Loop Shield: If your fold happens to align near a side belt loop, tuck the folded dart right behind or underneath the belt loop before pinning. The loop will act as a natural camouflage cover.
- The Comfort Check: After securing both sides, sit down, bend over, and move around. If you feel any metal poking your waist, adjust the angle of the pin head so the smooth side faces your body.
Why This Works Better Than a Belt
While reaching for a belt is the automatic response when dealing with loose jeans, it is often a quick fix that creates a whole new set of styling and comfort issues. A belt merely cinches; it doesn’t solve a sizing problem.
Here is why relying on a belt falls short—and why the safety pin method is superior in every way:
Problem 1: Belts Add Unnecessary Bulk and Creases
- The Bulge Under Tops: The buckle and thick leather of a belt create an unnatural, bulky bump right at your midsection. If you want to wear a fitted t-shirt, fine-knit sweater, or thin silk blouse, that buckle will project through your top, ruining your clean silhouette.
- Awkward Fabric Bunching: When you pull a loose waistband tight with a belt, the extra 1–2 inches of denim have to go somewhere. The fabric bunches up in ugly, random folds around your hips and crotch, creating an uncomfortable, gathered look that screams “these pants don’t fit me.”
Problem 2: Belts Cinch, But They Don’t Fix the Gap
- The Infamous Back Gap: Have you ever cinched a belt tight, only to sit down and find a massive gap at the back of your waist? Belts pull the circumference inward, but they don’t alter the structure of the denim. The gap remains, exposing your lower back or undergarments whenever you bend over.
- Lack of Customized Fit: A belt relies on pre-punched holes that are often spaced an inch apart. You are forced to choose between “slightly too loose” or “digging into your stomach.” It provides a rigid constraint rather than a tailored shape.
Problem 3: Belts Ruin Clean, Minimalist Styling
- A Visual Interruption: A belt acts as a harsh horizontal line across your midsection. If you are going for a sleek, minimalist outfit, a monochrome look, or an unbelted tucked-in top aesthetic, a belt disrupts the flow of your outfit.
- Hardware Clashing: Wearing a belt means matching your belt buckle’s metal (gold, silver, bronze) with your jewelry, handbag hardware, and shoes. It adds an unnecessary layer of styling complexity when all you wanted was jeans that stay up.
Why Safety Pins Are the Superior Tailoring Hack
- An Invisible, Tailored Silhouette: Safety pins eliminate the excess fabric by creating an internal, lay-flat dart. Instead of bunching the denim, they sculpt it to match the exact curvature of your waist.
- Zero Extra Weight or Bulk: Because the pins rest flush against the inside of the waistband, your waist area remains completely flat. You can wear body-skimming tops without any awkward bumps showing through.
- Micro-Precision Comfort: You aren’t restricted by belt holes. You can adjust the pin to the exact millimeter that feels comfortable for your body on any given day.
- Preserves Your Outfit’s Aesthetic: The safety pin method works completely under the radar. It allows your jeans to look like they were custom-fitted to your body at an expensive tailor, keeping your style seamless and effortless.
📌 YOU MIGHT ALSO LIKE:
DIY Sneaker Surgery: How to Restore and Whiten Yellowed Soles for Under $10
How to Style Your Resized Jeans
Now that your jeans fit like they were custom-tailored for your waist, it’s time to build outfits that highlight your newly sculpted silhouette. Because the safety pin method removes bulk and unsightly bunching, you can wear versatile, high-end looks that would normally be ruined by a bulky belt buckle or a sagging waistband.
Here is how to elevate your resized denim for maximum aesthetic impact:
Look 1: The Seamless Tucked-In Top
- Why It Works: A tucked-in shirt is the ultimate test of a good waistband fit. Since safety pins keep the waist flat without creating ugly fabric folds, your tucked-in tops will lie perfectly smooth all the way around.
- How to Style It:
- Pair high-rise or mid-rise jeans with a crisp, fitted white t-shirt, a rib-knit bodysuit, or a lightweight linen blouse.
- Use a “French tuck” (tucking just the front center) for a relaxed, effortless vibe, or a full tuck for a clean, sophisticated look.
- Styling Tip: Because there are no belt loops straining under tension, the waistline looks polished, intentional, and tailor-made.
Look 2: The Structured Oversized Blazer
- Why It Works: Playing with proportions is one of the easiest ways to make thrifty outfits look expensive. The high-contrast pairing of a structured, voluminous jacket with a snug, well-fitted waist creates an instantly chic hourglass frame.
- How to Style It:
- Throw an oversized wool, plaid, or neutral linen blazer over your resized jeans.
- Keep your under-layer fitted (like a crop top or fitted tank) so when the blazer moves, your defined waistline is clearly visible underneath.
- Finish the look with clean white sneakers or pointed-toe loafers for an off-duty model aesthetic.
Look 3: Elevated Footwear (Heels or Sleek Boots)
- Why It Works: When jeans fit improperly at the waist, they tend to slide down throughout the day, causing the hemline to pool awkwardly around your shoes. Once the waist is anchored securely with safety pins, the inseam sits at its intended height, allowing your footwear to shine.
- How to Style It:
- Ankle Boots: Pair straight-leg or wide-leg resized jeans with sleek leather ankle boots. The hem should hit right at or slightly above the boot shaft.
- Strappy Heels or Mules: If you’re wearing relaxed or boyfriend-style jeans, cuff the bottom hem once or twice and throw on minimalist heels. The juxtaposition of relaxed denim and delicate shoes instantly elevates the entire outfit.
Look 4: Minimalist Accessorizing (To Belt or Not to Belt)
- Why It Works: The safety pin trick gives you complete stylistic freedom over your waistline. You are no longer forced to wear a belt just to keep your pants up, which opens up new minimalist fashion choices.
- How to Style It:
- Option A (Go Beltless): Embrace the ultra-clean, beltless waistline. Let the smooth denim speak for itself, and draw attention upward with bold gold hoop earrings, a layered necklace, or a structured shoulder bag.
- Option B (Decorative Belt): If you choose to wear a belt, it now functions purely as an aesthetic accessory rather than a functional tool. You can wear a delicate slim belt or a vintage statement belt loosely without needing to pull it tight enough to pinch the fabric.
📌 YOU MIGHT ALSO LIKE:
Don’t Buy New Curtains! How to Upcycle Vintage Bed Sheets Into ‘Boho-Chic’ Window Treatments
The Math: What I Saved in One Year
Let me break down the actual dollars.
If I bought new jeans:
| Item | Cost | How Often | Annual Cost |
|---|---|---|---|
| New jeans | $60 | 4 pairs | $240 |
If I thrifted and resized:
| Item | Cost | How Often | Annual Cost |
|---|---|---|---|
| Thrifted jeans | $8 | 4 pairs | $32 |
| Safety pins | $0.50 | Once | $0.50 |
| Total | $32.50 |
Annual savings: $207.50
Over 5 years: $1,037.50
And I have a wardrobe of unique, perfectly fitting jeans.
Frequently Asked Questions (FAQ)
1. Does the safety pin method work on all types of jeans?
Yes. It works on skinny jeans, straight-leg jeans, boyfriend jeans, and wide-leg jeans. The technique is the same for all styles.
2. Will the pins be visible when I’m wearing the jeans?
No. If you place the pins correctly, they will be hidden by the fabric. The pins sit below the waistband on the inside of the jeans. No one will see them.
3. Can I wear a belt with the pins?
Yes. If you want to wear a belt, you can. The pins will still be hidden. But the pins are so effective that you might not need a belt at all.
4. Is it safe to wear safety pins near my skin?
Yes. Safety pins are safe. They’re closed and secured. They won’t poke you if they’re placed correctly. Use large safety pins for extra security.
5. Can I wash the jeans with the pins still in them?
No. Always remove the pins before washing. Put them back in after the jeans dry. The pins can rust if left in during washing.
6. How long does the safety pin method last?
It lasts as long as you want it to. You can keep the pins in for days, weeks, or months. If you want a permanent solution, you can sew the dart closed. But the pins work just fine for everyday wear.
7. What if I don’t have safety pins?
You can use large paper clips or binder clips as a temporary fix. But safety pins are better. They’re more secure and less visible.
8. Can I use this method on other types of pants?
Yes. This method works on any pants with a waistband. It works on trousers, khakis, shorts, and even skirts with waistbands.
Final Thoughts: The Best Fit Is the One You Create
The $80 pair of jeans is sitting in an online cart somewhere. My $6 thrifted jeans are in my closet. They fit perfectly. They look great. They cost me $6.50 total.
The best fit isn’t bought—it’s created. One thrift store find. One safety pin. Sixty seconds of your time.
Next time you see a pair of jeans at the thrift store that’s a size too big, don’t walk past them. Buy them for $6. Take them home. Put them on. Pinch the waistband. Fold the fabric. Secure it with a safety pin. Adjust until they fit perfectly.
You’ll save $80. You’ll look great. You’ll have a pair of jeans that no one else owns.
That’s not cheap. That’s smart.
That’s the frugal glow. And it’s waiting for you at the thrift store. 💛
For more thrift flip hacks, no-sew fashion fixes, and money-saving style strategies, visit The Frugal Glow.