

How to Make Your Own Water Kefir for Pennies a Bottle
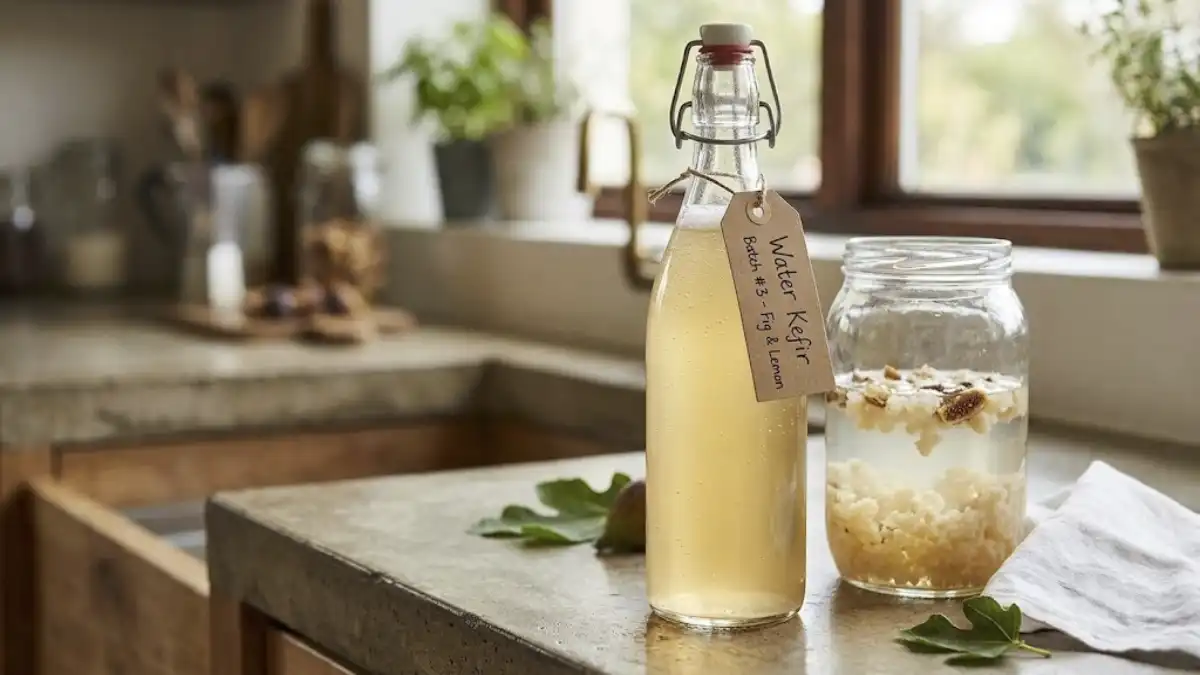
Walk down the fermented drinks aisle at any grocery store and you’ll see kombucha, probiotic sodas, and specialty fizzy drinks running $3 to $5 a bottle, sometimes more. Water kefir is the DIY version of that entire category — a naturally fizzy, probiotic-rich drink you can flavor endlessly — and once you have the starter culture (called kefir grains, though they’re not actually grain at all), the ongoing cost of making it at home drops to genuinely pennies per bottle.
This is the full, real process: what water kefir grains actually are, exactly how to run a first and second fermentation, how to flavor your batches, how to keep your grains alive long-term, and the safety basics that keep the whole process simple and low-risk. No specialty equipment required, and no prior fermentation experience needed.
Jump Links
- What Water Kefir Actually Is
- What You’ll Need
- Where to Get Water Kefir Grains
- Step-by-Step: The First Fermentation
- Step-by-Step: The Second Fermentation
- Flavor Combination Ideas
- Cost Breakdown: Store-Bought vs. Homemade
- Caring for Your Kefir Grains Long-Term
- Safety Basics You Shouldn’t Skip
- Troubleshooting Common Issues
- FAQ
- The Bottom Line
What Water Kefir Actually Is
Water kefir grains are a live culture of beneficial bacteria and yeast, held together in small, translucent, gelatin-like clusters. Despite the name, they contain no actual grain or gluten — the “grain” naming comes from their appearance, not their composition. When added to sugar water, these grains consume the sugar through fermentation, converting it into a mildly tangy, naturally carbonated, probiotic-rich beverage.
Unlike milk kefir, water kefir is completely dairy-free, making it a solid option for anyone avoiding dairy but still interested in the probiotic and gut-health angle that fermented drinks are known for. It’s also notably beginner-friendly compared to other home fermentation projects like kombucha, requiring less specialized equipment and a shorter overall process.
What You’ll Need
- Active water kefir grains (see the sourcing section below)
- Filtered, chlorine-free water — chlorine in tap water can damage or kill the culture over time
- Plain white sugar, or a mineral-rich sugar blend (see notes below)
- A large glass jar for the first fermentation
- A non-metal strainer (plastic or fine nylon mesh)
- A wooden, plastic, or silicone spoon for stirring — reactive metal utensils can damage the grains with repeated use
- A breathable cover for the first fermentation (a coffee filter, thin cloth, or paper towel secured with a rubber band)
- Airtight flip-top bottles (like Grolsch-style bottles) for the second, carbonating fermentation
- Optional flavoring ingredients: fresh or dried fruit, fruit juice, herbs, ginger, citrus slices
Where to Get Water Kefir Grains
This is genuinely the only real upfront cost in the entire process, and it’s a one-time investment rather than a recurring one, since healthy grains multiply and can be reused indefinitely with proper care. Options include:
- Buying dehydrated or active grains online from a fermentation supply retailer, typically running somewhere in the $10–$20 range for a starter batch.
- Getting a live culture from a friend or local fermentation community, since active grains multiply over time and are commonly shared or swapped for free among home fermenters.
- Local marketplace or community groups, where fermentation hobbyists frequently give away excess grains from their own thriving cultures.
Once you have a healthy, active batch, that single purchase or gift can realistically produce an ongoing, essentially unlimited supply of water kefir for years, which is exactly where the “pennies a bottle” math comes from — the grains themselves are reusable indefinitely, so every batch after the first only costs you sugar and water.
Step-by-Step: The First Fermentation
1. Dissolve sugar into water.
Use roughly a quarter cup of sugar per quart of filtered water (adjust proportionally for larger or smaller batches), stirring until fully dissolved. Make sure the water isn’t hot, since high temperatures can damage or kill the live culture.
2. Add the kefir grains.
Place your active grains directly into the cooled sugar water in a clean glass jar. It’s completely normal for grains to float, sink, or do both — this doesn’t indicate a problem.
3. Cover with a breathable lid.
Use a coffee filter, thin cloth, or paper towel secured with a rubber band rather than a sealed, airtight lid. The grains need airflow during this first fermentation stage.
4. Let it ferment at room temperature for 24 to 48 hours.
Warmer kitchens speed up fermentation, while cooler environments slow it down. Taste-testing at the 24-hour mark is the most reliable way to judge readiness — if it’s still quite sweet, give it another 12 to 24 hours.
5. Taste and check for readiness.
Finished first-ferment water kefir should taste lightly tangy with just a trace of sweetness remaining, and often shows a slight natural fizz even before the second fermentation stage.
6. Strain out the grains.
Using your non-metal strainer, separate the grains from the finished liquid. Immediately place the grains into a fresh batch of sugar water to keep the culture active and continuously producing, or refrigerate them in sugar water if you need to pause the process for a while.
Step-by-Step: The Second Fermentation
This stage is what transforms plain, mildly fizzy first-ferment kefir into a genuinely bubbly, flavored finished drink.
1. Pour the strained first-ferment kefir into airtight flip-top bottles.
Leave a small amount of headspace at the top of each bottle rather than filling completely to the brim.
2. Add your flavoring of choice.
Fresh or dried fruit, a splash of fruit juice, fresh herbs, or citrus slices all work well. If using low-sugar flavorings, adding a small amount of extra sugar (roughly a teaspoon per 16 ounces) helps ensure there’s enough fuel left for the second fermentation to produce good carbonation.
3. Seal the bottles tightly.
Unlike the first fermentation, this stage uses a fully sealed, airtight container specifically to trap the carbon dioxide produced during fermentation, which is what creates the natural fizz.
4. Ferment at room temperature for 24 to 48 hours.
Check periodically, since fermentation speed varies with kitchen temperature and the specific flavorings used.
5. “Burp” the bottles daily to release built-up pressure.
Briefly opening and reclosing the bottle once a day during the second fermentation releases excess carbon dioxide pressure, which is an important safety step — sealed bottles under too much pressure for too long can become difficult to open safely or, in rare cases, cause bottles to crack or burst if pressure builds unchecked.
6. Strain out any fruit or flavoring solids (if used) and refrigerate.
Once you’re happy with the flavor and carbonation level, strain out any fruit pieces, then refrigerate to slow fermentation and enjoy chilled.
Flavor Combination Ideas
- Ginger and lemon — a classic, zesty combination that pairs well with the natural tang of finished kefir.
- Berries (fresh or frozen) — strawberries, blueberries, or raspberries add color, natural sweetness, and a fruity finish.
- Mango and lime — a tropical-leaning combination that works especially well in warmer months.
- Apple and cinnamon — a cozy, fall-leaning flavor combination using apple juice or fresh apple slices.
- Grape juice — a simple, kid-friendly flavor option using just a splash of juice per bottle.
- Herbs like mint or basil — for a more complex, less overtly sweet finished drink.
Cost Breakdown: Store-Bought vs. Homemade
| Item | Store-Bought Fermented Drink | Homemade Water Kefir |
|---|---|---|
| Upfront cost | $0 (buy as needed) | $10–$20 one-time (starter grains) |
| Cost per 16 oz serving | $3–$5+ | Roughly $0.10–$0.25 (mostly just sugar) |
| Ongoing weekly cost (for regular drinking) | $15–$35+ | Under $2 |
| Flavor customization | Limited to available flavors | Fully customizable |
| Probiotic content | Varies by brand and pasteurization | Fresh, live culture with every batch |
According to the fermentation education resource Kombucha Kamp, water kefir is specifically prized for being one of the most affordable ways to make a healthy, bacteria-powered beverage at home, with the ongoing cost of each batch running to genuinely just pennies per glass once the initial grains are established.
Caring for Your Kefir Grains Long-Term
- Start a new batch immediately after straining, or refrigerate the grains in fresh sugar water if you need a short break from active fermentation.
- Change the sugar water weekly if storing grains in the refrigerator for an extended pause, and inspect them regularly for any signs of mold, discoloration, or an off smell.
- Avoid leaving grains dry or sitting in plain water for extended periods, since this stresses and can eventually kill the culture.
- Add mineral-rich ingredients occasionally, like a small amount of unrefined sugar, molasses, or a dried fruit like a raisin or fig, which helps keep grains healthy, especially if you’re using filtered water with low natural mineral content.
- Store backup grains in the refrigerator in sugar water for up to several weeks if you want a safety backup separate from your active culture.
Safety Basics You Shouldn’t Skip
- Use only filtered, chlorine-free water. Chlorine is specifically designed to kill bacteria, which makes it directly harmful to the live culture your grains depend on.
- Avoid reactive metal utensils and containers. Repeated contact with certain metals can damage the grains over time; stick to plastic, wood, silicone, or glass.
- Never use an airtight lid during the first fermentation. The grains need airflow at this stage; sealing them in an airtight container too early isn’t necessary and can create unwanted pressure buildup.
- Do burp bottles during the second fermentation. This is the most important safety step in the entire process, preventing excessive pressure buildup in sealed bottles.
- Watch for warning signs of contamination, including grains that appear to be disintegrating, an unpleasant or rotten odor, visible mold, or an unusually slimy texture — any of these suggest starting fresh with new, healthy grains rather than continuing to use a compromised culture.
- Avoid artificial sweeteners entirely. Water kefir grains specifically need real sugar to ferment properly; artificial sweeteners like stevia or monk fruit don’t provide the fuel the culture needs and can effectively starve the grains.
Troubleshooting Common Issues
| Issue | Likely Cause | Fix |
|---|---|---|
| Kefir still very sweet after 48 hours | Cool kitchen temperature, weak/inactive grains | Extend fermentation time; check grain health |
| No carbonation in second ferment | Not enough remaining sugar, bottles not sealed tightly, low temperature | Add a bit more sugar or juice; check the seal; ensure a warm enough spot |
| Grains not multiplying over time | Chlorinated water, low mineral content, metal utensil damage | Switch to filtered water; add mineral-rich ingredients; use non-metal tools |
| Off smell or visible mold | Contamination, dirty equipment, extended storage without changing sugar water | Discard the affected batch; start fresh with healthy grains and sanitized equipment |
| Overly sour or vinegary taste | Over-fermentation | Reduce fermentation time in future batches; refrigerate sooner once ready |
📌 YOU MIGHT ALSO LIKE:
The $2 ‘Pantry’ Probiotic: How to Make Your Own Sauerkraut and Save $10 a Jar
FAQ
Is water kefir actually cheaper than buying probiotic drinks at the store?
Yes, significantly. After a one-time cost of around $10 to $20 for starter grains, ongoing batches cost mostly just the price of sugar, working out to roughly $0.10 to $0.25 per 16-ounce serving compared to $3 to $5 or more for a comparable store-bought fermented drink.
Do I need any special equipment to make water kefir at home?
No specialized equipment is required. A glass jar, a non-metal strainer, a breathable cover, and some flip-top bottles for the second fermentation cover everything needed beyond the grains themselves.
How long do water kefir grains last?
With proper care, including regular feeding with fresh sugar water and avoiding contamination, healthy water kefir grains can be maintained and reused indefinitely, continuing to produce batch after batch for years.
Is it safe to drink water kefir every day?
For most healthy adults, moderate daily consumption of water kefir is considered safe, though anyone with specific health conditions or immune concerns should check with a healthcare provider before adding a new fermented food to their routine.
Why do my bottles need to be “burped” during the second fermentation?
Burping releases built-up carbon dioxide pressure that accumulates in sealed bottles during fermentation. Skipping this step can lead to excessive pressure buildup, making bottles difficult to open safely.
Can I use honey or artificial sweeteners instead of sugar?
No. Water kefir grains specifically require real sugar to ferment properly; artificial sweeteners don’t provide usable fuel for the culture, and substitutes like honey or coconut sugar can potentially harm the grains rather than support healthy fermentation.
The Bottom Line
Once you’ve got a healthy batch of water kefir grains established, the ongoing cost of making your own naturally fizzy, probiotic-rich drink drops to just pennies a bottle — a fraction of what a comparable store-bought fermented beverage costs. With a jar, some sugar water, a little patience, and a handful of simple safety habits, homemade water kefir is one of the easiest and most budget-friendly fermentation projects to start.
For more budget-friendly wellness and DIY guides, check out more posts over at The Frugal Glow.
Source: