

The $3 Root Smudge Hack: How to Blend Your Highlights at Home and Save $150
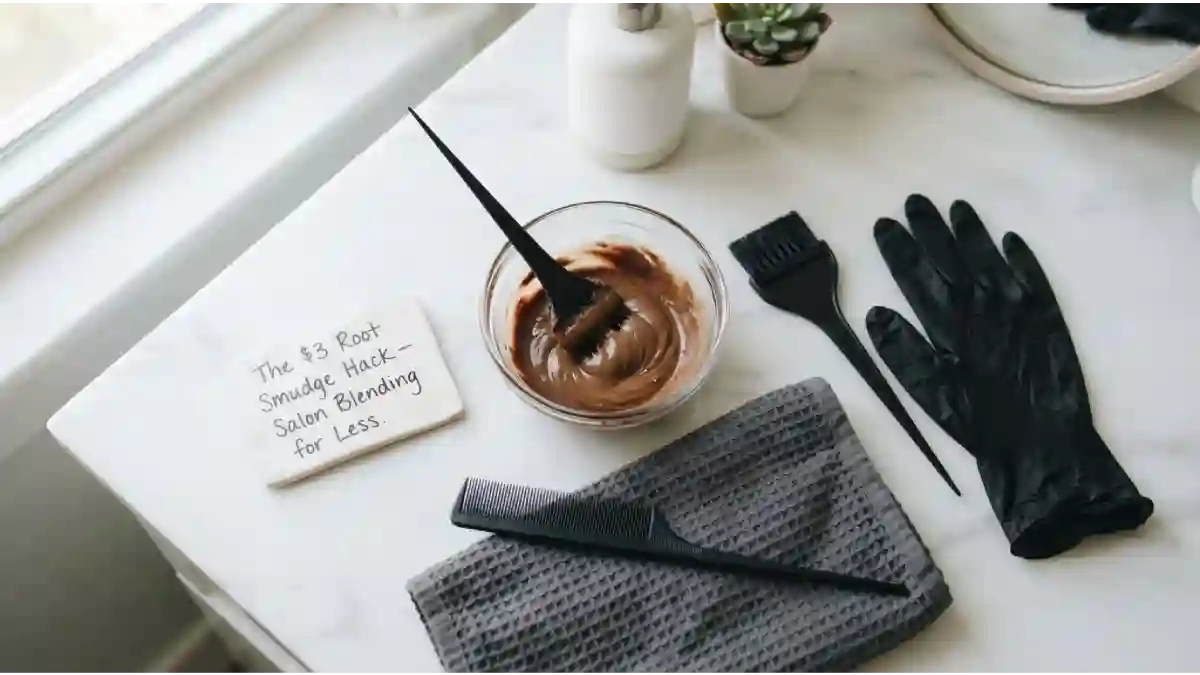
The $150 salon appointment was on my calendar. A root smudge, a toner, and a gloss. My highlights were beautiful, but the dark roots were growing in fast, creating a harsh line that made my hair look grown-out even when it wasn’t. I had been going to the salon every six weeks for two years. I had spent over $2,500 on my hair. And the salon was getting expensive.
Then I started researching. I learned that a root smudge is not a complicated procedure. It’s essentially a gentle application of a darker color to the root area, blended down into the highlights to soften the transition. It’s designed to be subtle and natural. And with the right products and technique, it’s something you can do at home.
I tried it. I made mistakes. I got better. And after three attempts, I had a root smudge that looked just as good as the salon version. For about $3.
This is the complete guide to the $3 root smudge hack. The technique. The products. The mistakes. And why you should never, ever pay $150 for a root smudge again.
Jump Links
- The $150 Salon Visit That Sent Me Looking for Alternatives
- What a Root Smudge Actually Is (And Why Salons Charge So Much)
- The $3 Root Smudge Hack: What You Actually Need
- Choosing the Right Shade (The Most Important Step)
- Step-by-Step: How to Do a Root Smudge at Home
- The “No-Bleed” Technique (Avoiding Harsh Lines)
- How to Blend the Smudge Into Your Highlights
- How to Make Your Root Smudge Last Longer
- My Biggest Mistakes (So You Don’t Make Them)
- What to Do If It Goes Wrong
- Who Should Skip the DIY Root Smudge
- The Math: What I Saved in One Year
- Frequently Asked Questions (FAQ)
- Final Thoughts: Salon Results for the Price of a Coffee
The $150 Salon Visit That Sent Me Looking for Alternatives
Let me break down what a $150 salon root smudge actually involves.
What the salon does: Your stylist applies a darker color to your roots, then uses a blending tool or their fingers to smudge it downward into your highlights. The goal is to soften the line between your dark roots and your light highlights. It takes about 30-45 minutes for the application and processing. Then they rinse, tone, gloss, and style.
What the salon charges: $100-150 for the root smudge alone. Add a toner ($30-40), a gloss ($40-50), and a tip ($20-30), and you’re looking at $200+ per visit.
Why salons charge so much: You’re paying for the stylist’s time and expertise. You’re paying for the salon’s overhead—rent, utilities, insurance, products. You’re paying for the “experience”—the shampoo bowl, the scalp massage, the coffee. And you’re paying for the convenience of having someone else do it for you.
What I realized: I didn’t need the salon for this. A root smudge is a simple application of color to the roots, blended downward. It’s not a full highlight. It’s not a color correction. It’s a technique that can be learned in an afternoon.
What a stylist told me: “A root smudge is one of the easiest color techniques to do at home. The key is choosing the right shade and blending it properly. If you can apply a face mask, you can do a root smudge.”
What a Root Smudge Actually Is (And Why Salons Charge So Much)
Let me explain what a root smudge is and why it’s different from other color services.
What it is: A root smudge, also called a root melt or root shadow, is a technique where a slightly darker color is applied to the roots and blended down into the mid-lengths and ends. The goal is to soften the contrast between your natural roots and your lighter highlights.
Why it’s popular: It makes highlights look more natural. It extends the time between salon visits by blurring the line between roots and highlights. It adds depth and dimension to the hair.
How it differs from a root touch-up: A root touch-up covers gray hair or matches the natural root color. A root smudge is a deliberate application of a darker shade to blend the roots with the highlights. It’s a stylistic choice, not a gray coverage solution.
How it differs from a gloss: A gloss adds shine and subtle tone adjustment. A root smudge adds a darker, more noticeable color to the root area. They’re often done together, but they’re different services.
Why salons charge so much: Because they can. Because it’s bundled with other services. Because it requires a stylist’s eye for color matching and blending. And because most people don’t know they can do it at home.
The $3 Root Smudge Hack: What You Actually Need
Here’s the truth: you don’t need much to do a root smudge at home.
The essential products:
| Product | What It Does | Cost |
|---|---|---|
| Demi-permanent hair color | The color itself | $3-8 |
| Developer (10 volume) | Activates the color | $2-4 |
| Applicator brush and bowl | For precise application | $1-3 |
| Gloves | Protects your hands | $1 |
| Total | ~$3-10 per application |
What I use: A $3 tube of demi-permanent color from Sally Beauty or a drugstore brand. A $4 bottle of 10-volume developer (which lasts for many applications). A $2 applicator brush and bowl set. And gloves.
Why demi-permanent: Demi-permanent color is gentler than permanent color. It doesn’t lift your natural color—it just deposits color on top. It fades gradually over 4-6 weeks, which means there’s no harsh line as it grows out. It’s perfect for a root smudge.
What a hairstylist told me: “Demi-permanent color is the right choice for a root smudge. It’s gentle, it deposits color without lifting, and it fades naturally. It’s what I would use in the salon.”
Choosing the Right Shade (The Most Important Step)
This is where most DIY root smudge attempts go wrong. The color is too dark, too warm, or too cool—and the result looks harsh and unnatural.
The rule: Choose a shade that’s one or two levels darker than your highlights, but still within your natural color family.
How to choose:
- Look at your natural root color. Your root smudge should be close to your natural color, maybe a shade or two darker for a subtle “shadow” effect.
- Consider the tone. If your highlights are cool (ashy), choose a cool-toned root color. If your highlights are warm (golden), choose a warm-toned root color. Mismatching tones creates a harsh, unnatural line.
- Don’t go too dark. The biggest mistake is choosing a shade that’s too dark. The goal is a subtle blend, not a dramatic contrast.
- When in doubt, go lighter. You can always add more color. You can’t easily remove it.
What a colorist told me: “The most common mistake in DIY root smudges is choosing a color that’s too dark. If you’re not sure, choose a shade that’s one level darker than your natural root color. It’s better to be too subtle than too dramatic.”
The shade test: Before applying the color to your whole head, test it on a small section of hair. Apply the color, wait for the recommended processing time, rinse, and dry. If the shade is too dark or too warm, adjust before applying to your entire head.
Step-by-Step: How to Do a Root Smudge at Home
Here’s the exact process I’ve perfected over three attempts. It takes about 45 minutes from start to finish.
Step 1: Prep your hair.
Wash your hair the day before, not the day of. Clean hair without conditioner is ideal for color application. If you have product buildup, use a clarifying shampoo. Don’t condition—the color needs to penetrate.
Step 2: Mix the color.
In a non-metallic bowl, mix one part demi-permanent color with two parts 10-volume developer. Mix thoroughly with the applicator brush. The mixture should be smooth and creamy.
Step 3: Section your hair.
Divide your hair into four sections: two in the front, two in the back. Use clips to hold each section. Start with the back sections first.
Step 4: Apply to the roots.
Using the applicator brush, apply the color to your roots, about 1/2 inch from the scalp. Work in small sections, applying the color along the part lines. Don’t apply to the scalp—it can cause irritation.
Step 5: Smudge downward.
Using your fingers, a wide-tooth comb, or a smudge brush, gently blend the color downward into your highlights. The goal is to create a soft, gradual transition, not a hard line. Work quickly—the color starts processing immediately.
Step 6: Process.
Leave the color on for 10-20 minutes, depending on the desired intensity. Check the color every 5 minutes by wiping a small section with a damp cloth. When it reaches the desired shade, rinse immediately.
Step 7: Rinse and condition.
Rinse thoroughly with cool water until the water runs clear. Then shampoo and condition as usual. The color will continue to develop slightly after rinsing, so don’t panic if it looks slightly darker than expected.
Step 8: Style as usual.
Dry and style your hair as you normally would. The root smudge will look natural and blended.
The “No-Bleed” Technique (Avoiding Harsh Lines)
The biggest challenge with a DIY root smudge is avoiding harsh lines. Here’s how to blend properly.
The problem: If you apply the color too heavily or leave it on too long, you’ll get a harsh line between the roots and the highlights. This looks unnatural and obviously DIY.
The solution: Apply light layers, blend immediately, and check frequently.
The technique:
- Apply a thin layer of color to the roots. Don’t saturate. A thin layer is enough.
- Blend immediately. Don’t wait. Use your fingers, a comb, or a smudge brush to blend the color downward.
- Check frequently. Every 5 minutes, wipe a small section with a damp cloth. If the color is too dark, rinse early.
- Use a lower-volume developer. 10-volume developer processes more slowly than 20-volume, which gives you more control.
- Don’t apply to the scalp. The heat from your scalp accelerates processing, which can cause the color to develop too quickly and look darker.
What a colorist told me: “The key to a natural root smudge is blending. Don’t just apply the color and leave it. Blend it downward immediately. And check it frequently. It’s better to rinse too early than too late.”
How to Blend the Smudge Into Your Highlights
The root smudge is only the first step. The second step is blending the color into your highlights so the transition is seamless.
The blending tools:
- Fingers: The simplest tool. Use your fingers to gently smudge the color downward into the highlights.
- Wide-tooth comb: A comb can help distribute the color more evenly. Use it to comb through the roots after applying the color.
- Smudge brush: A dedicated smudge brush (or a clean makeup brush) can help create a soft, blended transition.
- Rat-tail comb: For precise sectioning and application.
The blending technique:
- Apply the color to the roots.
- Use your fingers or a comb to blend the color downward, about 1-2 inches into the highlights.
- Use a light touch—don’t drag the color too far down.
- Check the blend in natural light. If the line is too harsh, blend more.
- Rinse when the blend looks natural.
What a colorist told me: “The blend is what makes a root smudge look natural. If you can see a line, you haven’t blended enough. The goal is a seamless transition from root to highlight.”
How to Make Your Root Smudge Last Longer
A root smudge fades over time. Here’s how to make it last longer.
Use color-safe shampoo. Sulfate-free, color-safe shampoo is gentler on color-treated hair and helps prevent fading.
Wash with cool water. Hot water opens the hair cuticle and releases color. Cool water keeps the cuticle closed and the color locked in.
Wash less often. Every other day is ideal. Dry shampoo can help extend the time between washes.
Avoid heat styling. Heat damages the hair and accelerates color fading. Use heat protectant if you must use heat tools.
Deep condition regularly. Moisturized hair holds color better. Use a deep conditioning treatment once a week.
Avoid chlorine and saltwater. Both can strip color from your hair. Wear a swim cap or rinse immediately after swimming.
What a colorist told me: “A demi-permanent root smudge typically lasts 4-6 weeks. With proper care, you can extend it to 6-8 weeks. After that, it’s time for a touch-up.”
My Biggest Mistakes (So You Don’t Make Them)
I made plenty of mistakes when I first started doing root smudges at home. Learn from me.
Mistake #1: Choosing a shade that was too dark.
My first root smudge was almost black. It looked harsh and unnatural. Choose a shade that’s one or two levels darker than your highlights, not five.
Mistake #2: Leaving it on too long.
I left the color on for 30 minutes. It processed too much and looked too dark. Start with 10 minutes. Check frequently. Rinse early if needed.
Mistake #3: Not blending enough.
I applied the color and left it. The result was a harsh line. Blend immediately. Don’t wait.
Mistake #4: Applying to the scalp.
I applied the color directly to my scalp. It was irritating and processed too quickly. Apply about 1/2 inch from the scalp.
Mistake #5: Using permanent color instead of demi-permanent.
I used permanent color the first time. It lifted my natural color and created a harsh line as it grew out. Use demi-permanent. It fades naturally.
Mistake #6: Not doing a strand test.
I applied the color to my whole head without testing it first. The shade was wrong. Always do a strand test on a small section of hair.
Mistake #7: Rushing the process.
I tried to do the whole thing in 15 minutes. It was messy and uneven. Give yourself time. A root smudge takes 45 minutes to an hour.
What to Do If It Goes Wrong
Even with the best preparation, things can go wrong. Here’s how to fix common problems.
Problem #1: The color is too dark.
If the color is too dark, don’t panic. Demi-permanent color fades over time. Wash your hair with a clarifying shampoo a few times to speed up the fading. You can also use a color-removing product specifically designed for demi-permanent color.
Problem #2: The color is too warm (orange or brassy).
If the color is too warm, use a blue or purple toning shampoo to neutralize the warmth. You can also apply a cool-toned toner to balance the color.
Problem #3: The line is too harsh.
If the line between the roots and highlights is too harsh, you can blend it with a gloss or a toner. Or you can apply a small amount of the root color to a wider area and blend more.
Problem #4: The color is uneven.
If the color is uneven, you can spot-treat the areas that need more color. Apply a small amount of color to the uneven areas and blend.
What a colorist told me: “Most root smudge mistakes are fixable. Demi-permanent color is forgiving. If it’s too dark, wash it. If it’s too warm, tone it. If it’s uneven, spot-treat it. Don’t panic.”
Who Should Skip the DIY Root Smudge
A DIY root smudge isn’t for everyone. Here are the cases where you should skip it.
If you have very dark hair and very light highlights. The contrast is too great for a subtle root smudge. You need a professional to blend properly.
If you have gray hair you’re trying to cover. A root smudge is not a gray coverage solution. It’s a blending technique. Use a permanent color for gray coverage.
If you have a sensitive scalp. Hair color can irritate sensitive skin. Patch test first. If you have a reaction, don’t proceed.
If you’re pregnant or breastfeeding. Consult your doctor before using hair color.
If you have significant hair damage. Hair color can further damage compromised hair. Wait until your hair is healthy before coloring.
If you’ve never colored your hair before. Start with a professional to learn the technique. Then try it at home.
What a colorist told me: “If you have very dark roots and very light highlights, a DIY root smudge is risky. The contrast is too great. See a professional for the first few times. Once you understand the technique, you can try it at home.”
The Math: What I Saved in One Year
Let me break down the actual dollars.
If I went to the salon for root smudges:
| Item | Cost | How Often | Annual Cost |
|---|---|---|---|
| Salon root smudge | $150 | Every 6 weeks | $1,300 |
| Total | $1,300 |
What I actually spend:
| Item | Cost | How Often | Annual Cost |
|---|---|---|---|
| Demi-permanent color | $6 | Every 2 months | $36 |
| Developer | $4 | Every 6 months | $8 |
| Applicator brush and bowl | $3 | Every 6 months | $6 |
| Gloves | $1 | Every 2 months | $6 |
| Total | ~$56 |
Annual savings: $1,244
Over 5 years: $6,220
And my root smudge looks just as good as the salon version.
📌 YOU MIGHT ALSO LIKE:
The 50-Cent Sock Hack: How to Get Perfect Hollywood Curls Without Heat or Stylers
Stop Wasting Money on Professional Gloss Treatments: The $5 At-Home Clear Shine Secret
Frequently Asked Questions (FAQ)
1. What is a root smudge?
A root smudge is a hair color technique where a slightly darker color is applied to the roots and blended down into the highlights. The goal is to soften the line between your natural roots and your lighter highlights, making the color look more natural and extending the time between salon visits.
2. Can I really do a root smudge at home?
Yes. A root smudge is a simple technique that can be done at home with the right products. Use demi-permanent color, 10-volume developer, and blend immediately. The key is choosing the right shade and blending properly.
3. What’s the difference between a root smudge and a root touch-up?
A root touch-up covers gray hair or matches the natural root color. A root smudge is a deliberate application of a darker shade to blend the roots with the highlights. It’s a stylistic choice, not a gray coverage solution.
4. What kind of color should I use for a root smudge?
Demi-permanent color is the best choice. It’s gentler than permanent color, deposits color without lifting, and fades gradually over 4-6 weeks. It’s what professionals use in the salon.
5. How long does a root smudge last?
A demi-permanent root smudge typically lasts 4-6 weeks. With proper care (color-safe shampoo, cool water, less frequent washing), you can extend it to 6-8 weeks.
6. What if I choose the wrong shade?
If the shade is too dark, wash your hair with a clarifying shampoo a few times to speed up fading. If it’s too warm, use a blue or purple toning shampoo. If it’s too cool, use a warm-toned gloss.
7. Can I do a root smudge on color-treated hair?
Yes. A root smudge is designed for color-treated hair. It’s specifically for blending highlights with natural roots. Just make sure your hair is healthy enough to handle the color.
8. How much does a DIY root smudge cost?
About $3-10 per application, depending on the products you use. A salon root smudge costs $100-150. The savings are significant.
Final Thoughts: Salon Results for the Price of a Coffee
The $150 salon appointment is off my calendar. My $3 DIY root smudge is on my bathroom counter. My highlights are blended, my roots are soft, and I didn’t break the bank to get them.
The $3 routine:
- Choose a demi-permanent color one or two shades darker than your highlights
- Mix with 10-volume developer
- Apply to the roots, about 1/2 inch from the scalp
- Blend downward immediately
- Process for 10-20 minutes
- Rinse thoroughly
- Shampoo and condition
That’s it. A complete root smudge for less than the price of a coffee.
I’ve been doing this for over a year. My hair looks salon-quality. My wallet is happier. And I’ve saved over $1,200.
That’s not cheap. That’s smart.
That’s the frugal glow. And it’s growing out of your roots right now. 💇💛
*For more DIY hair color tutorials, budget beauty strategies, and money-saving hair care advice, visit The Frugal Glow.*