

Doorframe Workouts: 5 Upper Body Exercises You Can Do in Any Room
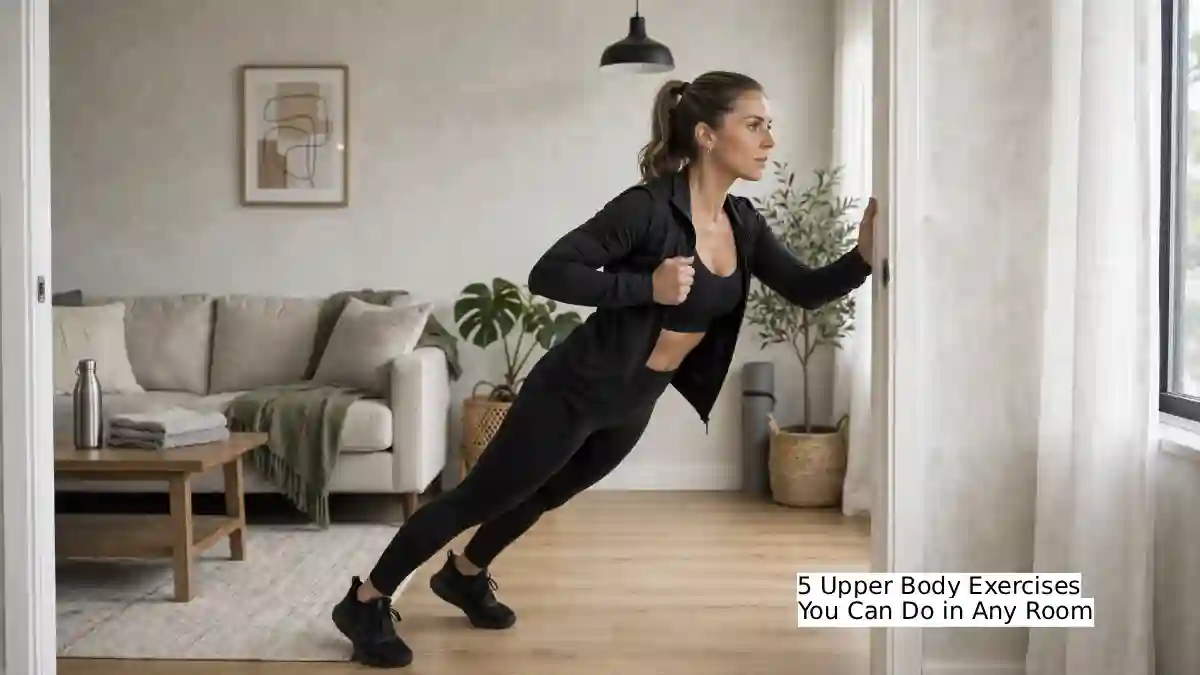
Most home workout routines quietly develop a lopsided habit: push-ups, planks, squats, lunges — all pushing movements, with almost nothing pulling in the opposite direction. This creates a genuine muscular imbalance over time, since the muscles responsible for pulling (your upper back, lats, and rear shoulders) get consistently neglected while the pushing muscles (chest, shoulders, triceps) do all the work. The fix doesn’t require a pull-up bar, a resistance band, or a single piece of equipment — it requires a doorframe, which is already structural, load-bearing, and sitting in every room of your home.
Here are five upper body exercises built entirely around a standard doorframe, covering pulling, pushing, and stretching in equal measure, so your at-home routine stops skipping half your upper body.
Jump Links
- Why the Doorframe Specifically Works So Well
- Safety First: Checking Your Doorframe
- Exercise 1: The Doorframe Row
- Exercise 2: The Doorway Power Row (Isometric)
- Exercise 3: The Towel Doorway Row
- Exercise 4: The One-Arm Doorway Row
- Exercise 5: The Doorway Chest and Shoulder Stretch
- Full Exercise Comparison Table
- Building These Into a Full Routine
- Common Mistakes Across All Doorframe Exercises
- How to Progress Over Time
- FAQ
- The Bottom Line
Why the Doorframe Specifically Works So Well
A doorframe (as opposed to the door itself, which is often hollow and not load-bearing) is genuinely structural — it’s built into the wall to handle real weight, which is exactly why it can safely anchor rowing and pulling movements that would otherwise require a pull-up bar or a gym cable machine. Most home workout routines are dominated by pushing movements, and while these are excellent exercises on their own, they create a genuine muscular imbalance when pulling exercises are absent from the routine. Anyone doing regular push-ups at home should be doing an equivalent volume of pulling exercises like the doorframe row, since neglecting the pulling side of upper body training over time can meaningfully affect posture and shoulder health.
Safety First: Checking Your Doorframe
Before starting any of these exercises, take a moment to actually assess what you’re working with:
- Use the frame itself, not the door. The wooden or metal frame surrounding the doorway is structural; the door itself, especially a hollow interior door, is not designed to bear body weight and can crack or break under load.
- Check that the frame feels solid by applying gradual pressure before committing your full body weight to any exercise, rather than immediately leaning back at full intensity.
- Avoid frames with visible damage, rot, or looseness at the point where you’ll be gripping.
- Start with a shallow lean-back angle for any rowing exercise, only increasing the angle (and therefore the difficulty and load on the frame) once you’re confident in both your form and the frame’s stability.
- Consider a folded towel or cloth over the frame edge where you’ll be gripping, both for comfort and to protect the frame’s paint or finish from repeated grip contact.
Exercise 1: The Doorframe Row
This is the foundational movement in this entire routine, and the one most directly responsible for building genuine pulling strength using nothing but bodyweight and a doorway.
How to do it:
- Stand in an open doorway and grip both sides of the frame at approximately chest height.
- Set your feet close to the frame, then walk them backward while leaning back, until your arms are fully extended and your body forms a straight line from head to heels.
- Brace your core and squeeze your glutes so your hips don’t sag out of that straight line.
- Pull your chest toward the frame by driving your elbows back and squeezing your shoulder blades together, rather than initiating the pull with your biceps.
- Pause briefly at the top, with your chest close to your hands.
- Lower yourself back down over two to three slow seconds — this controlled, slow descent is specifically where beginners build the most pulling strength.
Muscles worked: Rhomboids and trapezius (retracting the shoulder blades), latissimus dorsi (the main pulling muscle), rear deltoids, biceps, and forearm grip muscles.
To make it easier: Step your feet closer to the frame, reducing the lean-back angle.
To make it harder: Walk your feet further from the frame and lean back further, increasing the resistance your pulling muscles have to overcome.
Exercise 2: The Doorway Power Row (Isometric)
This variation adds an explosive, strength-building element by combining a rowing motion with a brief isometric (held, static) hold, making it a genuinely more advanced progression once the standard doorframe row feels comfortable.
How to do it:
- Stand sideways in a doorway so one shoulder is positioned in the doorway opening, with your feet pressed up against the base of the frame.
- Reach across with the arm closest to the doorway and grip the frame at chest height.
- Using your lats and biceps, pull your body up and toward the door frame as quickly and explosively as you can, keeping your shoulder turned slightly to avoid direct contact with the frame itself.
- Hold the contracted position briefly at the top of the pull before slowly releasing back to your starting position.
- Complete a set on one side, then switch to face the opposite direction and repeat with the other arm.
Muscles worked: Similar to the standard doorframe row, but with added emphasis on explosive strength and grip endurance due to the more intense, single-side contraction.
Exercise 3: The Towel Doorway Row
This variation is specifically useful if your doorframe’s edges aren’t comfortable to grip directly, or if you want an added grip-strength challenge layered into the same basic movement.
How to do it:
- Open a sturdy door and drape a thick towel over the very top edge, letting both ends hang down evenly on the side you’ll be standing on.
- Close the door partially (or fully, depending on the towel’s length and your door type) to help hold the towel securely in place at the top.
- Grip one end of the towel in each hand, then walk your feet backward while leaning back, similar to the standard doorframe row setup.
- Pull your body toward the door by bending your elbows and squeezing your shoulder blades together, keeping your body in a straight line throughout.
- Lower back down with control, maintaining tension on the towel throughout the entire movement.
Muscles worked: The same core back, lat, and bicep muscles as the standard doorframe row, with a significant additional grip-strength component from holding the towel rather than a fixed, solid frame edge.
Important safety note: Test the towel’s placement and the door’s stability with light pressure before committing full body weight, since this setup relies on the towel staying securely wedged rather than a fixed structural grip point.
Exercise 4: The One-Arm Doorway Row
Once the standard two-arm doorframe row feels genuinely manageable, this single-arm progression significantly increases the load on each side individually, building both strength and useful muscular symmetry between your left and right sides.
How to do it:
- Stand facing the doorframe and grip one side of the frame with a single hand at chest height.
- Position your feet and lean back as you would for the standard row, keeping your body in a straight line.
- Perform the rowing motion using just that one arm, pulling your chest toward your gripping hand while keeping your elbow close to your body.
- Complete your full set on one side before switching to the other arm, paying attention to whether one side feels noticeably weaker (a common and totally normal finding when isolating each side individually for the first time).
Muscles worked: The same core pulling muscles as the two-arm version, with increased individual demand on each side’s lats, rhomboids, biceps, and grip strength.
Exercise 5: The Doorway Chest and Shoulder Stretch
Rounding out this routine with a stretch matters genuinely, since all four exercises above are pulling-focused; balancing that pulling work with a stretch targeting the opposing chest and shoulder muscles supports overall upper body mobility and posture.
How to do it:
- Stand in a doorway and raise one or both arms to roughly shoulder height, placing your forearms or palms flat against the door frame on either side.
- Step one foot forward through the doorway, gently leaning your body weight forward until you feel a stretch across your chest and the front of your shoulders.
- Hold this position for 20 to 30 seconds, breathing steadily rather than holding your breath.
- Adjust arm height (slightly higher or lower on the frame) to shift the stretch’s emphasis across different parts of the chest and shoulder.
Muscles stretched: Pectoralis major and minor (chest), anterior deltoids (front shoulders), and to a lesser extent the biceps, depending on arm positioning.
Full Exercise Comparison Table
| Exercise | Primary Muscles | Difficulty | Equipment Beyond Doorframe |
|---|---|---|---|
| Doorframe Row | Lats, rhomboids, biceps, rear delts | Beginner | None |
| Doorway Power Row (Isometric) | Same as above, with explosive/isometric emphasis | Intermediate–Advanced | None |
| Towel Doorway Row | Same as standard row, plus grip strength | Beginner–Intermediate | A towel |
| One-Arm Doorway Row | Same muscles, isolated per side | Intermediate | None |
| Doorway Chest/Shoulder Stretch | Pectorals, anterior deltoids | Beginner | None |
Building These Into a Full Routine
A simple, balanced session combining all five moves might look like:
- Doorframe Row: 3 sets of 10–15 reps
- Towel Doorway Row: 3 sets of 10 reps (as a variation or superset with the standard row)
- One-Arm Doorway Row: 2–3 sets of 8–10 reps per arm
- Doorway Power Row: 2–3 sets per side, focused on explosive effort
- Doorway Chest and Shoulder Stretch: Hold for 20–30 seconds per side, ideally at the end of the session as a cooldown
This full sequence takes roughly 15 to 20 minutes and, when paired with your existing pushing exercises (push-ups, dips, shoulder presses using household items), creates a genuinely balanced upper body routine rather than one dominated exclusively by pushing movements.
Common Mistakes Across All Doorframe Exercises
- Leading the pull with your biceps instead of your back. Initiating each row by driving your elbows back and squeezing your shoulder blades together, rather than simply bending your arms, is what actually targets your back muscles effectively.
- Letting your hips sag out of a straight line. This reduces core engagement and shifts stress away from the intended muscles; actively bracing your core and squeezing your glutes keeps your body in the correct straight-line position throughout.
- Skipping the safety check on your doorframe. Testing stability with gradual pressure before committing full body weight prevents the specific risk of a weak or damaged frame giving way mid-exercise.
- Rushing through the lowering phase. The slow, controlled descent (over two to three seconds) is specifically where beginners build the most strength; dropping quickly back to the starting position wastes much of the exercise’s benefit.
- Neglecting the stretch entirely. Since all four active exercises target pulling muscles, skipping the chest and shoulder stretch leaves the opposing muscle groups without any counterbalancing attention in the same session.
How to Progress Over Time
- Increase your lean-back angle gradually on the standard doorframe row, which directly increases the resistance your body weight provides against the pull.
- Add the one-arm variation once the two-arm version feels comfortable for your full target rep range, since single-arm work meaningfully increases the demand per side.
- Incorporate the isometric power row for an explosive-strength element once your base pulling strength has developed through the standard row.
- Slow down your tempo further on any of the rowing variations, extending the lowering phase even longer for increased time under tension without needing any additional resistance.
- Track your rep counts and hold times weekly, since doorframe exercises don’t have an obvious “add more weight” progression the way equipment-based training does; tracking reps, angle, and tempo instead gives you a concrete way to measure improvement over time.
📌 YOU MIGHT ALSO LIKE:
FAQ
Is it actually safe to use a doorframe for exercises like this?
Yes, when using the structural frame itself (not the door) and checking for solid, undamaged construction before applying full body weight. Doorframes are built into the wall specifically to bear structural load, making them a genuinely safe, sturdy anchor point for bodyweight pulling exercises.
Can doorframe rows really replace a pull-up bar?
For building foundational pulling strength, yes, doorframe rows are widely considered one of the few genuinely effective back exercises requiring zero equipment. They work the same core pulling muscles (lats, rhomboids, biceps) as a pull-up, though through a horizontal rather than vertical pulling angle.
What if my door doesn’t have a sturdy enough frame?
Test the frame with gradual pressure before committing full body weight, and if it feels unstable or damaged, the towel-over-the-door variation or finding a different, sturdier doorway in your home are both reasonable alternatives.
How often should I do these doorframe exercises?
Most bodyweight strength routines like this can reasonably be done 2 to 4 times per week, allowing adequate recovery time between sessions, similar to general strength training guidelines for any muscle group.
Do I need to be strong already to try these exercises?
No, these exercises are specifically beginner-accessible, since adjusting your foot position (closer to the frame for less resistance, farther for more) allows anyone to scale the difficulty to their current strength level.
Can I do a full upper body workout using only a doorframe, with no other equipment at all?
These five exercises cover pulling movements and a stretch thoroughly. For a fully complete upper body routine, pairing these with pushing exercises like push-ups (which require no additional equipment either) rounds out a genuinely balanced, equipment-free upper body workout.
The Bottom Line
A doorframe is one of the most overlooked pieces of “equipment” in the average home, capable of anchoring genuine, effective pulling exercises that most bodyweight routines otherwise skip entirely. These five exercises — a foundational row, an explosive power variation, a grip-challenging towel version, a single-arm progression, and a balancing chest stretch — cover a genuinely complete upper body session using nothing but a doorway that’s already in every room of your house.
For more budget-friendly wellness and home workout guides, check out more posts over at The Frugal Glow.
Sources: