How to Build a Professional Yoga Studio in Your Bedroom for Under $25
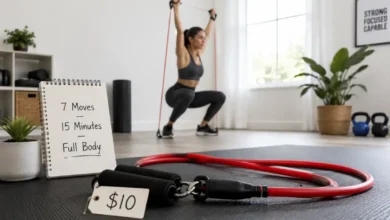
Let me tell you about the $120 yoga mat that almost broke my spirit.
I was standing in a boutique fitness store, holding a mat that promised “superior grip,” “eco-friendly materials,” and “studio-grade thickness.” The price tag said $120. I nearly had a heart attack. Then I looked at the blocks ($25 each), the strap ($20), and the “essential oil diffuser” ($50). By the time I added everything up, I would have needed a second job just to stretch in my own bedroom.
I put everything back and walked out.
That night, I rolled out my old $10 mat from Target. I grabbed a stack of books from my shelf, a belt from my closet, and a scarf I never wore. I dimmed the lights and lit a candle I already had. I practiced yoga in my bedroom.
It felt exactly the same as any studio I had ever been to. Actually, it felt better—I didn’t have to share the space with anyone else’s sweat.
That was three years ago. I’ve been practicing in my “studio” ever since. It cost me less than $25 total.
Today, I’m sharing my exact blueprint for building a professional yoga studio in your bedroom. No construction. No expensive gear. Just creativity and a little bit of intention.
Let’s get into it.
Jump Links
- The $120 Mat That Made Me Rethink Everything
- The $25 Blueprint: What You Actually Need (And What You Don’t)
- Step 1: Lay Your Foundation (The Mat)
- Step 2: Build Your Prop Collection (For $5)
- Step 3: Create the Vibe (Lighting and Scent)
- Step 4: Set Your Intention (The Free Part)
- How to “Studio-Proof” Your Bedroom (Space Management)
- The Math: What I Saved in One Year
- Frequently Asked Questions (FAQ)
- Final Thoughts: The Best Studio Is the One You Actually Use
The $120 Mat That Made Me Rethink Everything
I need to describe that moment in the boutique store.
I was holding the mat. It was beautiful. The color was perfect. The texture felt amazing. The salesperson told me it was “the best mat on the market.” She said it would last for years and completely transform my practice.
I almost bought it. I almost handed over my credit card. Then I remembered I had a perfectly good mat at home. It was $10 from Target. It had served me well for two years. The only problem was that it wasn’t “fancy.”
That’s when I realized I was falling for marketing. The yoga industry wants you to believe that you need expensive gear to have a “real” practice. But yoga isn’t about the mat. It’s about the movement. The breath. The intention.
I went home. I unrolled my $10 mat. I grabbed a stack of books for blocks. I used a belt for a strap. I dimmed the lights. I lit a candle. I had a better experience than I ever had in a studio. And I didn’t spend $120.
That was the day I became a believer in the DIY yoga studio.
The $25 Blueprint: What You Actually Need (And What You Don’t)
Before we start, let’s look at what you really need versus what the marketing says you need.
What the yoga industry tells you:
| Item | Price |
|---|---|
| Professional yoga mat | $80-120 |
| Yoga blocks (2) | $25-40 |
| Yoga strap | $15-25 |
| Yoga towel | $20-30 |
| Essential oil diffuser | $40-60 |
| Total | $180-275 |
What you actually need:
| Item | Price |
|---|---|
| A comfortable surface to practice on | $0-5 |
| Something to prop you up | $0 |
| Something to help you reach | $0 |
| A place to wipe sweat (optional) | $0 |
| A pleasant atmosphere | $5-10 |
| Total | $5-15 |
The difference: Over $200 saved. And you’ll have a more personalized experience.
The $25 spending plan:
| Category | What to Buy | Cost |
|---|---|---|
| Mat (or alternative) | A cheap mat, towel, blanket, or use carpet | $0-5 |
| Props | Books, belts, scarves, shoeboxes | $0 |
| Ambiance | Dimmer switch, candle, or essential oil | $10-15 |
| Intention | A playlist, a plan, and a few minutes of quiet | $0 |
| Total | $15-20 |
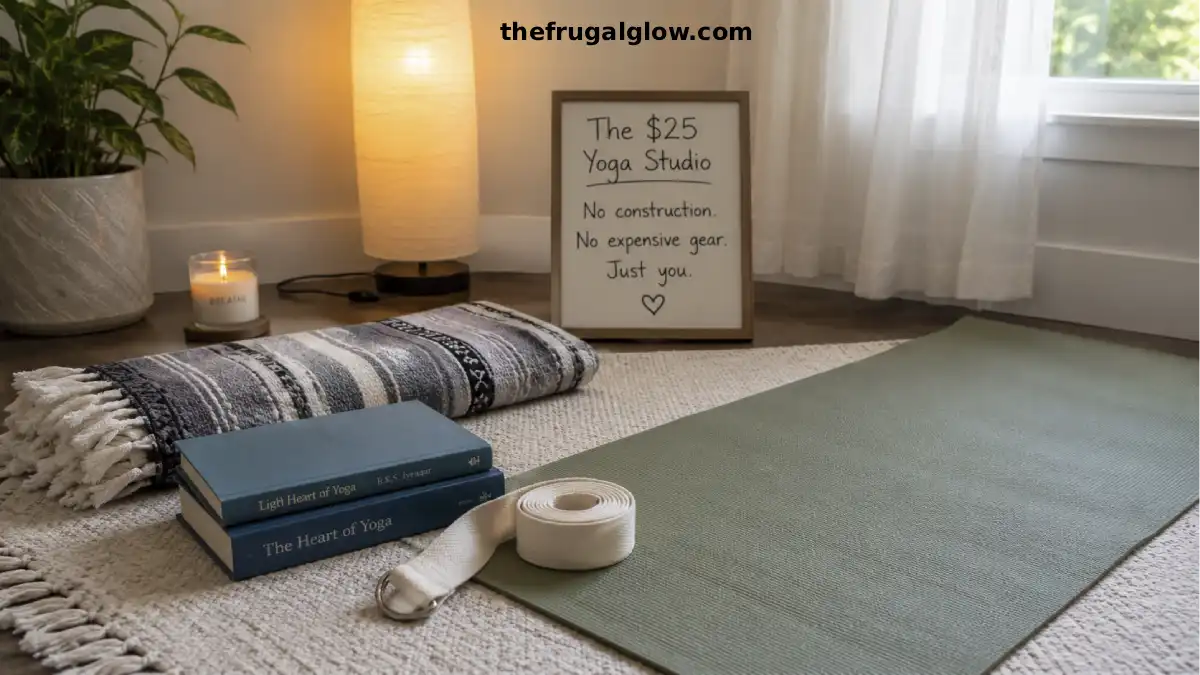
Step 1: Lay Your Foundation (The Mat)
You don’t need a $120 mat. Here’s what you can use instead.
Option A: Use what you already own (cost: $0)
If you have wall-to-wall carpet, you don’t even need a mat. The carpet provides cushioning. A yoga mat on carpet can actually make you slip more. If you have carpet, just practice on the carpet.
If you have hardwood or tile, use a towel, a blanket, or a cheap rug. A folded beach towel provides enough cushioning for most poses. A thick blanket works well too.
Option B: Buy a cheap mat (cost: $5-10)
If you want a mat, you don’t need to spend $120. Target, Walmart, and Five Below sell perfectly good mats for $10-15. Look for a mat with good grip (not too slippery). Thickness doesn’t matter as much as grip. A 1/8 inch mat is fine for most people.
Option C: A bath mat (cost: $5)
A non-slip bath mat works as a yoga mat. It’s grippy. It’s cushioned. It’s cheap. And you can throw it in the washing machine.
What to avoid:
- Mats with strong chemical smells (they off-gas)
- Mats that are too slick (you’ll slip in downward dog)
- Mats that are too thick (over 1/4 inch makes balancing hard)
The grip test: Before you buy, press your hands into the mat. Do they slide? If yes, keep looking. Good grip is the most important feature.
Step 2: Build Your Prop Collection (For $5)
You don’t need to buy blocks, straps, or bolsters. Here’s what to use instead.
Instead of yoga blocks (cost: $25 each):
| Alternative | What It Costs | Why It Works |
|---|---|---|
| Books | $0 | Two thick hardcover books of the same size |
| Shoeboxes | $0 | Sturdy and the right size |
| Cushions | $0 | Soft and supportive |
| Tupperware containers | $0 | Stack them for height |
| Firewood logs | $0 | Natural and sturdy |
How to use books as blocks: Place two hardcover books side by side. They’re the exact same size as yoga blocks. If you need more height, stack them.
Instead of a yoga strap (cost: $15-25):
| Alternative | What It Costs | Why It Works |
|---|---|---|
| Belt | $0 | The perfect length and adjustable |
| Scarf | $0 | Soft and comfortable |
| Rope | $0 | Strong and adjustable |
| Tights or leggings | $0 | Stretchy and comfortable |
| Old necktie | $0 | Long and adjustable |
How to use a belt as a strap: Use a fabric belt with a buckle. It works exactly like a yoga strap. You can adjust the length by moving the buckle.
Instead of a yoga bolster (cost: $30-50):
| Alternative | What It Costs | Why It Works |
|---|---|---|
| Pillows | $0 | Soft and supportive |
| Rolled blanket | $0 | Firm and comfortable |
| Couch cushion | $0 | Large and supportive |
| Foam roller | $0 | If you have one already |
Instead of a yoga blanket (cost: $20-30):
| Alternative | What It Costs | Why It Works |
|---|---|---|
| Any blanket | $0 | Thick, soft, and supportive |
| Towel | $0 | Firm and grippy |
| Cardigan or sweater | $0 | Soft and can be rolled |
The “all of the above” trick: If you want a full set of props, just gather things from around your house. One hardcover book, one belt, one pillow, and one thick blanket. That’s your entire kit. Cost: $0.
Step 3: Create the Vibe (Lighting and Scent)
This is where you turn your bedroom into a “professional studio.” Lighting and scent make the biggest difference.
Lighting (cost: $5-10):
The $10 dimmer hack: A plug-in dimmer switch costs about $10 at a hardware store or on Amazon. It plugs into your lamp. You plug your lamp into it. Then you can dim your lights. A dim lamp instantly transforms a room.
The scarf hack: If you don’t want to buy a dimmer, drape a thin scarf over your lampshade. This diffuses the light and creates a soft, warm glow. The room will look like a studio.
The natural light trick: If you practice during the day, open your curtains but put up a sheer curtain. It softens the light. If you practice at night, use just one lamp with a warm bulb.
What to avoid:
- Overhead bright lights (too harsh)
- Fluorescent lights (too cold)
- Blue-white LED bulbs (too clinical)
Scent (cost: $3-5):
The stove hack: Simmer a pot of water with a cinnamon stick, a few cloves, and an orange peel. Your whole room will smell like a high-end spa. Cost: pennies.
The essential oil hack: Buy one small bottle of essential oil (lavender, eucalyptus, or peppermint) for $5. Put a few drops in a bowl of hot water. The steam carries the scent. No diffuser needed.
The candle hack: A simple unscented candle from the dollar store ($1) creates a peaceful atmosphere. If you have a scented candle, even better.
Sound (cost: $0):
- Use a free meditation app (Insight Timer, Calm, Headspace have free options)
- Use YouTube for free yoga music or nature sounds
- Use your phone’s “Do Not Disturb” mode to avoid interruptions
Step 4: Set Your Intention (The Free Part)
The final step is free. It’s the most important step.
Clear your space (5 minutes):
Before you practice, clear clutter from your immediate area. You don’t need a whole clean room—just the space around your mat. Clutter is distracting. A clear space helps create a clear mind.
Set an intention (2 minutes):
This is the “professional studio” secret. Studios always start with an intention. You can do the same thing at home. Before you start, take two deep breaths. Think about why you’re practicing. Is it for strength? Relaxation? Flexibility? Just moving your body? Set a simple intention.
Use a free app or video (cost: $0):
You don’t need to pay for classes. YouTube has thousands of free yoga classes. Search for “beginner yoga,” “vinyasa flow,” “restorative yoga,” or “yoga for back pain.” Some of my favorites:
- Yoga with Adriene (free, beginner-friendly)
- Fightmaster Yoga (free, more advanced)
- SarahBethYoga (free, gentle)
- DoYogaWithMe (free)
The “studio experience” in your bedroom:
- 5 minutes to set up
- 2 minutes to set an intention
- 20-60 minutes of practice
- 5 minutes to roll up your mat
Total time commitment: 30-70 minutes. The same as going to a studio, but without the commute, the cost, or the crowd.
How to “Studio-Proof” Your Bedroom (Space Management)
You don’t need a lot of space. Here’s how to make it work.
Use a corner:
You don’t need a whole room. Just a corner of your bedroom is enough. A 6×6 foot space is plenty for yoga. Clear out a corner. Put your mat there. Keep it rolled out if you can.
Use a folding mat:
If space is tight, use a folding mat. It folds up and slides under your bed or into a closet. The Gaiam Foldable Mat is a great option.
Use multi-purpose furniture:
Your bed can be a prop. Your chair can be a prop. Your wall can be a prop. You don’t need specialized equipment.
The “studio” feel:
Put a small plant in the corner. Add a piece of art or a photo that inspires you. Keep the area clean. A few small touches make the space feel intentional.
The Math: What I Saved in One Year
Let me break down the actual dollars.
If I had bought studio-quality equipment:
| Item | Price |
|---|---|
| Professional yoga mat | $120 |
| Two yoga blocks | $40 |
| Yoga strap | $20 |
| Yoga towel | $20 |
| Essential oil diffuser | $50 |
| Studio classes (monthly) | $150 |
| Total | $400 |
What I actually spent:
| Item | Price |
|---|---|
| Cheap mat (already had) | $0 |
| Books for blocks | $0 |
| Belt for strap | $0 |
| Towel for sweat | $0 |
| Dimmer switch | $10 |
| Essential oil (lavender) | $5 |
| Free YouTube videos | $0 |
| Total | $15 |
Annual savings: $385
Over 5 years: $1,925
What I did with the savings:
- Bought a nicer mat (still under $30 – and I actually use it)
- Took a weekend yoga retreat ($200 – worth it for the experience)
- Put the rest into savings
The best part: My practice is better now than it ever was with expensive gear. Because I’m consistent. The studio is in my bedroom. I have no excuses.
The ‘Walking Pad’ vs. The ‘Outdoor Walk’: Which One is Actually More Frugal in 2026?
Frequently Asked Questions (FAQ)
1. Do I really need a yoga mat?
No. If you have carpet, you can practice directly on the carpet. If you have hard floors, a towel, blanket, or cheap mat works fine. A yoga mat is a tool, not a necessity. Many people in India practice yoga on the ground without a mat.
2. Are cheap mats as good as expensive ones?
For most people, yes. A $10 mat from Target or Five Below works perfectly for years. The expensive mats are made of different materials (rubber vs. PVC) and may have better grip, but the difference is minimal for beginners and intermediate practitioners.
3. Can I use pillows as yoga props?
Yes. Pillows are excellent for restorative yoga, seated poses, and as bolsters. They’re soft, supportive, and you already have them. Use them for supported fish pose, supported bridge, or as a cushion for seated meditation.
4. How do I create the “studio atmosphere” without buying anything?
Use what you have: dim your lights (use a scarf over a lamp), light a candle, play free meditation music on YouTube, and open a window for fresh air. The atmosphere is about intention, not purchases.
5. Will practicing at home without props hurt my progress?
No. Props are tools to help you, not necessities. Many traditional yoga practices use no props at all. Blocks and straps can help you reach further, but they’re not required for a safe or effective practice.
6. How do I keep my bedroom studio from feeling cluttered?
Keep it simple. You only need a small corner. If you can’t leave your mat out, roll it up and put it away. Use multi-purpose items (books for blocks, belt for strap) so you don’t have extra things sitting around.
7. What’s the best free app or YouTube channel for home yoga?
Yoga with Adriene is the most popular and beginner-friendly. Fightmaster Yoga has more advanced content. SarahBethYoga is gentle and restorative. DoYogaWithMe has a wide variety. All are free.
Final Thoughts: The Best Studio Is the One You Actually Use
Here’s what I want you to take away.
I almost spent $120 on a yoga mat. I almost spent $400 on a full studio setup. Instead, I spent $15 and created a space that feels professional, peaceful, and completely personal.
The yoga industry wants you to believe that you need expensive gear to have a “real” practice. But yoga isn’t about the mat. It’s about the movement. The breath. The intention.
My bedroom studio has no $120 mat. It has no $25 blocks. It has a $10 dimmer, a $5 essential oil, and a collection of household items that work as props. And my practice is better than it ever was in a studio.
Because the best studio is the one you actually use.
This weekend, clear a corner of your bedroom. Roll out a towel. Grab a book. Set a timer. Practice for 10 minutes.
You’ll have the studio you always wanted. And you’ll have saved $200 in the process.
That’s the frugal glow. And it’s waiting for you in your bedroom. 🧘♀️💛
For more budget wellness tips, DIY studio hacks, and money-saving strategies, visit The Frugal Glow.