

How to Fix a Cakey Foundation Base Using Only Free Household Items
You’re already dressed, your shoes are on, and then you catch your reflection. The foundation that looked smooth an hour ago is now sitting in tiny patches, clinging to dry spots, and settling into every fine line. It’s cakey, and it makes even a good makeup day feel ruined. The usual instinct is to wipe everything off and start over, or to buy yet another product that promises to fix the problem.
Here’s the encouraging truth: most cakey foundation can be rescued in a couple of minutes without starting over and without spending a dollar. The fixes professional makeup artists and major makeup brands recommend rely on water, gentle pressure, and good technique. All of them can be done with items you already have at home.
This guide explains why foundation turns cakey in the first place, how to figure out which type of cakiness you’re dealing with, eight free fixes you can use right now, and the habits that stop it from happening again.
Jump Links
- Why Foundation Gets Cakey
- Cause-and-Fix Table
- Diagnose Before You Fix
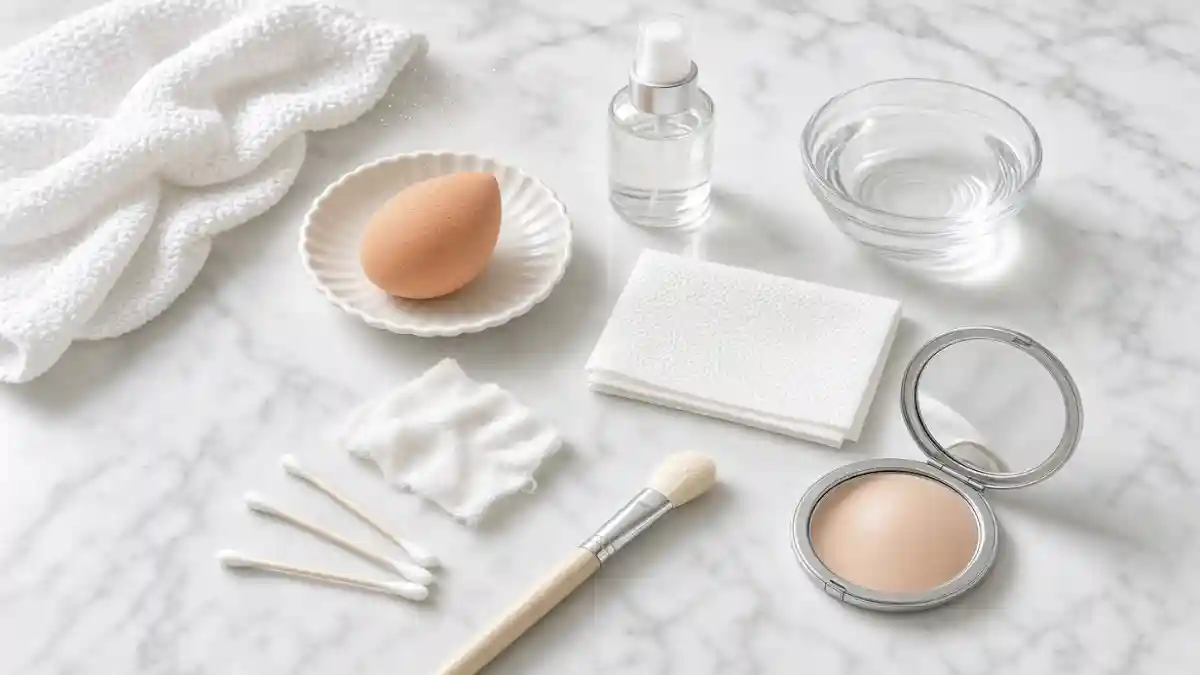
- Your Free Household Toolkit
- Fix 1: The Water Mist and Press
- Fix 2: The Warm Fingertip Press
- Fix 3: The Tissue Blot
- Fix 4: The Damp Cloth Dab
- Fix 5: The Steam Reset
- Fix 6: The Dry Patch Spot Repair
- Fix 7: The Back-of-Hand Blend
- Fix 8: The Under-Eye and Nose Rescue
- Fix Comparison Table
- What Not to Do
- The 2-Minute Emergency Routine
- Free Habits That Prevent Cakey Foundation
- Dry Skin vs. Oily Skin: Different Fixes
- When Cakiness Points to a Skin Issue
- FAQ
- The Bottom Line
Why Foundation Gets Cakey
Cakey makeup looks dry, heavy, and textured, with foundation that seems to sit on top of your skin instead of looking like part of it. Makeup brands and artists consistently trace it back to a short list of causes.
Dry skin. When skin lacks moisture, foundation has nothing to blend into, so it clings to dry patches and can peel or flake. Skin that feels comfortable and hydrated holds makeup much better.
Too much product. Heavy layers of foundation and concealer pile up, especially in areas that move or crease, like around the nose and under the eyes.
Too much powder. Powder is useful for controlling shine, but a heavy hand, or powdering areas that are already dry, can soak the moisture out of the foundation underneath and emphasize texture. Applying powder before foundation has had time to settle has the same effect.
Skipping prep. Makeup applied over skin that hasn’t been cleansed or moisturized tends to separate and look patchy.
Poor blending. Foundation that isn’t pressed or blended into the skin sits in visible layers.
Layering products that don’t get along. Combining products with very different formulas can cause them to separate or pill.
Touching up without removing buildup. Adding more product over product that’s already shifted just compounds the problem.
Excess oil. On the opposite end of the spectrum, oil can cause makeup to separate and break up, which can also look cakey.
Once you know which of these is behind your cakiness, the fix is much more targeted.
Cause-and-Fix Table
| Likely cause | What it looks like | Best free fix |
|---|---|---|
| Dry skin | Flaky patches, foundation clinging to cheeks or around the mouth | Water mist and press, dry patch spot repair |
| Too much powder | Dull, chalky, textured finish | Tissue blot, water mist and press |
| Too much foundation | Thick, mask-like look, creasing | Damp cloth dab, warm fingertip press |
| Poor blending | Visible lines or patchy edges | Warm fingertip press, damp cloth dab |
| Excess oil | Shiny areas with makeup breaking up | Tissue blot, then press |
| Buildup from touch-ups | Heavy, rough texture by midday | Steam reset, then damp cloth dab |
Diagnose Before You Fix
Take ten seconds to look at your face in natural light and ask a few quick questions.
- Is the problem concentrated on dry areas, like the cheeks or around the nose and mouth? That points to dryness and a need for moisture.
- Does the finish look chalky or flat overall? That usually means too much powder.
- Does your skin look shiny in places and patchy in others? That points to oil breaking up the makeup.
- Does the makeup look thick everywhere? You probably applied more product than your skin could absorb.
The fix you choose should match the problem. For dry or powdery cakiness, add moisture and press. For oily cakiness, blot first and avoid adding more powder. For general heaviness, remove the excess with gentle pressure.
Your Free Household Toolkit
You don’t need special tools for any of the fixes below. Everything on this list is probably already in your home.
- Clean water. From the tap, in a clean spray bottle if you have one, or on your fingertips.
- Clean, dry hands. Your fingertips are warm, which helps makeup melt back into the skin.
- A tissue or soft toilet paper. Plain, unscented, and lotion-free is best.
- A clean washcloth or soft paper towel. To be used slightly damp, never soaking wet.
- Steam. From a hot shower or a bowl of hot water, used with care.
- The back of your hand. A handy palette for blending.
- Whatever moisturizer you already own (optional), for stubborn dry patches.
A quick hygiene note: any tool that touches your face should be clean. Wash your hands before you start, use a clean cloth, and don’t reuse a tissue that’s already been used. If you use a spray bottle, rinse it and refill it with fresh water often, because water that sits in a bottle for a long time can pick up bacteria.
Fix 1: The Water Mist and Press
Makeup artists and brands consistently rank a light mist of moisture at the top of the list of quick fixes. A face mist rehydrates dry patches and helps product melt back into the skin. You can get a similar effect with plain water.
How to do it:
- Hold a spray bottle filled with clean water about 8 to 10 inches from your face. If you don’t have a spray bottle, wet your fingertips and flick a few fine droplets onto your skin.
- Mist lightly, closing your eyes and mouth.
- Immediately press the mist into your skin with clean, warm fingertips, using gentle patting motions instead of rubbing.
- Let your skin sit for a few seconds so the moisture can settle.
Why it works: The moisture softens the layer of powder and foundation and helps it merge back into one cohesive layer instead of sitting in separate, dry patches.
Tip: If your foundation is heavy on silicones, water can bead up on the surface. In that case, use a lighter mist and press gently so it blends in.
Fix 2: The Warm Fingertip Press
Body heat helps makeup soften and blend, and this fix uses nothing but your own clean fingertips.
How to do it:
- Wash and dry your hands.
- Warm your fingertips by rubbing them together for a few seconds.
- Gently press and pat your fingertips over the cakey areas, using small, tapping motions.
- Focus on patchy spots, like the sides of your nose, your chin, and your cheeks.
Why it works: Pressing, rather than rubbing, helps the makeup melt into your skin instead of dragging product around. Skincare-focused makeup brands recommend a damp sponge or warm fingertips to press remaining pigment back into the skin and smooth out separation.
Fix 3: The Tissue Blot
If you’ve layered too much powder or your skin looks both shiny and patchy, a plain tissue can lift away the excess.
How to do it:
- Separate a single ply of facial tissue or use a small piece of soft toilet paper.
- Lay it gently over the cakey area.
- Press lightly with your fingertips for a couple of seconds, then lift it away without wiping or dragging.
- Repeat on any other areas where the makeup looks heavy.
Why it works: Pressing lifts excess powder and oil without moving the foundation underneath. Makeup brands specifically warn against rubbing during this step, since rubbing can shift product and make things worse.
Tip: Blot before you add anything new. If you reach for more powder when your face looks shiny, you’ll make cakiness worse. Blotting first removes the shine without piling on another layer.
Fix 4: The Damp Cloth Dab
This fix mimics what a damp beauty sponge does, using a cloth you already own.
How to do it:
- Dampen a clean, soft washcloth (or a soft paper towel) with water, then wring it out thoroughly so it’s slightly damp, not dripping.
- Fold the cloth into a small pad.
- Gently bounce or dab the cloth over the cakey areas, pressing the makeup into your skin rather than wiping it.
- Work in small sections, and use a clean part of the cloth as you go.
Why it works: Makeup artists use a damp sponge because the dampness keeps the sponge from absorbing too much foundation while the bouncing motion presses the product into the skin. A damp cloth gives you a similar effect. The key is that it should be slightly damp, because a soaking wet cloth will remove your makeup instead of blending it.
Fix 5: The Steam Reset
For stubborn cakiness that doesn’t respond to a mist and a press, a little steam can soften the makeup so it can be pressed back into the skin. One makeup brand’s quick-fix guide suggests holding your face about a foot above a bowl of hot water for 30 to 45 seconds, then following up immediately with a damp sponge to smooth everything out.
How to do it:
- Fill a bowl with hot (not boiling) water, or use the steam from a hot shower.
- Keep your face about a foot away from the steam source for 30 to 45 seconds, with your eyes closed.
- Immediately press the makeup back into place with warm fingertips or a damp cloth.
Safety notes:
- Never use boiling water, and never lean close to steam. Steam can cause burns.
- Be extra careful with a bowl of hot water, since it can tip over. Place it on a stable surface.
- If steam makes your skin red or uncomfortable, skip this fix and use the water mist method instead.
Fix 6: The Dry Patch Spot Repair
If one stubborn patch refuses to blend, it usually needs more than water. It needs a bit of moisture to help the foundation melt back in.
How to do it:
- Mist the spot lightly with water.
- If you have moisturizer at home, put a tiny amount on the back of your hand, then pick up a small amount with your fingertip.
- Gently press it onto the dry patch, and then press over the area again with a clean fingertip to blend it in.
- If you don’t have moisturizer, pressing the mist in with warm fingertips a few times can still help.
Why it works: Makeup experts note that dry skin makes foundation cling to patches, and that a little moisture on those spots, followed by blending, helps the makeup meld with the skin.
Tip: Use a very small amount. Too much moisturizer can make makeup slide around, which brings you back to uneven coverage.
Fix 7: The Back-of-Hand Blend
If you’ve applied powder too heavily, or if there’s a visible edge where product stops and starts, using a little cream or moisturizer to melt it all together can help.
How to do it:
- Put a pea-sized dab of moisturizer on the back of your hand.
- Pat your fingertip into it, then tap off the excess so there’s only a very thin film left.
- Gently press over the powdery areas, using small tapping motions.
Why it works: Creamy products help blend powder into cream-based foundation and give makeup a more natural finish, according to one makeup brand’s guide.
Tip: If you notice the makeup starts to move or smear, stop and let it sit for a minute, then press with a clean tissue.
Fix 8: The Under-Eye and Nose Rescue
The under-eyes and the sides of the nose tend to be the first places foundation looks cakey, because the skin there is thin, moves a lot, and creases easily. Makeup experts suggest applying less product in these areas and setting lightly rather than adding more powder.
How to do it:
- Mist the area lightly and press with a warm ring finger, which applies the gentlest pressure.
- If there’s heavy product in the creases, blot gently with a tissue first.
- Tap the area with your fingertip to re-blend.
- Don’t add powder to these dry zones. Powder here tends to emphasize fine lines and dryness.
Why it works: Light misting and tapping reblends product without adding another layer, and avoiding powder prevents more dryness.
Fix Comparison Table
| Fix | Best for | Time | Caution |
|---|---|---|---|
| Water mist and press | Dry patches, powdery finish | 1 minute | Use clean water; light mist only |
| Warm fingertip press | Patchy edges, light buildup | 1 minute | Use clean hands |
| Tissue blot | Excess powder or oil | 30 seconds | Press, don’t wipe |
| Damp cloth dab | Heavy, thick-looking makeup | 2 minutes | Cloth must be slightly damp, not wet |
| Steam reset | Stubborn cakiness | 2 minutes | Burn risk; keep a safe distance |
| Dry patch spot repair | Persistent dry spots | 2 minutes | Use a tiny amount of moisturizer |
| Back-of-hand blend | Powdery or uneven areas | 1 minute | Too much moisturizer can cause slipping |
| Under-eye and nose rescue | Creasing in thin or moving areas | 1 minute | Avoid adding powder |
What Not to Do
- Don’t wipe or rub. Rubbing drags foundation around and can leave you with a patchy, uneven mess. Press and pat instead.
- Don’t add more powder. When foundation looks cakey, more powder usually makes it worse. Blot first.
- Don’t soak your sponge or cloth. A dripping wet tool removes makeup instead of blending it.
- Don’t use dirty tools. Used tissues, unwashed cloths, or unwashed hands can transfer bacteria to your face.
- Don’t pile new foundation over cakey makeup. Remove the excess first, then reblend, or you’ll build up even more texture.
- Don’t get too close to hot steam. Burns are a real risk.
- Don’t use heavy kitchen oils or fragranced products as a shortcut. They can clog pores or irritate skin, and they can make makeup slide around.
- Don’t pick at flaky patches. Picking can irritate your skin and make the dryness worse.
The 2-Minute Emergency Routine
When you have almost no time, here’s a quick sequence that combines the fixes above:
- Wash your hands (10 seconds).
- Blot any shiny or powdery areas with a single ply of tissue, pressing gently (20 seconds).
- Mist your face lightly with water (10 seconds).
- Press the moisture and makeup into your skin with warm fingertips or a slightly damp cloth, focusing on the cakiest spots (40 seconds).
- Spot-repair any dry patches with a tiny amount of moisturizer, if you have it (20 seconds).
- Let it sit for 20 to 30 seconds so everything can settle before you touch your face again.
Free Habits That Prevent Cakey Foundation
The best fix is to avoid the problem in the first place, and most of the habits that help are free.
- Start with clean, hydrated skin. Wash your face, then use the moisturizer you already own. Dry skin is one of the biggest causes of cakiness, and makeup brands note that skin that feels comfortable holds makeup better.
- Apply moisturizer to slightly damp skin. This helps lock in moisture before makeup goes on.
- Wait before you build. Give your moisturizer or primer a minute to absorb, and give foundation 30 to 60 seconds to settle before applying concealer or powder.
- Use thin layers. Build coverage only where you need it instead of applying one thick layer all over.
- Press, don’t drag. Pressing foundation into your skin with a damp sponge or clean fingertips helps it look more natural than rubbing it around.
- Powder only where you need it. Focus on oily areas like the center of your face, and skip dry areas like the cheeks and under-eyes.
- Blot before you powder. If you’re getting shiny, use a tissue before adding more powder.
- Don’t touch your face during the day. Touching disrupts your makeup and adds oil and bacteria to your skin.
- Match your formula to your skin. Lightweight, sheer formulas are less likely to cake than heavy, full-coverage ones, and if your skin is dry, hydrating formulas generally work better. If you tend to cake, many makeup artists recommend water-based foundations because they blend more easily over creamy skincare.
- Clean up before touch-ups. Remove excess product or oil before adding more, so you don’t layer new makeup over buildup.
Dry Skin vs. Oily Skin: Different Fixes
| Skin type | Main cakiness cause | Best approach |
|---|---|---|
| Dry or dehydrated | Foundation clinging to dry patches | Hydrate first with water mist, spot-repair with a tiny amount of moisturizer, skip powder on dry zones |
| Oily | Makeup breaking up as oil rises | Blot first with a tissue, avoid layering more powder, press gently to re-blend |
| Combination | Both, in different zones | Treat each zone separately: moisture on dry areas, blotting on the T-zone |
| Sensitive | Irritation from rubbing or heavy layers | Use the gentlest methods: mist, warm fingertip press, and a clean damp cloth |
When Cakiness Points to a Skin Issue
Occasional cakiness is a technique or prep problem, and it’s usually fixable at home. But if your skin is consistently flaky, red, scaly, or itchy, even without makeup, the issue may be more than just dryness. Persistent flaking and irritation can be linked to underlying skin conditions, and it’s worth talking to a dermatologist or healthcare provider if you notice that pattern rather than trying to cover it with more makeup.
📌 YOU MIGHT ALSO LIKE:
Matte vs. Dewy: The Best Budget Foundations Under $12 for Every Skin Type
How to Erase Dark Circles Instantly with a $10 Drugstore Routine
FAQ
Can I really fix cakey foundation without removing everything?
Yes, in many cases. Makeup brands and artists commonly recommend a light mist, a gentle press with a damp sponge or clean fingertips, and blotting away excess powder or oil, all of which can rescue your base without starting over. If the makeup is extremely heavy, you may need to remove some of the product first.
Is plain water safe to spray on my face over makeup?
A light mist of clean water is generally fine for rehydrating makeup and helping it blend. Use a clean spray bottle, rinse and refill it often, and avoid soaking your skin or makeup.
Why does my foundation look cakey around my nose and under my eyes?
Those areas have thin skin, lots of movement, and tend to collect extra product, so they show dryness and texture first. Applying less product there, setting lightly, and avoiding extra powder usually helps.
Should I add more powder to fix cakey foundation?
Usually not. Too much powder is one of the top causes of cakey makeup, and adding more tends to dry out the foundation underneath. Blot first, rehydrate with a mist, and then press the makeup back into your skin.
Does a damp sponge work better than a brush for preventing cakiness?
Many makeup artists prefer a damp sponge for people who tend to cake, because the dampness helps the product melt into the skin instead of sitting on top. If you don’t have a sponge, a clean, slightly damp cloth or warm fingertips can give you a similar pressing motion.
What’s the single most important prevention step?
Hydrated, well-prepped skin. Dry skin makes foundation cling and flake, so cleansing and moisturizing before makeup, and giving each layer time to settle, does more to prevent cakey makeup than almost any single product.
The Bottom Line
Cakey foundation looks like a makeup problem, but it’s almost always a moisture-and-technique problem, which means the fix is usually free. A light mist of water, a gentle press with warm fingertips, a quick blot with a tissue, and a slightly damp cloth can rescue most cakey bases in a couple of minutes. Pair those rescues with a few simple habits, like hydrating your skin first, using thin layers, and powdering only where you need it, and you may find you rarely need a rescue at all.
For more budget-friendly beauty guides and makeup tips, check out more posts over at The Frugal Glow.
Sources: