
How to Repair Fraying Scarf Edges at Home Without a Sewing Machine
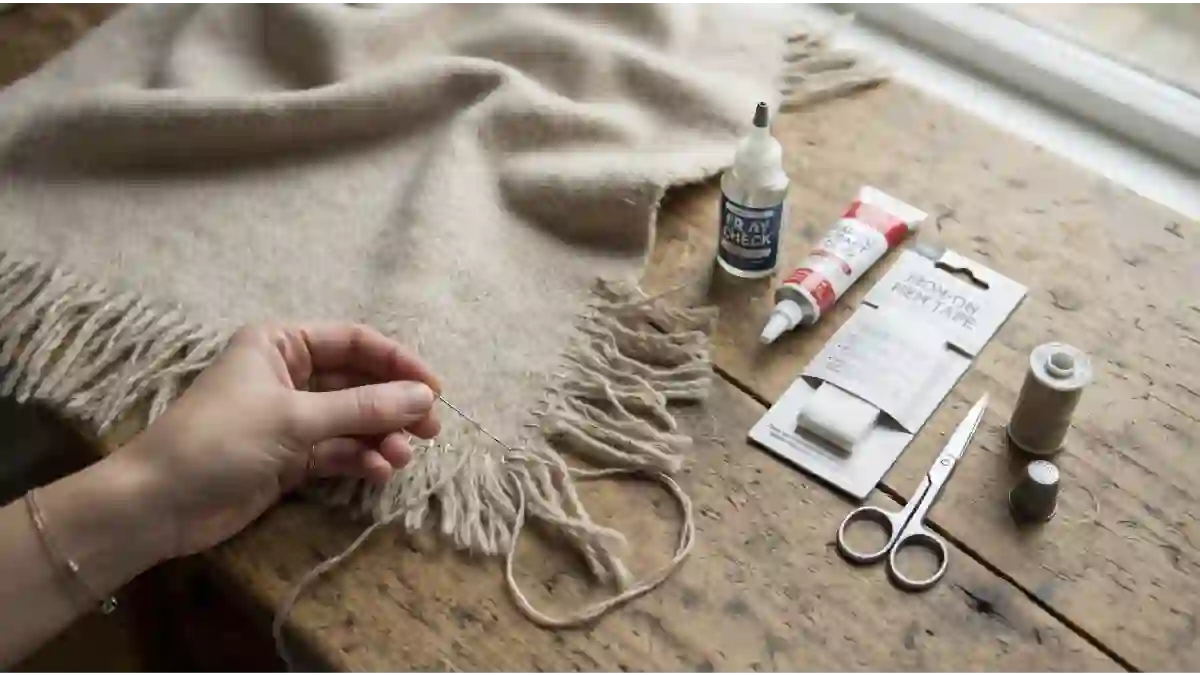
A fraying scarf edge has a way of getting worse fast. It starts with a few loose threads at the corner, you tug one to tidy it up, and suddenly half an inch of unraveled fabric is dangling off the end. The good news is that most fraying is easy to stop, and you don’t need a sewing machine, a tailor, or advanced skills to do it. A needle and thread, a small bottle of fray sealant, a dab of fabric glue, or a strip of iron-on hem tape can each do the job, depending on your scarf’s fabric and how much strength the repair needs.
This guide walks through eight methods, from basic hand stitches to no-sew fixes, explains which works best for wool, cotton, silk, and synthetic scarves, and shows how to repair fringe and knitted scarves too. Everything here can be done at home with supplies that cost a few dollars.
Jump Links
- Step One: Figure Out What You’re Repairing
- The Under-$10 Repair Kit
- Method 1: Trim and Tidy First
- Method 2: The Whipstitch
- Method 3: The Blanket Stitch
- Method 4: A Hand-Rolled or Folded Hem
- Method 5: Liquid Fray Sealant
- Method 6: Fabric Glue
- Method 7: Iron-On Hem Tape
- Method 8: Repairing Fringe and Knitted Scarves
- Method Comparison Table
- Best Method by Fabric Table
- Common Mistakes to Avoid
- How to Prevent Fraying in the First Place
- When to Take It to a Professional or Let It Go
- Repair Kit Cost Table
- FAQ
- The Bottom Line
Step One: Figure Out What You’re Repairing
Before choosing a method, take a minute to identify two things: how your scarf is constructed and what it’s made of. The best repair for a woven silk scarf is very different from the best repair for a chunky knit.
Woven scarves are made by interlacing threads at right angles, like a shirt or a pashmina. When the cut or worn edge isn’t finished, the threads can pull loose and fray. This is the classic fraying problem the methods below were mostly designed for.
Knit scarves are made of looped yarn. They don’t fray the same way. Instead, they can unravel when a loop is pulled or a yarn end comes loose, which needs a different fix (covered in Method 8).
Fringe is a decorative edge made of loose threads or yarn. Fringe can tangle, thin out, or come loose, and it’s repaired with knots and trimming rather than hemming.
Fiber content matters too. Natural fibers like wool, cotton, silk, and linen respond well to most of the methods below, while some synthetic fabrics react differently to sealants and heat. Check the care label inside your scarf if it has one.
A quick diagnostic:
| What you see | Likely issue | Go to |
|---|---|---|
| Loose threads at a cut woven edge | Classic fraying | Methods 1–7 |
| A single loop pulled out of a knit | Snag or unraveling | Method 8 |
| Sparse, tangled, or dropping fringe | Fringe wear | Method 8 |
| A long raveled stretch along one side | Worn or unfinished edge | Methods 2–4 or 7 |
The Under-$10 Repair Kit
You can handle almost every repair in this guide with a small, inexpensive kit:
- A hand-sewing needle (a fine one for lightweight fabrics, a slightly larger one for wool).
- Thread in a matching color. Matching the scarf as closely as you can makes the stitches nearly invisible.
- Small, sharp scissors for trimming loose threads.
- Pins or clips to hold the edge in place.
- A liquid fray sealant such as Dritz Fray Check or Aleene’s Stop Fraying (optional).
- Fabric glue (optional).
- Iron-on hem tape (optional).
- An iron and a pressing cloth if you use hem tape.
Prices are in the table near the end. A basic needle, thread, and scissors set can handle several methods on its own.
Method 1: Trim and Tidy First
Whatever method you choose, prepare the edge before repairing it. Skipping this step is the most common reason a repair looks messy.
- Lay the scarf flat on a table so you can see the full extent of the fraying.
- Trim loose threads with small scissors, snipping close to the fabric. Don’t pull them, since pulling can unravel more fabric.
- Straighten the edge. If the fraying has made the edge uneven, you can trim a thin, even strip off the fabric (a quarter inch or less) to create a clean line, as long as it won’t change the look of the scarf.
- Brush off loose fibers so they don’t get caught in your stitches or sealant.
This step is also the entire repair for very light fraying. If only a few threads are loose and the fabric isn’t unraveling, trimming alone may be enough.
Method 2: The Whipstitch
The whipstitch is one of the simplest hand stitches, and a popular choice for finishing a raw edge by hand. The needle passes in and out of the fabric in a series of stitches that wrap around the edge, which creates a neat finish and keeps the threads from unraveling.
Best for: Wool, cotton, linen, and other medium-weight woven scarves.
How to do it:
- Thread your needle with a length of thread about 18 inches long, and tie a small knot at the end.
- Start on the underside of the scarf, about a quarter inch from the edge, and bring the needle up through the fabric near the edge.
- Wrap the thread around the edge and push the needle through the fabric from the same side again, a little way along.
- Continue in a spiral pattern, keeping stitches small (about an eighth of an inch apart) and the tension even, so the edge lies flat without puckering.
- When you reach the end, make a few small stitches in the same spot to secure the thread, and trim the excess.
Tips: Pull the thread snug but not tight. Too much tension will make the edge ripple, and too little will leave gaps where threads can escape.
Method 3: The Blanket Stitch
The blanket stitch is both functional and decorative. It creates a clean, looped edging that reinforces the fabric, and some sewers prefer it to the whipstitch when overcasting an edge by hand. It’s also a good choice when the edge will be visible, since it looks intentional.
Best for: Thicker wool scarves, fleece, and any edge where you want a decorative finish.
How to do it:
- Start with a knot on the back, and bring the needle up near the edge.
- Move a short distance along the edge, insert the needle from the front to the back, and bring it up again at the very edge, looping the thread under the needle before pulling it through.
- Pull gently to form a loop along the edge.
- Repeat along the edge, keeping the loops the same size and the spacing consistent.
- Secure the thread at the end with small stitches on the back.
Tips: Choose a thread that either matches the scarf closely for a subtle finish or contrasts for a decorative border.
Method 4: A Hand-Rolled or Folded Hem
A folded hem encloses the raw edge so no threads are exposed, which makes it the cleanest and most durable hand-sewn finish. It works especially well on lightweight woven fabrics.
Best for: Silk, cotton, lightweight viscose, and other thin woven scarves. Hand-sewing with fine thread and tiny stitches is generally considered the best approach for delicate fabrics like silk and organza.
How to do it:
- Trim the edge neatly.
- Fold the raw edge over by about an eighth of an inch and crease it with your fingers (or press lightly with an iron, using a pressing cloth and the right temperature for your fabric).
- Fold it over again by the same amount so the raw edge is hidden inside the fold, and pin or clip it.
- Use a slip stitch, which catches just a few threads of the scarf and then a tiny bit of the fold, so the stitches are nearly invisible from the front.
- Work all the way along the edge, then secure the thread at the end.
Tips: Use the finest needle and thread you can, and take small stitches. If the scarf is very sheer, test on a hidden corner first.
Method 5: Liquid Fray Sealant
If you don’t want to sew at all, a liquid fray sealant is the quickest fix. Products like Dritz Fray Check seal the fabric’s fibers together so they can’t come apart, and they stay flexible so they won’t make the edge feel stiff. Aleene’s Stop Fraying is another liquid option that works the same way.
Best for: Small repairs, thick or bulky fabrics, and edges that you don’t want to stitch.
How to do it:
- Trim the loose threads.
- Lay the scarf on a protective surface, like a piece of plastic or wax paper, so the sealant doesn’t soak through to the table.
- Apply a thin, even line of sealant along the edge, using the applicator tip and working slowly to avoid dripping onto the visible part of the scarf.
- Let it dry completely, which can take a while, so avoid handling the edge until it’s dry.
Important notes:
- Test first. Try a tiny amount on a hidden corner to check that it doesn’t darken or stain your fabric, especially on silk and other delicate materials.
- Washing. Fray Check washes out of most fabrics with water and detergent, but it may become permanent on some synthetic fabrics, so don’t assume it will come out.
- Use sparingly. Too much can soak through, stiffen the edge, or leave a visible mark.
Method 6: Fabric Glue
Fabric glue is another no-sew option. You apply a thin line along the edge, and it holds the threads in place as it dries.
Best for: Decorative edges, light-use scarves, and quick temporary fixes.
How to do it:
- Trim loose threads and lay the scarf flat on a protected surface.
- Apply a very thin line of glue along the frayed edge, or add small dots along the edge.
- Press gently with a clean finger or the back of a spoon, and let it dry fully before handling.
Limits to know about:
- It doesn’t add much strength. Fabric glue is effective for quick repairs, but it won’t provide significant strength, so avoid relying on it for an edge that will be under stress.
- Read the label. Make sure the glue is right for your fabric, and check whether it’s machine washable before you wash the scarf.
- It can stiffen or show. Apply sparingly, and test on a hidden spot first.
Method 7: Iron-On Hem Tape
Iron-on hem tape bonds a folded edge in place using heat, without a single stitch. It’s a clean, quick way to finish a raw edge as long as the fabric can handle the heat.
Best for: Cotton, linen, and other woven fabrics that tolerate an iron.
How to do it:
- Trim the edge, then fold it over once by about the width of your tape.
- Place the tape inside the fold, keeping it fully tucked inside so the adhesive doesn’t touch your iron.
- Cover with a pressing cloth, and press with the iron at the temperature appropriate for your fabric, holding it in place instead of sliding.
- Let it cool completely before handling, so the bond can set.
Limits to know about:
- Not suitable for every fabric. Hem tape isn’t a good match for some fabrics and designs, so avoid it on delicate silk, very sheer scarves, and anything that can’t take heat.
- It can add stiffness. The finished edge may feel a bit firmer than the rest of the scarf.
- Knits don’t work well. Fusible tape isn’t designed to stretch, so skip it on stretchy or loosely knit scarves.
Method 8: Repairing Fringe and Knitted Scarves
Knitted scarves and fringed scarves have their own repair techniques, since they don’t fray like woven fabric.
Fixing loose fringe:
- Comb out the fringe gently with your fingers or a wide-tooth comb.
- Trim any uneven or badly frayed strands so the length is consistent.
- If strands are coming loose from the scarf body, group a few strands together and tie a small, snug overhand knot close to the scarf edge. This is a common way to secure fringe and keep it from pulling out.
- For a decorative finish, tie knots in a consistent pattern across the whole edge.
Fixing an unraveling knit:
- Don’t pull the loose yarn, since pulling can cause more unraveling.
- Thread a blunt or tapestry-style needle with a matching yarn (or with the loose end itself).
- Weave the loose yarn end back into the fabric, following the path of the stitches, then trim the excess.
- For a pulled loop, gently work the loop back to the inside of the fabric with the needle or a small crochet hook.
For a bigger run, it’s worth taking the scarf to a knitter or tailor rather than risking more damage.
Method Comparison Table
| Method | Best for | Strength | Look | Difficulty | Washable? |
|---|---|---|---|---|---|
| Trim and tidy | Very light fraying | Low | Natural | Very easy | Yes |
| Whipstitch | Medium-weight woven scarves | High | Visible but neat | Easy | Yes |
| Blanket stitch | Thick wool, fleece, decorative edges | High | Decorative | Easy to medium | Yes |
| Hand-rolled hem | Silk and lightweight wovens | Very high | Nearly invisible | Medium | Yes |
| Fray sealant | Small repairs, bulky fabrics | Moderate | Nearly invisible if used sparingly | Very easy | Usually, but can be permanent on some synthetics |
| Fabric glue | Decorative or light-use edges | Low to moderate | Can stiffen | Very easy | Check the label |
| Hem tape | Cotton, linen, heat-tolerant wovens | Moderate to high | Clean, can feel firm | Easy | Yes, once bonded |
| Fringe knots / knit repair | Fringe, knitted scarves | Moderate | Natural | Easy | Yes |
Best Method by Fabric Table
| Scarf fabric | Best method | Avoid |
|---|---|---|
| Wool or wool blend (woven) | Whipstitch or blanket stitch | Heavy glue that can stiffen the fabric |
| Cashmere or pashmina | Hand-rolled hem or whipstitch with fine thread | Hem tape and strong sealants |
| Cotton or linen | Whipstitch, hem tape, or hand-rolled hem | Too much glue |
| Silk or satin | Hand-rolled hem with fine thread | Hem tape and untested sealants |
| Polyester or viscose | Hand-rolled hem or whipstitch | Sealants that may become permanent without testing |
| Acrylic or wool knit | Weave in loose ends with a blunt needle | Fusible tape and glue |
| Fringed edge | Knotting and trimming | Cutting too much length at once |
Common Mistakes to Avoid
- Pulling loose threads. Pulling can unravel more of the fabric. Always trim.
- Using thread that doesn’t match. A contrasting thread makes stitches stand out. Match the scarf’s color as closely as you can.
- Stitching too tight. Overly tight stitches pucker the fabric, while loose stitches let threads escape.
- Skipping the test spot. Sealants, glues, and heat can discolor or stiffen delicate fabrics. Always test on a hidden corner.
- Using too much sealant or glue. A little goes a long way, and too much can soak through or leave a hard edge.
- Using hem tape on delicate fabrics. Heat and adhesive can damage silk and very sheer materials.
- Washing before the sealant or glue has cured. Give it enough time to dry fully.
- Ignoring small fraying. Repair early, before the damage spreads.
How to Prevent Fraying in the First Place
- Trim loose threads instead of pulling them. One tug can undo several inches of fabric.
- Wash gently. Hand wash or use a delicate cycle in a mesh bag for scarves that fray easily, following the care label.
- Avoid snag hazards. Zippers, jewelry, bag hardware, and rough surfaces can catch threads.
- Store flat or loosely folded. Tight knots and cramped storage can stress the edges.
- Finish raw edges at the start. If you make or buy an unfinished scarf, a quick hem or sealant before the first wear is much easier than repairing a frayed edge later.
- Check edges regularly. A quick look every few wears lets you catch fraying while it’s still easy to fix.
When to Take It to a Professional or Let It Go
DIY repairs handle most fraying, but a few situations are better left to a professional or a replacement:
- A valuable or sentimental scarf, such as a cashmere heirloom or a designer silk scarf, where an imperfect repair could reduce its value.
- Large tears or big runs, especially in knitwear, where a skilled repair may be needed.
- Fabric that’s worn thin along the whole edge. If the fabric itself is weak, repairs may not hold.
- Fabrics you can’t identify, where testing a sealant or heat could cause damage.
A tailor or a seamstress can often finish an edge for a modest fee, and for a well-loved scarf, that’s often worth it.
Repair Kit Cost Table
| Item | Approx. cost | Used for |
|---|---|---|
| Needle and thread set | ~$3–$5 | Whipstitch, blanket stitch, hand-rolled hem |
| Small sewing scissors | ~$3–$6 | Trimming threads |
| Liquid fray sealant | ~$4–$7 | Quick no-sew edge repairs |
| Fabric glue | ~$3–$6 | Decorative or light-use repairs |
| Iron-on hem tape | ~$3–$6 | Fusing a folded edge |
| Total for a full kit | ~$15–$30 | Covers every method above |
Prices are approximate and may change at any time depending on the store, brand, size, and current sales.
You don’t need everything. A needle, thread, and scissors cost only a few dollars and handle most scarf repairs by themselves.
📌 YOU MIGHT ALSO LIKE:
How to Fix a Stuck or Broken Zipper on Your Favorite Bag in 30 Seconds
The $1 Kitchen Pantry Secret to Preventing Cheap Rings from Turning Your Fingers Green
FAQ
What’s the easiest way to fix a fraying scarf edge without sewing?
A liquid fray sealant like Fray Check is the quickest no-sew fix. Trim the loose threads, apply a thin line along the edge, and let it dry. Test on a hidden spot first, since it can stain delicate fabrics.
Is fabric glue strong enough for a scarf?
It works for light-use or decorative edges, but fabric glue doesn’t provide significant strength, so it’s not the best choice for an edge that gets a lot of stress. Hand-sewing is more durable.
Will fray sealant wash out?
It washes out of most fabrics with water and detergent, but it may be permanent on some synthetic fabrics, so test before you assume it’s reversible.
Can I use iron-on hem tape on a silk scarf?
It’s generally not recommended for delicate or sheer fabrics. For silk, a hand-rolled hem with fine thread is a safer choice.
How do I stop a knit scarf from unraveling?
Don’t pull the loose yarn. Use a blunt needle to weave the loose end back into the fabric, following the stitch path, then trim the excess. For a larger run, take it to a knitter or tailor.
What stitch should I use to stop fraying by hand?
A whipstitch is simple and gives an even finish, while a blanket stitch is a good choice for thicker fabrics or a decorative edge. For lightweight fabrics like silk, a hand-rolled hem with a slip stitch is the cleanest option.
The Bottom Line
A fraying scarf edge is one of the easiest repairs to handle at home. Start by trimming the loose threads, then choose the method that matches your fabric: a whipstitch or blanket stitch for wool and cotton, a hand-rolled hem for silk and other delicate woven scarves, a fray sealant or glue for quick no-sew fixes, or hem tape for heat-tolerant fabrics. Test any product on a hidden corner first, work in small steps, and repair fraying early. For a few dollars and about ten minutes, you can keep a favorite scarf in rotation for many more seasons.
For more budget-friendly wardrobe repair guides and DIY fixes, check out more posts over at The Frugal Glow.
Sources: