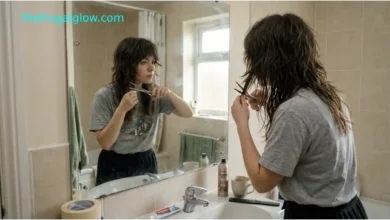
How to Master the “Butterfly Cut” at Home: Save $150 on Your Next Salon Appointment

In This Article
- The $150 Question Nobody Is Asking
- What Exactly Is the Butterfly Cut and Why Is Everyone Getting It
- What Salons Are Actually Doing When They Charge You $150
- What You Need Before You Start
- The Step-by-Step Butterfly Cut Guide
- The Face-Framing Pieces — The Secret That Makes It Work
- How to Style Your Butterfly Cut at Home
- Common Mistakes and How to Avoid Them
- The Real Math: What This Saves You Over a Year
- Final Thoughts
- Frequently Asked Questions About the Butterfly Cut at Home
The $150 Question Nobody Is Asking
In the spring of 2023, a haircut went viral.
Not in the way haircuts usually go viral — through a celebrity sighting or a magazine spread or a single influential photograph that gets screenshotted ten thousand times before anyone has had their morning coffee. This one moved differently. It spread through TikTok in the particular way that TikTok spreads things: through ordinary people in ordinary bathrooms holding their phones at arm’s length, turning their heads side to side, and saying some version of “I just got the butterfly cut and I am never going back.”
Within six months, salons across the country were booking out weeks in advance for the cut. The average price, according to booking data from StyleSeat and Vagaro, had climbed to between $120 and $180 depending on your city, your stylist’s following, and what neighborhood the salon happened to occupy. In major metro areas — New York, Los Angeles, Chicago, Miami — $200 was not uncommon if the stylist had over 100,000 Instagram followers, which is apparently now a pricing tier.
Here is the question nobody was asking out loud, but that a significant number of people were clearly thinking:
What is actually happening to my hair when a stylist does this cut? And could I learn to do it myself?
The answer to the first question is more straightforward than the industry would prefer you to know. The answer to the second question is yes — with the right information, the right tools, and the willingness to approach your own reflection with a pair of scissors and a reasonable level of calm.
This is that information.
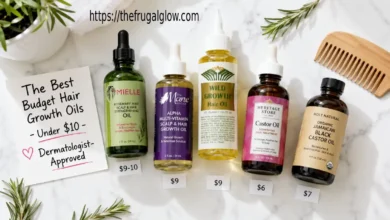
Scalp Oiling on a Budget: The Best $10 Drugstore Oils That Beat $60 Luxury Brands
What Exactly Is the Butterfly Cut and Why Is Everyone Getting It
The butterfly cut is a layered haircut characterized by two defining features: heavy, voluminous layers through the mid-lengths and ends that create a rounded, wing-like silhouette when the hair is parted in the middle, and shorter face-framing pieces that fall forward around the face and blend into the longer layers behind them.
When you look at someone with a well-executed butterfly cut from the front, you see the shape that gives the cut its name: the face-framing pieces form the upper “wings” of the butterfly, and the fuller layers through the body of the hair form the lower wings. It is romantic, slightly retro — the DNA of the cut traces back to the voluminous layered styles of the late 1970s — and extraordinarily flattering on a wide range of face shapes because the layering adds width and dimension where most faces benefit from it.
The cut works on straight hair, wavy hair, and loosely curly hair. It works on thick hair and fine hair, though the execution differs slightly between the two. It does not work particularly well on very tightly coiled hair, where the layering pattern produces a different silhouette than the characteristic butterfly shape.
The reason it went so dramatically viral is simple: it is one of those cuts that looks genuinely transformative in a before-and-after video, and it photographs beautifully, and it is legitimately flattering. It is not a trend that exists purely on social media and looks ordinary in real life. The butterfly cut delivers what it promises.
What it does not require is $150 and a stylist with a waiting list.
The $5 Silk Pillowcase Hack: How to Wake Up with Perfect Hair Without Expensive Stylers
What Salons Are Actually Doing When They Charge You $150
Let us talk about what is actually happening in that salon chair.
A butterfly cut involves three technical elements: a base cut that establishes the length and removes bulk, interior layers that create the voluminous rounded silhouette, and face-framing pieces that are cut shorter and blended into the layers. A skilled stylist executes these three elements with a combination of point cutting (holding the scissors vertically and cutting into the ends of the hair to remove bulk and add texture) and slice cutting (drawing the scissors through sections at an angle to create seamless layers).
The tools involved are haircutting scissors — which are different from regular scissors in that they are sharper, longer-bladed, and precisely calibrated for clean cuts — and a rat-tail comb for sectioning.
That is the technical reality of the cut. It is not simple, and a genuinely skilled stylist brings years of training and muscle memory to the execution that matters for the quality of the result. I want to be honest about that. A professional butterfly cut done by someone who is excellent at their craft is a better butterfly cut than most people will achieve on their first home attempt.
But here is the thing that the salon industry has not particularly incentivized anyone to tell you: the butterfly cut is considerably more learnable at home than most complex haircuts, for one specific reason. The interior layers and face-framing pieces that define the look are inherently forgiving — they are meant to be soft, textured, and slightly imprecise. The controlled imperfection is the aesthetic. A slightly uneven layer in a butterfly cut does not read as a mistake. It reads as intentional texture.
This is not true of a blunt bob, where a millimeter of unevenness is immediately visible. It is not true of a precision cut with defined lines. It is very much true of a soft, layered butterfly cut, where the whole point is movement and dimension and the kind of organic variation that a perfectly uniform cut would actually undermine.
You are not trying to replicate a surgical result. You are trying to achieve a look that is, by its nature, soft and imprecise. That is a meaningful advantage.
The Best Shark FlexStyle Alternatives: Get Salon-Quality Hair at Home for Less
What You Need Before You Start
Sharp haircutting scissors. This is non-negotiable and the single investment worth making if you plan to cut your own hair with any regularity. Regular household scissors will work in an emergency but produce split ends and ragged cuts that make the result look homemade in the wrong way. A decent pair of haircutting shears costs $15 to $25 on Amazon — brands like Equinox Professional and Suvorna have solid entry-level options — and will last for years with basic care. If you have a pair from a previous home haircut attempt, check their sharpness by cutting through a single sheet of paper: they should glide cleanly without tearing.
A rat-tail comb. For sectioning the hair precisely. A standard fine-tooth comb works as a substitute. Cost: $3 to $5.
Two or three hair clips or scrunchies. For holding sections out of the way while you work.
A handheld mirror. For checking the back and sides as you go.
Good lighting. Natural light near a window is ideal. The worst possible lighting for cutting your own hair is a single overhead bulb that casts downward shadows — it makes it genuinely difficult to see what you are doing.
Clean, dry hair. The butterfly cut is easiest to execute on clean, completely dry hair because you can see exactly how the layers fall and how the length sits. Cutting wet hair introduces the variable of shrinkage — hair that looks the right length wet can be an inch shorter than expected once it dries, particularly in wavy or curly textures.
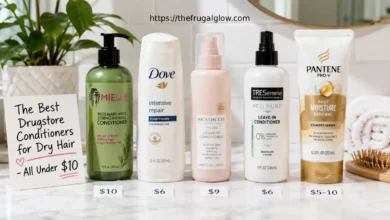
Affordable Hair Care Hacks: Smart, Low-Cost Habits That Actually Improve Your Hair
The Step-by-Step Butterfly Cut Guide
Work slowly. The most important rule of cutting your own hair is that you can always take more off and you can never put it back. Cut less than you think you need to cut. Check the result. Cut a little more if necessary. Repeat.
Step 1 — Part and Section
Part your hair down the center from forehead to nape. This center part is the structural foundation of the butterfly cut and needs to be clean and precise. Use the rat-tail end of your comb to draw the part.
Clip the right side of your hair out of the way with a clip or scrunchie. You will work on the left side first, then mirror the process on the right.
Step 2 — Establish Your Length
Take the front section of the left side — roughly the portion that falls in front of your ear — and hold it between your index and middle fingers. This is the section that will become one of the face-framing pieces. Do not cut it yet. Just identify where you want it to fall — most people choose somewhere between the chin and the collarbone for the shortest face-framing piece, though this is a matter of personal preference and face shape.
Step 3 — Cut the Interior Layers
This is the step that creates the volume and the butterfly silhouette. Gather all the hair on the left side into a loose ponytail at the top of your head — not a tight, smooth ponytail, but a loose gathering that keeps the hair roughly together. Hold the gathered hair straight up toward the ceiling and twist it gently once.
Slide your fingers down the gathered twist to approximately the length you want your shortest interior layer to be. Cut straight across. This technique — sometimes called the “unicorn cut” for layers — creates multiple layer lengths throughout the hair when it falls because different sections of hair travel different distances to reach the same cutting point. The result is soft, rounded layers that blend naturally.
Do not cut more than two to three inches from the end of the gathered hair on your first pass. Check how the layers fall before considering whether to go shorter.
Step 4 — Repeat on the Right Side
Mirror the process exactly on the right side. Gather, twist, hold to the same point, cut. Consistency between the two sides is what creates the symmetrical butterfly silhouette.
Rosemary Water 101: How to Make the Viral Hair Growth Spray at Home for Under $2
Step 5 — Cut the Face-Framing Pieces
This is the step that most dramatically transforms the look and is worth taking the most time on.
Release all clips and let your hair fall naturally with the center part. Take a small triangular section from the front of each side — roughly the width of one eyebrow — and hold it forward in front of your shoulder.
Here is the technique: hold the section loosely between two fingers at the length where you want the face-framing piece to begin — typically two to four inches shorter than your longest layer. Point-cut into the ends at a slight angle rather than cutting straight across: hold your scissors vertically and make small snips into the hair rather than one clean cut. This creates a soft, feathered edge that blends invisibly into the longer layers behind it rather than creating a visible blunt line.
Work in very small increments. Take off half an inch, check how it falls, take off a little more if needed. The face-framing pieces can always be adjusted but they cannot be uncut.
Step 6 — Blend and Check
Run your fingers through your hair, shake it out, and look at the overall shape. The layers should fall into a soft rounded silhouette. The face-framing pieces should fall forward around your face and blend smoothly into the layers behind them.
Look for any sections that are noticeably longer or shorter than their neighbors — these are the areas that need blending. Use point-cutting to soften any hard lines or abrupt length changes.
Stop Wasting Money: Why Your $50 Shampoo is Actually Ruining Your Hair.
The Face-Framing Pieces — The Secret That Makes It Work
The face-framing pieces are where the butterfly cut lives or dies, and they are the element that most home haircut attempts get wrong — not because the technique is difficult, but because most people cut them too short too quickly and too bluntly.
The face-framing pieces should start at a length that is flattering to your face shape. As a general guideline: round faces benefit from pieces that start at or below the jaw, which elongates the face. Oval faces can start them anywhere from the chin down. Heart-shaped faces look best with pieces that start at or below the cheekbones. Long faces benefit from slightly shorter pieces that add width at the mid-face.
The other crucial element is the cutting angle. Face-framing pieces cut straight across look dated and heavy. Face-framing pieces cut with a consistent point-cutting technique — those small vertical snips into the ends — look soft, modern, and deliberately textured. Take your time with this step. It is what makes the difference between a butterfly cut that looks salon-done and one that looks like you tried something at home.
Curly Hair Care on a Budget: A Smart Guide to Affordable, Proven Products That Actually Work
How to Style Your Butterfly Cut at Home
The butterfly cut looks best with some additional styling — it is not a wash-and-go cut in the way that blunt cuts are. The good news is that the styling is straightforward and can be done with tools most people already own.
For straight to wavy hair: Apply a small amount of mousse or texturizing spray to damp hair before drying. Use a round brush while blow-drying, directing the air downward to smooth the cuticle and add bounce to the layers. When dry, use a 1-inch or 1.25-inch curling wand to add soft waves to the ends of the face-framing pieces and the outer layers — wrap sections away from the face, hold for 8 to 10 seconds, release. Finish with a light-hold flexible hairspray.
For wavy to curly hair: Apply curl cream or a styling gel to soaking wet hair and scrunch to encourage your natural curl pattern. Diffuse on low heat, lifting sections of hair toward the scalp as you dry to encourage volume at the root. The butterfly cut layers will enhance your natural curl pattern by removing weight and allowing individual curls to spring more freely.
The no-heat option: French braid damp hair in two braids from the crown down, leave overnight, release in the morning and finger-separate the waves. The butterfly cut frames this look beautifully.
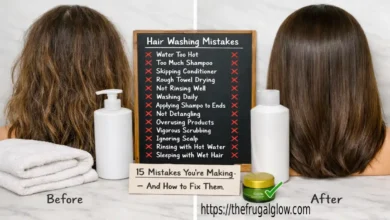
Common Mistakes and How to Avoid Them
Cutting too much at once. The most common and irreversible mistake. The correction is simply to slow down and cut in much smaller increments than feel necessary. Half an inch at a time is not too conservative.
Cutting wet hair. Wet hair stretches and appears longer than it is dry. If you cut to length while wet, you will almost always end up shorter than intended when the hair dries. Work on dry hair whenever possible.
Using dull scissors. Dull scissors push the hair aside rather than cutting cleanly through it, producing split ends and ragged edges that make any haircut look homemade. Sharp scissors are the single most important tool investment.
Rushing the face-framing pieces. These are the pieces that frame your face and appear in every photograph and every conversation. They deserve the most time, the most care, and the smallest incremental cuts of anything in the process.
Not checking the back. Use a handheld mirror against a bathroom mirror to check the back of your head at multiple angles. Asymmetry that is invisible from the front is often visible from the back, and catching it during the cut rather than after is considerably less distressing.
The Real Math: What This Saves You Over a Year
Most people with medium to long hair get a trim or cut every two to three months — roughly four to five salon visits per year. At an average butterfly cut price of $150 plus a 20 percent tip, each visit costs approximately $180. Four visits: $720. Five visits: $900.
The one-time investment to cut your own hair at home:
| Item | Cost |
|---|---|
| Haircutting scissors | $20 |
| Rat-tail comb | $4 |
| Hair clips | $5 |
| Handheld mirror | $8 |
| Total setup cost | $37 |
Year one savings after setup: approximately $683 to $863.
Year two savings (no new purchases needed): approximately $720 to $900.
Three-year total savings: approximately $2,100 to $2,600.
For $37 in tools and the time it takes to read this article, you are looking at multi-thousand-dollar savings over the next few years. The math is not complicated. The decision should not be either.
Final Thoughts
The story of the butterfly cut is, in miniature, the story of the beauty industry — which is the story of a set of skills that were once widely shared among ordinary people, that were gradually professionalized and monetized to the point where most people feel they cannot safely be trusted with their own hair, and that are now being slowly repatriated to the people they belong to, one viral TikTok tutorial at a time.
There is a version of haircare expertise that genuinely requires a professional — complex chemical treatments, precision geometric cuts, corrective color work. The butterfly cut is not that. It is a layered cut designed around softness and organic variation, and those qualities make it genuinely learnable at home by people who have never cut hair before and who approach the task with patience, sharp scissors, and the willingness to take it slow.
You are not going to get it perfect on the first try. Nobody does. But the beauty of this particular cut — and I use the word beauty deliberately — is that imperfect is part of the point. The texture, the movement, the soft variation between layers. These are features, not bugs. And they are achievable, at home, for $37 in tools and whatever this article cost you in time.
The $150 is yours. Keep it.
At The Frugal Glow, we believe that looking like a million dollars should not cost anywhere near it. DIY beauty tutorials, budget haircare, smart money moves for the style-conscious — this is what we do. Because the best version of you does not have a salon price tag. She has a good pair of scissors and the confidence to use them.
Frequently Asked Questions About the Butterfly Cut at Home
Q1: What is a butterfly cut and how is it different from regular layers?
The butterfly cut is a specific layered haircut defined by two signature elements: heavy interior layers through the mid-lengths and ends that create a rounded, voluminous silhouette, and shorter face-framing pieces that fall forward around the face and blend into the longer layers behind. What distinguishes it from generic layering is the intentional butterfly wing shape created when the hair is parted down the center — the face-framing pieces form the upper wings and the fuller body layers form the lower wings. Regular layering can mean many things and does not necessarily produce this specific silhouette. The butterfly cut also typically features more dramatic length variation between the face-framing pieces and the longest interior layers than a standard layered cut.
Q2: What hair types does the butterfly cut work best on?
The butterfly cut works beautifully on straight, wavy, and loosely curly hair textures — roughly Type 1 through Type 2C on the standard hair typing scale. On straight hair, it creates movement and dimension that straight hair often lacks. On wavy hair, it enhances the natural wave pattern by removing weight and allowing the waves to form more freely. On loosely curly hair, the layering adds volume and spring. The cut becomes less predictable on tighter curl patterns (Type 3B and above) because the shrinkage factor makes the layer lengths harder to control, and the silhouette that results can differ significantly from the classic butterfly shape. Very fine hair can also achieve the look but may need more careful layering to avoid appearing too sparse.
Q3: How long does hair need to be for a butterfly cut?
The butterfly cut works best on hair that is at least shoulder length — typically eight inches or more from the root. The cut requires enough length to create meaningful variation between the face-framing pieces and the interior layers, and on shorter hair, that variation becomes difficult to achieve without the face-framing pieces being extremely short. The ideal length range is shoulder to mid-back, where the layers have room to create the characteristic rounded silhouette without the weight of very long hair pulling the layers flat. On very long hair (past the waist), the cut still works but the layers may need to be more dramatic to show against the weight of the length.
Q4: Can I do a butterfly cut on curly hair at home?
Yes, with modified technique and realistic expectations about the result. On curly hair, the butterfly cut produces a different silhouette than on straight or wavy hair — typically more rounded and voluminous rather than the classic wing shape. The key modification for curly hair is to cut on dry hair rather than wet, because the curl shrinkage factor means that cuts made on wet curly hair are almost always shorter than expected when dry. For the face-framing pieces specifically, err on the side of cutting very conservatively — curly face-framing pieces spring up significantly when dry and can end up much shorter than intended. The interior layering technique using the gathered ponytail method works well on curly hair and produces lovely results.
Q5: How often do I need to trim a butterfly cut to keep it looking fresh?
Every eight to twelve weeks for most people, depending on how fast your hair grows and how defined you want the layers to remain. The butterfly cut, like all layered cuts, grows out in a way that gradually reduces the drama of the layers — the interior layers grow longer and begin to blend with the overall length, and the face-framing pieces lose their distinctiveness. A light trim every two to three months — even just half an inch off the ends and a refresh of the face-framing pieces — keeps the cut looking intentional. The advantage of learning to do this at home is that these maintenance trims are quick (15 to 20 minutes once you know what you are doing) and represent the majority of the annual salon cost for most people.
Q6: What scissors should I buy for cutting my own hair at home?
Look for scissors specifically labeled as haircutting shears or hair scissors — not craft scissors, kitchen scissors, or general-purpose scissors. The key differences are blade length (hair scissors typically have 5.5 to 6.5 inch blades), blade sharpness (hair scissors are calibrated for clean cuts through multiple hair strands without pulling), and the convex blade design that creates a smooth cutting action. For a first pair at the lowest reasonable quality threshold, the Equinox Professional Razor Edge and Utopia Care brands both have entry-level options in the $15 to $25 range that are adequate for home use. Above $40, you enter professional territory with significant quality improvements — worth it if you cut your own hair regularly. Avoid anything marketed as “multipurpose” or priced under $10.
Q7: Will a DIY butterfly cut look as good as a salon version?
Honestly — your first attempt will likely not be as polished as a skilled stylist’s work, and it is worth being clear-eyed about that. What it will be is recognizably a butterfly cut with the characteristic layers, volume, and face-framing pieces that define the style. With each subsequent trim and adjustment, your technique will improve and the results will get closer to professional quality. Many people who have been cutting their own hair for a year or more produce results that are genuinely indistinguishable from salon work in photographs and in person. The butterfly cut is more forgiving than most home haircut attempts because the soft, textured nature of the style accommodates slight imprecision in a way that blunt or precision cuts do not.
Q8: How do I fix a butterfly cut that I cut too short?
Wait, and embrace what you have in the meantime. There is no shortcut for growing hair back — the average rate is approximately half an inch per month, which means a one-inch miscalculation takes two months to correct. In the interim, the most effective strategies are leaning into the shorter length by styling in ways that flatter it (tighter waves or curls on shorter face-framing pieces often look intentional and chic), using hair accessories strategically to manage pieces that are awkwardly short, and resisting the urge to cut the surrounding hair to “match” — which typically results in a cascading series of corrections that leave you with a significantly shorter overall cut than you started with.
Q9: Can I do a butterfly cut on someone else’s hair at home?
Yes — and cutting someone else’s hair is in some ways easier than cutting your own because you have a better angle and a clearer view of the overall shape. The technique is identical to the self-cut version. The main adjustment is positioning: have the person sit in a chair at a height that allows you to work comfortably, ensure the lighting is good, and have them hold a mirror so they can provide feedback on how the face-framing pieces are falling as you go. Work slowly and communicate throughout — the person in the chair should be your best source of real-time feedback on whether the face-framing pieces are landing where they want them.
Q10: Do I need to use thinning shears for a butterfly cut?
Thinning shears are not required for the butterfly cut, but they can be a useful finishing tool for very thick hair where the layers feel heavy even after the primary cut. Thinning shears have one serrated blade that removes approximately 30 percent of the hair in each pass while leaving the surface smooth — they reduce bulk without changing the overall length or shape. For medium to fine hair, the point-cutting technique described in this guide achieves sufficient texture and lightness without thinning shears. If you have very thick hair and want to invest in one additional tool beyond basic scissors, a pair of entry-level thinning shears runs about $15 to $20 and can meaningfully improve the result on thick hair textures.
Q11: What is the difference between a butterfly cut and a wolf cut?
Both cuts feature layering and face-framing pieces, and they are frequently confused — but they produce meaningfully different silhouettes. The wolf cut is inspired by 1970s shag cuts and features shorter, more dramatic layers at the crown that create a distinctly rocker-adjacent, slightly disheveled look with visible texture at the roots. The butterfly cut is softer and more romantic — the layers are concentrated in the mid-lengths and ends rather than starting high at the crown, producing the characteristic rounded wing shape rather than the shaggy crown of the wolf cut. The butterfly cut is generally considered more versatile and suitable for a wider range of settings (including professional environments), while the wolf cut has a more distinct, editorial personality. Both can be done at home, but the butterfly cut is somewhat more forgiving for a first attempt.
Q12: How do I know if a butterfly cut will suit my face shape?
The butterfly cut is genuinely one of the more universally flattering haircuts available because the face-framing pieces can be adjusted to complement almost any face shape. For oval faces — often described as the most versatile face shape for haircuts — the butterfly cut works at virtually any length variation. For round faces, longer face-framing pieces that start at or below the jaw create elongation. For square faces, the softness of the layered ends and curved silhouette counterbalances strong jaw angles. For heart-shaped faces, face-framing pieces that start at the cheekbone or below add width at the mid and lower face. For long or oblong faces, shorter face-framing pieces add width and balance the length. The only face shape that requires more careful consideration is very round — in that case, avoid face-framing pieces that end exactly at the widest point of the face, as this emphasizes roundness rather than softening it.