The 3-Ingredient DIY Vitamin C Serum That Actually Works (And Costs Under $5)

🔗 Jump Links
- Why Vitamin C Serum Is a Non-Negotiable
- Why Store-Bought Serums Are Kinda Robbing You
- The 3 Ingredients You Actually Need
- Step-by-Step: How to Make It at Home
- How to Use Your DIY Vitamin C Serum
- Tips to Make It Last Longer
- Is This as Good as the Store-Bought Stuff?
- Skin Types & Who Should Be Careful
- The Real Talk: What to Expect
- Frequently Asked Questions (FAQ)
Introduction
Okay, real talk — if you’ve ever stood in the skincare aisle at Sephora or Ulta and watched yourself drop $75 on a tiny little bottle of Vitamin C serum, only to go home, use it for two weeks, and wonder if it’s even doing anything… you’re not alone, sis.
Vitamin C serums are everywhere right now, and honestly? The hype is real. But the price tags? Absolutely not. We’re out here spending grocery money on skincare, and for what?
Here’s the thing nobody in the beauty industry wants you to know: you can make a genuinely effective Vitamin C serum at home using just 3 ingredients, and it’ll cost you under $5 per batch. Not $5 for a tiny bottle — $5 for multiple batches.
I know what you’re thinking. “Does this actually work, or is this one of those TikTok things that sounds good but does nothing?” Girl, I’ve tested this. I’ve done the research. And I’m going to walk you through everything — the ingredients, the science, the exact recipe, and all the tips and tricks to make it work for your skin.
This is the kind of skincare hack that makes you feel like you cracked a secret code. And once you try it, you’re going to wonder why you ever paid full price again.
Let’s get into it.
How to Save Money on Beauty Products: 12 Habits to Cut Your Spending in Half
Why Vitamin C Serum Is a Non-Negotiable
Before we talk DIY, let’s make sure we’re on the same page about why Vitamin C is such a big deal in skincare. Because this isn’t just a trend — this is backed by actual dermatologists and science.
What Does Vitamin C Actually Do for Your Skin?
Vitamin C (specifically in the form of L-Ascorbic Acid) is one of the most well-researched skincare ingredients on the planet. Here’s what it’s really doing when you apply it:
1. Brightening Dark Spots and Hyperpigmentation
Vitamin C inhibits melanin production — that’s the pigment that causes dark spots, sun spots, and uneven skin tone. If you’re dealing with post-acne marks or dullness, this is your best friend.
2. Boosting Collagen Production
This is the big one. Vitamin C is essential for collagen synthesis in your skin. More collagen = firmer, plumper skin. It’s literally anti-aging in a bottle.
3. Protecting Against Free Radical Damage
Every day, your skin gets hit with UV rays, pollution, stress, and environmental junk that breaks down healthy cells. Vitamin C is a powerful antioxidant that neutralizes those free radicals before they can do damage.
4. Evening Out Skin Tone
Regular use of Vitamin C leads to a more radiant, even complexion. It’s not overnight, but give it 4–6 weeks and people will start asking you what you’re doing differently.
5. Reducing Inflammation
If your skin gets red, irritated, or puffy easily, Vitamin C has anti-inflammatory properties that can help calm things down.
The bottom line? Vitamin C is not optional if you care about your skin. It’s a staple. The question is just how much you’re going to pay for it.
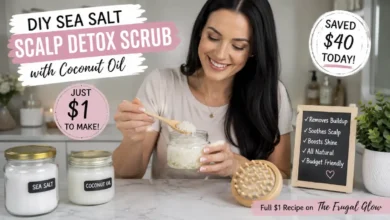
5 Banana Peel Beauty Hacks for Glowing Skin (The $0.00 Glow)
Why Store-Bought Serums Are Kinda Robbing You
Let’s be real about what’s happening when you buy that $80 bottle from a fancy skincare brand.
You’re paying for:
- Marketing — those gorgeous ads and influencer deals aren’t free
- Packaging — pretty bottles cost money
- Brand prestige — you’re paying for the name on the label
- Retail markup — Sephora takes a cut, the brand takes a cut, everyone takes a cut
- Stabilizers and fillers — half the ingredients list is stuff to make the product shelf-stable for 2 years
Here’s the kicker: L-Ascorbic Acid, the active ingredient that actually does the work, is incredibly cheap in its pure form. We’re talking pennies per batch.
Meanwhile, many of those expensive serums use Vitamin C derivatives (like Ascorbyl Glucoside or Sodium Ascorbyl Phosphate) because they’re more stable — but they’re less effective than pure L-Ascorbic Acid. You’re paying more for a less potent version of the ingredient.
The beauty industry has been playing us, and it’s time to stop letting it happen.
DIY Flaxseed Gel: The $1 Natural Alternative to Expensive Curling Creams
The 3 Ingredients You Actually Need
Okay, here’s where it gets good. This recipe is genuinely simple. No chemistry degree needed, no exotic ingredients, no long shopping list. Just three things.
Ingredient #1: L-Ascorbic Acid Powder
This is the star of the show. Pure Vitamin C in its most potent form.
Why this form?
L-Ascorbic Acid is the most bioavailable form of Vitamin C — meaning your skin can actually absorb and use it most efficiently. It’s the gold standard in clinical skincare research.
Where to get it:
- Amazon (search “L-Ascorbic Acid powder cosmetic grade”)
- Bulk Apothecary
- Making Cosmetics website
- Some health food stores
Cost: A 4 oz bag runs about $8–$12 and will make dozens of batches. We’re talking cents per serum.
What concentration to use:
- Beginners / sensitive skin: 10%
- Normal skin: 15–20%
- Oily/thicker skin or more experience: 20%
Pro tip: Start with 10% and work your way up. More is not always better with Vitamin C — too high too fast can cause irritation.
Ingredient #2: Distilled Water
Not tap water. Not filtered water. Distilled water.
Why distilled specifically?
Tap water contains minerals, chlorine, and other stuff that can actually deactivate your Vitamin C and cause it to oxidize faster. Distilled water is pure H2O — nothing extra.
Where to get it:
- Literally any grocery store — it’s usually in the water aisle in gallon jugs
- Walmart, Target, CVS
Cost: About $1–$1.50 per gallon. That’s basically free.
Ingredient #3: Vegetable Glycerin
This is your humectant — it draws moisture from the air into your skin and helps the serum feel smooth and not just like water on your face.
Why glycerin?
- It gives the serum some slip and a more serum-like texture
- It helps the Vitamin C absorb better and stay on skin longer
- It’s deeply moisturizing on its own
- It acts as a mild preservative, helping extend the serum’s shelf life
Where to get it:
- Amazon, craft stores (Michael’s), health food stores, or Walmart pharmacy section
- Make sure it says “vegetable glycerin” or “USP grade” — you want food/cosmetic grade
Cost: About $6–$8 for a big bottle that will last you forever.
That’s literally it. Three ingredients. Let’s make this thing.
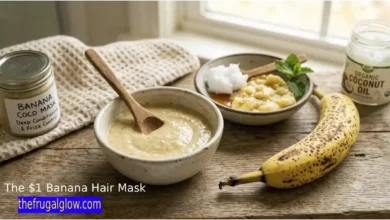
The Rice Water Secret: How to Grow Long, Shiny Hair for Pennies
Step-by-Step: How to Make It at Home
What You’ll Need (Equipment)
- A small amber or dark glass dropper bottle (1–2 oz size) — dark glass protects Vitamin C from oxidizing
- A measuring spoon or digital kitchen scale
- A small bowl or glass cup for mixing
- A plastic or wooden stirring stick (avoid metal — it can react with Vitamin C)
- Labels for your bottle (optional but cute)
You can get a pack of amber glass dropper bottles on Amazon for around $8–$10 for a set of 10. Worth every penny because they’ll keep your serum fresh longer.
The Recipe (for 1 oz / 30ml batch)
For a 15% Vitamin C Serum:
| Ingredient | Amount |
|---|---|
| L-Ascorbic Acid Powder | 0.15g (roughly 1/16 tsp) |
| Distilled Water | 27ml (about 1.8 tbsp) |
| Vegetable Glycerin | 3ml (about 1/2 tsp) |
For a 10% Vitamin C Serum (beginner-friendly):
| Ingredient | Amount |
|---|---|
| L-Ascorbic Acid Powder | 0.10g (a small pinch) |
| Distilled Water | 27ml |
| Vegetable Glycerin | 3ml |
Note: If you want to be precise (which I recommend for Vitamin C, because concentration matters), invest in a small digital kitchen scale that measures in grams. They’re like $10 on Amazon and they’re a game-changer for DIY skincare.
How to Use Coconut Oil for 10 Different Beauty Needs on a Budget
Step-by-Step Instructions
Step 1: Clean Everything
Wash your hands thoroughly. Clean your bowl, stirring stick, and bottle with rubbing alcohol or wash with soap and hot water. Let them dry completely. You don’t want any bacteria getting into your serum.
Step 2: Measure Your Water
Add your measured distilled water to the small bowl.
Step 3: Add the L-Ascorbic Acid Powder
Sprinkle in your L-Ascorbic Acid powder. Stir gently with your non-metal stirring stick until the powder is fully dissolved. It should look completely clear with no visible particles.
Important: The pH of this mixture should be between 2.5 and 3.5 for maximum effectiveness. L-Ascorbic Acid dissolved in distilled water will naturally hit this range at the concentrations we’re using. If you want to be extra precise, you can grab cheap pH test strips from Amazon for a few bucks.
Step 4: Add the Glycerin
Add your vegetable glycerin and stir to combine. The mixture might look very slightly viscous now — that’s perfect.
Step 5: Transfer to Your Dropper Bottle
Using a small funnel or dropper, transfer your serum into your dark amber glass bottle. Cap it tightly.
Step 6: Label It
Write the date on your bottle! This is important because Vitamin C serum has a shorter shelf life than store-bought (more on that below).
Total time: About 5 minutes. That’s it.
How to Use Your DIY Vitamin C Serum
Making it is just half the battle — using it correctly is what gets you results.
The Golden Rules of Using Vitamin C Serum
1. Use it in your morning routine
Vitamin C + sunlight = antioxidant protection throughout the day. That’s when you want it working. Apply it in the morning, not at night.
2. Apply to clean, slightly damp skin
After cleansing, pat your face until it’s damp (not dripping, just slightly moist). Damp skin absorbs serums better.
3. Use 3–5 drops
Less is more. Gently press a few drops into your skin — forehead, cheeks, chin, and neck. Don’t rub aggressively.
4. Wait before layering
Let it absorb for about 3–5 minutes before applying your moisturizer. This gives the Vitamin C time to penetrate before you layer anything on top.
5. Always — and I mean ALWAYS — follow with SPF
Vitamin C makes your skin more photosensitive. If you skip sunscreen after using Vitamin C, you’re basically undoing the whole point. Use at least SPF 30 every morning. No exceptions. Not negotiable. Full stop.
6. Use it consistently
You’re not going to see results overnight. Commit to using it every morning (or every other morning if your skin is sensitive) for at least 4–6 weeks before you judge whether it’s working.
Tips to Make It Last Longer
One of the only downsides of DIY Vitamin C serum is that it oxidizes faster than the commercially stabilized stuff. Here’s how to maximize its freshness:
1. Store in a dark, cool place
Light and heat are the enemies of Vitamin C. Keep your serum in a dark amber bottle (which you’re already doing) and store it somewhere away from sunlight — a medicine cabinet, drawer, or even the fridge.
2. Keep it in the fridge
Storing your serum in the refrigerator is a legit move. It slows down oxidation significantly. Plus, cold serum on your face in the morning? Low-key amazing.
3. Make small batches
Don’t try to make a month’s worth at once. Stick to 1–2 week batches. Since it takes 5 minutes to make, this is no big deal.
4. Watch for color changes
Fresh Vitamin C serum should be clear or very pale yellow. If it turns orange or brown, it has oxidized and lost its effectiveness. Toss it and make a fresh batch. Using oxidized Vitamin C can actually cause more free radical damage — the opposite of what you want.
5. Don’t get water in the bottle
Every time you open the dropper bottle, try to minimize exposure to air. This slows oxidation.
Shelf life: 1–2 weeks at room temperature, up to 3–4 weeks if refrigerated.
Is This as Good as the Store-Bought Stuff?
This is the real question, right? Let me be honest with you.
In some ways, yes — it’s actually better.
When you make your own serum fresh, you’re getting active, potent L-Ascorbic Acid that hasn’t been sitting in a warehouse for 6 months. Many store-bought serums, by the time they reach you, have already started to degrade. That’s why you’ll sometimes open a “new” serum and it’s already slightly yellow or orange.
Your fresh DIY serum has no stabilizers, no preservatives, no fillers — just the active ingredient doing its thing.
In some ways, it requires more maintenance.
Commercial serums are engineered to be shelf-stable for 1–2 years. Yours will last 1–4 weeks. You have to actually make it regularly. For some people, that’s a dealbreaker. For smart, budget-conscious folks? It’s just part of the routine.
The bottom line?
The active ingredient is the same. The chemistry is the same. The results, when used consistently, are the same or better. The only real difference is the packaging, the shelf life, and — dramatically — the price.
Skin Types and Who Should Be Careful
Vitamin C is generally well-tolerated, but it’s not for everyone all the time. Here’s what you need to know:
Who This Works Great For:
- Normal to oily skin
- People dealing with hyperpigmentation, dark spots, or dullness
- Anyone who’s used Vitamin C products before without issues
- People who want to start an anti-aging routine
- Those with sun damage concerns
Who Should Start Slow:
- Sensitive skin: Start with 5% and work up slowly. Vitamin C can cause tingling or redness in sensitive skin types.
- Dry skin: Make sure you’re following up with a good moisturizer. Glycerin helps, but dry skin needs extra love.
- Rosacea: Consult a dermatologist first. The acidity can sometimes aggravate rosacea.
Who Should Skip It (or Ask a Derm First):
- Anyone with a compromised skin barrier (very dry, cracked, or inflamed skin)
- People currently using strong prescription retinoids (check with your dermatologist about timing — you can use both, just not simultaneously)
- If you’re pregnant, consult your OB about topical Vitamin C
The Patch Test Rule
Always, always patch test a new DIY product. Apply a small amount to your inner arm or behind your ear. Wait 24 hours. If no irritation, you’re good to go on your face.
The Real Talk: What to Expect
Let me set your expectations right because I want you to stick with this:
Week 1–2: Your skin might look basically the same. This is normal. The Vitamin C is working on a cellular level before you can see it. Some people experience mild tingling when they first start — that’s the acidity. It should lessen as your skin adjusts.
Week 3–4: You may start to notice your skin looking a little more… awake? Brighter? Like you slept better than you did? That’s the Vitamin C starting to show up.
Week 6–8: This is when people start noticing. Dark spots may begin to fade. Skin tone looks more even. That post-sun-damage dullness starts to lift. This is when you’ll start getting the “you look glowing, what are you using?” comments.
Long-term (3+ months): Consistent use leads to visible reduction in fine lines (thanks to collagen boosting), significant improvement in dark spots, and overall brighter, more youthful-looking skin.
Consistency is everything. One week of using Vitamin C serum then stopping does literally nothing. This is a long game, and it’s worth playing.
Frequently Asked Questions (FAQ)
1. Can I use this DIY Vitamin C serum every day?
Yes, you can — but it depends on your skin type. If you have normal to oily skin, daily use in the morning is totally fine and actually ideal. If your skin is sensitive or on the drier side, start with every other day and see how your skin responds. Some people find their skin needs a few weeks to build up tolerance before daily use feels comfortable.
2. Why does my Vitamin C serum turn yellow or brown?
Color change is a sign of oxidation. When L-Ascorbic Acid is exposed to air, light, or heat, it degrades and turns from clear to yellow to orange to brown. A slightly pale yellow is okay, but once it’s orange or brown, the active Vitamin C has broken down and is no longer effective. Toss it and make a fresh batch. This is exactly why dark amber glass bottles and refrigerator storage are so important.
3. Can I use Vitamin C serum at night instead of the morning?
You can, but morning is optimal. Vitamin C is an antioxidant, meaning it fights free radical damage caused by UV exposure, pollution, and other environmental stressors throughout your day. Using it in the morning gives it the best opportunity to do its job. If you’re using a strong retinol at night, morning Vitamin C is actually a great complementary routine.
4. Can I mix Vitamin C with niacinamide?
This is one of the most Googled skincare questions ever. The old advice said to avoid mixing them. The current science says the concern was overstated — using them in the same routine is generally fine for most people. However, if you want to be safe, use Vitamin C in the morning and niacinamide at night. Both are powerful brightening ingredients and they’ll work great as part of the same overall routine.
5. Does DIY Vitamin C serum really work the same as $80 brand-name serums?
Yes — if formulated correctly, it genuinely does. The active ingredient doing the work is L-Ascorbic Acid, and you’re using the exact same thing. The main things expensive serums offer are longer shelf life and sometimes additional active ingredients (like Vitamin E or Ferulic Acid). If you want to upgrade your DIY version, you can add a drop of Vitamin E oil to your mixture, which also helps with oxidation. But even without it? The core serum works.
6. What’s the right percentage of Vitamin C for beginners?
Start at 10%. This is effective enough to see results while being gentle enough not to cause irritation. Once your skin has adjusted after a few weeks, you can move up to 15% or even 20%. There’s no benefit to starting high if it causes your skin to freak out — you just end up irritated and having to take a break from the product.
7. How do I know if Vitamin C is irritating my skin vs. just “working”?
A slight tingling sensation when you first apply Vitamin C is normal for many people, especially when starting out. That’s just the acidity. What’s not normal is prolonged burning, significant redness that doesn’t fade within 30 minutes, itching, or breakouts. If you experience these, your skin might be reacting to the concentration or just not tolerating the pH. Try lowering your percentage or applying after moisturizer (which buffers the acidity) and see if that helps.
8. Can I add Vitamin E or Ferulic Acid to make it stronger?
Absolutely! This is actually the next-level version of the recipe. Vitamin E (tocopherol) and Ferulic Acid are both proven to enhance the effectiveness of Vitamin C and increase its stability (meaning your serum will last longer). The classic formula used in some of the most-loved Vitamin C serums is 15% Vitamin C + 1% Vitamin E + 0.5% Ferulic Acid. You can find both Ferulic Acid and Vitamin E oil online. Adding these makes your DIY serum even more comparable to high-end products — still at a fraction of the price.
9. Can I use this serum on my body, not just my face?
Yes! Vitamin C serum works on any skin. If you’re dealing with dark spots, uneven skin tone, or sun damage on your chest, arms, or hands, you can absolutely use your DIY serum there too. You’ll just go through it faster and might want to make larger batches. It’s still incredibly cheap either way, so no big deal.
10. Is DIY skincare safe? What are the risks?
DIY skincare done correctly is safe. The main risks are using the wrong concentration (too high = irritation), using contaminated equipment (bacteria getting into your serum), or using non-cosmetic-grade ingredients. To stay safe: always use cosmetic or USP-grade ingredients (labeled specifically for skincare or food use), clean all equipment thoroughly before making your serum, make small batches and use them fresh, and always patch test before applying to your face. As long as you follow these steps, you’re good.
Final Thoughts
Look, the beauty industry is a billion-dollar machine, and a big part of how it stays that way is making you believe you need to spend a lot of money to have great skin. But the truth is, the most effective skincare ingredients are actually accessible and affordable — you just have to know what you’re looking for.
This 3-ingredient DIY Vitamin C serum is proof of that. It’s effective, it’s simple, it’s customizable to your skin’s needs, and it costs pennies compared to what you’d pay at the store. The only thing it costs you is five minutes of your time every week or two.
If you’re someone who’s into glowing up without breaking the bank, this is exactly the kind of hack that changes your entire approach to skincare. Once you start making your own, you’ll look at that $80 serum on the shelf and just… walk right past it.
This is what The Frugal Glow is all about — giving you the knowledge and the tools to look amazing without spending a fortune. Your glow doesn’t have a price tag.
Now go make your serum. Your skin will thank you later. 🌟
Found this helpful? Bookmark it, share it with a friend who’s always spending too much on skincare, and check out more money-smart beauty tips at The Frugal Glow.