The Frugal Glow | DIY Beauty | Affordable Hair Care
Jump to the Good Stuff
- The Dry Shampoo Habit Is Quietly Draining Your Budget
- What Dry Shampoo Actually Does — And Why the DIY Version Works
- The $1 Recipe: Two Ingredients, Five Seconds, Perfect Hair
- The Formulas: Light Hair, Dark Hair, and Every Shade Between
- How to Apply DIY Dry Shampoo Like a Professional
- My Honest 6-Month Results
- The Commercial Dry Shampoo Ingredients You’ve Been Paying For
- Who This Works For and Who Should Stick to the Spray Can
- The Frugal Glow Verdict
- FAQ — All Your Questions, Answered Simply
The Dry Shampoo Habit Is Quietly Draining Your Budget
I want to start with a number that I am genuinely embarrassed to admit.
For approximately three years, I was spending between $12 and $18 per month on dry shampoo. Not because I was using one can per month — I was actually using closer to one and a half to two cans. Batiste Original for $8.99 at CVS. Dove Refresh + Care for $10.49 when Batiste was out of stock. The occasional Living Proof Perfect Hair Day at $30 when I was feeling like my hair deserved something “better.”
I never thought of this as a significant expense because each individual purchase felt small and entirely justified. Dry shampoo is a genuine daily necessity for anyone who washes their hair every other day or every third day — which, according to most dermatologists, is actually healthier for the scalp than daily washing. At $8.99 a can, it felt like a reasonable investment in a quality-of-life product that I genuinely needed.
I was wrong about the math. Three years of $15 average monthly dry shampoo spending is $540. Five hundred and forty dollars on aerosol cans filled with starches, propellants, and fragrance — most of which went into my bathroom trash when the can was empty and the rest of which went into my scalp and lungs as fine particle spray.
The DIY dry shampoo recipe I switched to six months ago costs $1 for a batch that lasts six to eight weeks. The performance — oil absorption, volume boost, scalp freshness — is identical to the commercial products I was buying. The ingredients are two things I already had in my kitchen.
Here’s everything you need to know to make the switch.
What Dry Shampoo Actually Does — And Why the DIY Version Works
Understanding the mechanism of dry shampoo is what makes you a confident DIY converter rather than a skeptical one.
Dry shampoo works through exactly one primary mechanism: starch absorption of scalp sebum. Sebum is the natural oil your scalp produces — the substance that makes hair look flat, shiny, and greasy when you haven’t washed it. Dry shampoo deposits starch particles at the root zone of the hair. Those starch particles absorb the sebum, and when you massage the powder in and brush or shake it through, you remove both the powder and the absorbed sebum — leaving the roots looking clean, lifted, and fresh.
Every commercial dry shampoo on the market — from the $8.99 Batiste to the $30 Living Proof — uses starch as its primary active ingredient. The differences between products are in the delivery system (aerosol spray versus powder), the additional ingredients (fragrance, conditioning agents, scalp treatments), and the marketing wrapped around those differences.
The primary starch used in commercial dry shampoos: Tapioca starch, rice starch, corn starch, or some combination thereof. These are food-grade starches that are also available for a fraction of the cost at any grocery store or natural health food store.
What the $15 spray can is charging you for:
The starch itself: approximately $0.15 worth per can.
The propellant gas that delivers the starch: the majority of the can’s contents by volume.
The fragrance: a few cents worth of scent compounds.
The packaging, the aerosol can manufacturing, the brand marketing: the remaining cost.
When you make DIY dry shampoo, you eliminate the propellant, the excess packaging, and the brand premium. You keep the starch — the only ingredient that actually does the job.
Why I Swapped My $30 Sephora Lip Scrub for This 50-Cent Kitchen Hack
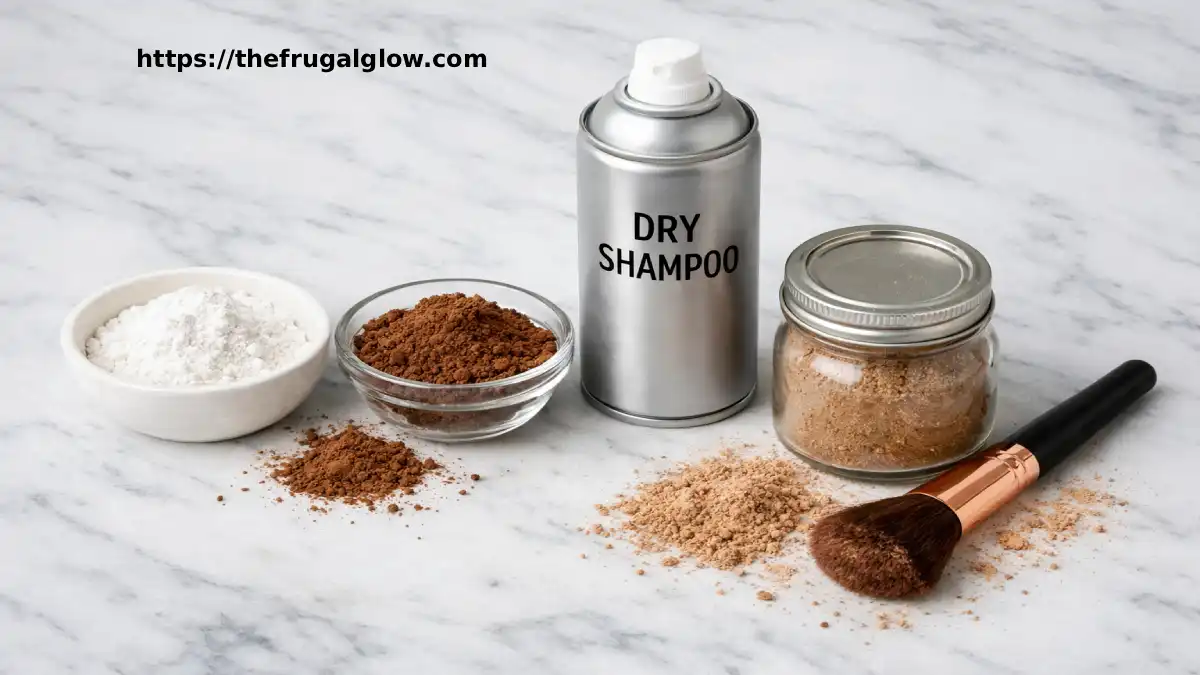
The $1 Recipe: Two Ingredients, Five Seconds, Perfect Hair
Here is the complete recipe. I am going to give you the ingredient list and then explain why each one is there — because understanding the function of each ingredient is what lets you adapt the recipe to your specific hair.
For Light Hair (blonde, light brown, gray, silver):
- 3 tablespoons arrowroot powder or cornstarch
That’s it. One ingredient. Done.
For Dark Hair (medium brown, dark brown, black):
- 2 tablespoons arrowroot powder or cornstarch
- 1 tablespoon unsweetened cocoa powder
Two ingredients. Still done.
Cost breakdown:
Arrowroot powder at most grocery stores: $4 to $6 for an 8-ounce bag. One batch of dry shampoo uses approximately 3 tablespoons — about 1.2 ounces. You get approximately 6 to 7 batches from one bag. Cost per batch: approximately $0.85.
Cocoa powder for the dark-hair version: already in most kitchens. If purchasing specifically: $4 for an 8-ounce container that produces significantly more batches than you’ll ever need for dry shampoo. Additional cost per batch: approximately $0.15.
Total cost per batch: $0.85 to $1.00.
Each batch — approximately 3 tablespoons of powder — lasts me six to eight weeks of every-other-day application. Some people with finer hair or oilier scalps may go through it faster. Some with thicker hair or drier scalps may make a batch last longer.
How to make it:
Combine the ingredients in a small jar or container with a lid. Shake. Done. The entire “manufacturing process” is fifteen seconds and produces a product that performs identically to what you’ve been spending $15 on.
The Formulas: Light Hair, Dark Hair, and Every Shade Between
The most important variable in DIY dry shampoo is matching the powder color to your hair color. This is the step that commercial dry shampoos handle with their aerosol delivery — the spray disperses the white powder so finely that it becomes invisible in most hair colors. With a powder application, you need the powder itself to blend with your hair color.
Platinum blonde, white, or silver hair:
Pure arrowroot or cornstarch. The white powder is invisible against light hair. No cocoa powder needed and its addition would create visible contrast.
Golden blonde or strawberry blonde:
Three tablespoons arrowroot with half a teaspoon of cocoa powder — just enough to warm the color slightly without adding visible brown.
Light to medium brown:
Two and a half tablespoons arrowroot with one teaspoon to one tablespoon of cocoa powder. Adjust by mixing a small amount on your palm and comparing to the underside of your hair before applying.
Medium to dark brown:
Two tablespoons arrowroot with one tablespoon to one and a half tablespoons of cocoa powder. The deeper color requires more cocoa to blend.
Dark brown to black:
One tablespoon arrowroot with two tablespoons cocoa powder. Some people with very dark hair find that adding a small amount of activated charcoal (half a teaspoon) further darkens the blend for better invisibility.
Red or auburn hair:
Two tablespoons arrowroot with half a tablespoon of cocoa powder and a very small pinch of cinnamon (which adds warm red undertones). Test on your palm against your hair color before applying.
The calibration process:
Before your first application, mix a small test batch and rub a pinch between your fingers on your forearm. Compare it to the color of your hair in natural light. Adjust the cocoa ratio up or down until the color matches. This calibration takes two minutes on day one and produces a perfectly matched formula you never have to adjust again.
The $2 Target Face Mask Dupe: How I Get Glowy Skin Without the $50 Price Tag
How to Apply DIY Dry Shampoo Like a Professional
Application technique is where DIY dry shampoo has the biggest learning curve — and where most people who try it once and give up make their mistake. The spray can’s aerosol delivery disperses the product more evenly than a brush or finger application. With powder, the technique requires slightly more intentionality to achieve the same result.
Method 1 — The Makeup Brush Method (My Preferred Approach):
Use a large, fluffy makeup brush — a powder brush or blush brush works perfectly. Dip the brush lightly into the powder and tap off excess on the side of the container. Apply to the roots by dabbing — not sweeping — the brush along your part line and in sections through the crown area. Dab the powder into the roots and let it sit for 60 to 90 seconds. Then use your fingertips to massage it thoroughly into the roots in circular motions. Finish by flipping your hair upside down and shaking vigorously to distribute the powder through the roots and remove any visible residue. Flip back and style normally.
Method 2 — The Finger Method (For Quick Application):
Dip your fingertips directly into the powder and rub them together lightly. Work the powder into your roots using the same motion you’d use to massage a scalp treatment — circular, thorough, getting down to the scalp surface. This method is faster but slightly less even than the brush method. Finish with the upside-down shake.
Method 3 — The Mason Jar Shaker Method (For Even Distribution):
Repurpose a mason jar or spice jar with a shaker lid (or poke small holes in a regular lid). Add your dry shampoo powder to the jar. Shake the jar lightly over your roots while parting sections of your hair to expose the scalp. The shaker distributes the powder more evenly than finger application and more precisely than a brush. Massage in and shake out as with the other methods.
The non-negotiable finishing step:
Regardless of method — brush, finger, or shaker — always finish with a 30-second upside-down head shake. This removes any visible white residue and fluffs the roots simultaneously. Skip this step and you risk the chalky appearance that gives DIY dry shampoo a bad reputation among people who’ve tried it once without proper technique.
Timing matters:
Apply dry shampoo to roots that are slightly oily — not soaking wet with fresh sebum, not completely dry and clean. The sweet spot is second-day hair in the morning, or hair that has been styled the previous day and is beginning to lose freshness. Applying to completely clean, recently washed hair prevents the starch from having sebum to absorb and the result looks white and powdery rather than natural.
The 3-Ingredient DIY Vitamin C Serum That Actually Works (And Costs Under $5)
My Honest 6-Month Results
I want to give you the unfiltered update after six months of using DIY dry shampoo exclusively — because I think the details matter for anyone considering the switch.
What works exactly as well as the commercial version:
Oil absorption is genuinely equivalent. My second-day and third-day hair looks as fresh after DIY dry shampoo as it did after Batiste. The volume lift at the roots is comparable. The scalp freshness — the sensation of clean, lifted roots — is identical. I have had multiple people comment on my hair looking good on days when I’m wearing DIY dry shampoo, with zero indication that they noticed anything different from my “real wash” days.
What works better than the commercial version:
My scalp health has genuinely improved. This surprised me because I expected a neutral change, not a positive one. Commercial dry shampoos contain alcohols, synthetic fragrances, and propellant chemicals that can irritate the scalp with repeated daily application. The simple starch formula has none of these. After six months of DIY use, I have noticeably less scalp flaking and irritation than I had during my years of aerosol dry shampoo use.
I also use it more freely now. When a product costs $15, there’s a subtle reluctance to apply more than you need to. When a product costs $0.05 per application, you apply exactly as much as you need without that background financial anxiety.
What is genuinely different and requires adjustment:
The learning curve is real. My first three applications were not great. The brush method took me a few tries to master, and my first attempt left some visible white residue that required extra shaking and massaging to remove. By application four or five, I had the technique down and the results were consistently excellent.
The lack of fragrance is noticeable. Commercial dry shampoos have a distinctive, pleasant scent that the DIY version completely lacks. The DIY powder has a very mild, neutral starch smell when you open the jar and essentially no smell once applied. If the fragrance experience of your dry shampoo is genuinely important to you, you can add two to three drops of your favorite essential oil to the jar and shake — lavender, peppermint, or rose all work well.
5 Banana Peel Beauty Hacks for Glowing Skin (The $0.00 Glow)
The Commercial Dry Shampoo Ingredients You’ve Been Paying For
I want to make the ingredient comparison explicit because I think seeing it directly is what finally converts skeptics.
Batiste Original Dry Shampoo ingredient list:
Butane, Isobutane, Propane (propellants — make up approximately 60-70% of the can’s contents), Alcohol Denat., Oryza Sativa (Rice) Starch, Parfum (Fragrance), Cetrimonium Chloride, Limonene, Linalool.
The DIY version ingredient list:
Arrowroot Powder (or Cornstarch). Optional: Cocoa Powder.
The active ingredient — starch — is in both. Everything else in the commercial version is either propellant (to spray the starch out of the can), preservatives (to give it a 3-year shelf life), or fragrance.
The skin absorption consideration:
Butane, isobutane, and propane propellants are designated as “safe” in cosmetic applications at the concentrations used in aerosol products. However, the American Lung Association and multiple dermatology researchers have noted that repeated daily inhalation of aerosolized particles — including the fine particles from dry shampoo sprays — can irritate respiratory tissue over time. The DIY powder version, applied with a brush rather than inhaled from a spray, eliminates this exposure entirely. This is not a reason to panic about your commercial dry shampoo use — it is a reason to feel good about switching.
Who This Works For and Who Should Stick to the Spray Can
✅ DIY dry shampoo is perfect for you if…
You wash your hair every two to three days and use dry shampoo as a between-wash freshener. This is the exact use case the recipe is designed for.
You have any hair color that the formula can be calibrated to match. The cocoa ratio system works reliably across the full spectrum from platinum to near-black.
You are willing to spend five minutes learning the brush or finger application technique before expecting perfect results.
You are motivated by the financial savings — $90 per year or more — and the reduced ingredient exposure from a simpler formula.
You have a sensitive scalp that has been irritated by commercial dry shampoos in the past.
❌ Stick with commercial dry shampoo if…
You have very fine, very light-colored hair where even a tiny amount of powder creates visible residue that’s difficult to remove without disturbing your style. Very fine platinum hair is the most challenging hair type for powder dry shampoo at any price point.
The fragrance experience of your dry shampoo is a significant part of the ritual for you and essential oil additions don’t feel like a sufficient substitute.
You need extreme convenience — the aerosol spray is genuinely faster than powder application, and if your mornings are so rushed that two extra minutes of application technique is a dealbreaker, keep the can.
You have a specific scalp condition being treated with a medicated dry shampoo containing active ingredients like salicylic acid or zinc pyrithione. The DIY version does not replicate these therapeutic ingredients.
DIY Flaxseed Gel: The $1 Natural Alternative to Expensive Curling Creams
The Frugal Glow Verdict
Six months. Zero commercial dry shampoo purchased. $90 saved. Hair that looks as good as it ever did on non-wash days — and a scalp that is measurably healthier than it was during three years of daily aerosol use.
The DIY dry shampoo is not a compromise. It is not the thing you do when you can’t afford the real version. It is, by most objective measures, a superior product — simpler ingredients, better scalp compatibility, dramatically lower cost, and zero aerosol inhalation. The only thing it lacks is the fragrance and the convenience of a spray can, and both of those can be addressed if they matter to you (essential oils for fragrance, a shaker jar for faster application).
The $15 monthly commercial dry shampoo habit is one of those beauty expenses that accumulates invisibly — too small to feel significant in any individual month and too consistent to ever examine as an annual total. Five hundred and forty dollars over three years for a product whose active ingredient costs less than $1 to replicate at home is a genuinely remarkable illustration of how beauty marketing converts cheap commodity ingredients into premium-priced consumer products.
Two tablespoons of arrowroot powder and one tablespoon of cocoa powder. Fifteen seconds of mixing. A jar that lives in your bathroom drawer. That is the entire difference between a $15 monthly habit and a $1 bimonthly one.
At The Frugal Glow, this is what we’re always looking for — the places where a five-minute DIY replaces a fifteen-dollar monthly purchase without any meaningful sacrifice in quality or results. Bookmark us, share this with the friend who goes through a can of Batiste every two weeks, and come back for more honest DIY beauty content that keeps your hair looking great and your bank account looking even better. 💚✨
FAQ — All Your Questions, Answered Simply
1. Does DIY dry shampoo actually work?
Yes — DIY dry shampoo made from arrowroot powder or cornstarch works through the same mechanism as commercial dry shampoo and produces equivalent oil absorption results for most hair types. Commercial dry shampoos use starch as their primary active ingredient — the aerosol propellant simply delivers the starch to the roots in a fine mist. The DIY powder delivers the same starch to the same roots through a brush or finger application, and once massaged in and shaken out, the result is indistinguishable in terms of oil absorption, volume lift, and root freshness. The learning curve is the application technique rather than the product itself — powder application requires slightly more intentionality than aerosol spray, and the first two or three applications may not be perfect while you calibrate the amount and technique.
2. What is the best powder to use for DIY dry shampoo?
Arrowroot powder is the preferred base for DIY dry shampoo for several reasons: it has a finer particle size than cornstarch, which means it blends more invisibly into the hair and absorbs sebum more effectively per gram. It is also naturally more neutral in color — a very pure, bright white — which makes it easier to calibrate with cocoa powder for darker hair shades. Cornstarch is a fully functional substitute that most people already have in their kitchen, making it the more accessible starting point. Both work. If you’re starting today and have cornstarch at home, use it — the results are equivalent for most hair types. If you’re purchasing specifically for DIY dry shampoo, arrowroot powder’s finer texture provides a slight performance advantage worth the typically similar price point.
3. Will DIY dry shampoo make my hair look white?
DIY dry shampoo will leave white residue if applied in too large a quantity or not properly massaged in and shaken out — but the same is true of commercial dry shampoo sprays, which also leave visible white residue when over-applied or not blended. The risk of visible white residue is primarily a technique issue rather than a product issue. Three practices eliminate it completely: using the correct amount (a small dip of a brush or a fingertip amount, not a large scoop), massaging the powder thoroughly into the roots with circular fingertip motions for at least 30 seconds, and finishing with a vigorous upside-down head shake to distribute the powder and remove any residue. For darker hair colors, adding cocoa powder to the base formula (see the color-matching guide in this article) reduces the white cast further by matching the powder color to the hair.
4. How long does homemade dry shampoo last?
A batch of DIY dry shampoo — approximately 3 tablespoons of powder — lasts between six and ten weeks for most people who use dry shampoo every other day. Because the ingredients are dry powders with no water content, bacterial and mold growth cannot occur, and the product has essentially indefinite shelf stability when stored in a dry, sealed container. The only risk to longevity is moisture contamination — if water gets into the jar, the powder can clump and potentially develop mold over time. Store the jar with a tight-fitting lid away from the shower splash zone, and use a dry brush or dry fingers when scooping the powder. A small silica gel packet placed in the jar is an extra precaution against moisture if your bathroom is particularly humid.
5. Can I add scent to DIY dry shampoo?
Yes — adding essential oils to your DIY dry shampoo formula is straightforward and allows complete customization of the fragrance experience. Add two to four drops of your preferred essential oil directly to the jar of powder and shake vigorously to distribute. Lavender essential oil adds a calming, floral scent that many people find pleasant in a hair product. Peppermint provides a fresh, cooling scalp sensation alongside its scent. Rose or jasmine add a more feminine floral note. Citrus oils (lemon, orange, grapefruit) add brightness. Start with two drops and smell the powder after shaking — add additional drops if you want a stronger scent. The scent fades over the shelf life of the batch but can be refreshed by adding drops to the existing powder. Avoid fragrance oils (as opposed to essential oils) — these contain synthetic compounds that may irritate the scalp.
6. Is DIY dry shampoo better for your hair than commercial dry shampoo?
For scalp health specifically, DIY dry shampoo is likely better than commercial aerosol alternatives for most people. Commercial dry shampoos contain denatured alcohol (which can dry and irritate the scalp with repeated daily use), synthetic fragrances (a leading cause of contact dermatitis on the scalp), and propellant gases (which introduce aerosolized chemical particles to the scalp environment). The DIY arrowroot and cocoa powder formula contains none of these — it is two food-grade ingredients with no synthetic additives. Anecdotally, people who switch from commercial to DIY dry shampoo frequently report reduced scalp flaking, reduced scalp itching, and improved scalp comfort within one to two months of switching. For hair strand health, both approaches are neutral — the starch absorbs and removes sebum equally, and neither damages the hair shaft when used as directed.
Two ingredients. One dollar. Six weeks of perfect second-day hair. That’s the whole deal — and at The Frugal Glow, the whole deal is exactly what we’re here for. Bookmark us, share this with the friend who’s going through a can of dry shampoo a week, and come back for more DIY beauty finds that prove looking great has nothing to do with how much you spend at CVS. 💚✨