Why I Swapped My $30 Sephora Lip Scrub for This 50-Cent Kitchen Hack

The Frugal Glow | Budget Beauty | DIY Beauty Hacks
Jump Links
- The Lip Care Industry Is Lowkey Scamming Us
- My Very Expensive Lip Scrub Era
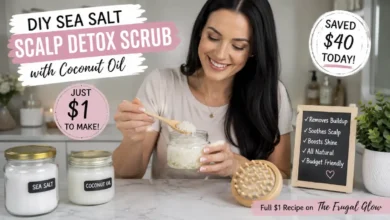
- The Kitchen Hack That Changed Everything
- What’s Actually in Your Fancy Lip Scrub (You’ll Be Surprised)
- My DIY 50-Cent Lip Scrub: The Exact Recipe
- Full Comparison: $30 Sephora Scrub vs. 50-Cent Kitchen Hack
- How to Get the Softest Lips of Your Life: My Full Routine
- Six Months Later: Honest Lips Update
- Budget Lip Care Myths We Need to Cancel
- Who Will Love This Hack (And Who Should Skip It)
- The Frugal Glow Verdict
- FAQ — 12 Questions People Are Actually Googling
The Lip Care Industry Is Lowkey Scamming Us
Okay, I need to start with a confession: I have spent an embarrassing amount of money on lip products in my lifetime. Lip scrubs, lip masks, lip oils, lip plumpers, lip serums — if it promised softer, fuller, smoother lips, I was clicking “Add to Cart” before I’d even finished reading the product description.
And look, I don’t think I’m alone in this. Lip care has had a serious glow-up in the beauty world over the last few years. What used to be a simple ChapStick-and-go situation has turned into a full multi-step ritual with products that cost as much as a nice dinner out. Walk into any Sephora and you’ll find lip scrubs priced anywhere from $15 to $38. And they’re not even hiding it — they’re front and center on those little displays near the register, just waiting to be impulse-purchased.
The lip care market is worth billions of dollars globally, and it’s growing every single year. Brands have gotten very, very good at convincing us that our lips require specialized, premium, carefully formulated products to be soft and smooth and presentable. They put these scrubs in adorable little pots with names like “Brown Sugar Kissable Lips” and “Lush Lip Smoothie” and they make them smell like dessert, and we hand over our credit cards without a second thought.
Here’s what they’re not advertising on those little pots: the main active ingredient in almost every single one of them is stuff you already have in your kitchen.
I know. I was shook too.
The Rice Water Secret: How to Grow Long, Shiny Hair for Pennies
My Very Expensive Lip Scrub Era
For about two years, I was a devoted customer of a $28 lip scrub from a well-known brand at Sephora. It came in a cute little glass pot, it smelled like brown sugar and vanilla, and it made my lips feel genuinely incredible — smooth, soft, and ready for whatever lip product I put on after.
I bought it every two to three months when I ran out. I recommended it to friends. I included it in my “current favorites” list whenever anyone asked. In my mind, it was a non-negotiable part of my beauty routine — one of those products I just had to have.
But then something happened that made me take a much closer look at what I was actually paying for.
I was at my friend Maya’s apartment one Sunday, and we were doing a whole lazy self-care day — face masks, painted nails, the works. I mentioned I’d just run out of my Sephora lip scrub and was going to order more. Maya looked at me like I’d said something truly baffling, walked into her kitchen, and came back two minutes later with the smoothest, most kissable lips I’d ever seen — after using a mixture she’d literally just made from her pantry.
“What did you just put on your lips?” I asked.
“Sugar and honey,” she said. “It’s like fifty cents worth of ingredients. Maybe less.”
I did not believe her. And then she made a batch for me on the spot, I tried it, and I sat there for a full minute just pressing my lips together because I could not get over how soft they were.
That was the beginning of the end of my $28 lip scrub subscription.
The $2 Target Face Mask Dupe: How I Get Glowy Skin Without the $50 Price Tag
The Kitchen Hack That Changed Everything
Let me be completely upfront about what this “hack” is, because it’s not complicated or mysterious — and that’s kind of the whole point.
The 50-cent lip scrub that changed my entire lip care routine is a simple mixture of two ingredients that are almost certainly sitting in your kitchen right now:
1. Granulated white sugar or raw brown sugar
2. Raw honey (or regular honey if that’s what you have)
That’s it. Seriously, that’s the entire thing. Mix them together, apply to your lips in gentle circular motions for about 60 seconds, rinse off, and prepare to be genuinely amazed by how soft your lips feel.
The reason this works is rooted in basic skincare science — the same science that’s behind every expensive lip scrub on the market. Sugar is a physical exfoliant that buffs away dead skin cells. Honey is a humectant that draws moisture to the skin while also being naturally antibacterial. Together, they do exactly what every $30 lip scrub claims to do: exfoliate and hydrate simultaneously.
When I tell you I felt a little silly for not thinking of this sooner, I mean it genuinely.
What’s Actually in Your Fancy Lip Scrub (You’ll Be Surprised)
Before we go any further, let’s talk about what’s actually inside those beautiful little Sephora pots — because I think once you see it, you’ll understand exactly why this kitchen hack hits the same.
I went through the ingredient lists of three popular lip scrubs priced between $18 and $32. Here’s what I consistently found at the top of every list:
🍬 Sugar (Sucrose)
Every single lip scrub — from drugstore to luxury — uses sugar as its primary exfoliating agent. Sucrose granules are the right size and texture to gently buff away dead skin without being too abrasive. It’s literally just sugar. The same stuff in your kitchen cabinet.
🍯 Honey or Honey-Derived Ingredients
Most high-end lip scrubs include honey, honey extract, or related ingredients like propolis. These provide the humectant hydration component — drawing moisture into the lips while the scrubbing is happening. Some fancier formulas swap this out for synthetic humectants, but honey is actually the OG version.
🛢️ Carrier Oils (Coconut, Jojoba, Sweet Almond)
Many lip scrubs add a carrier oil to give the product a more luxurious texture and additional moisture. You can easily replicate this at home by adding a tiny drop of coconut oil or olive oil to your DIY mix.
🌸 Fragrance and Flavor
Here’s where a big chunk of that $30 price tag lives — in the fragrance and flavor development that makes your lip scrub smell like a bakery or a tropical vacation. It’s genuinely nice. But it’s also genuinely not necessary for results.
🎨 Packaging and Branding
The rest of what you’re paying for is the cute glass pot, the clever product name, the influencer campaign, the Sephora shelf space, and the brand equity that makes you feel fancy when you use it. None of that touches your lips.
Bottom line: the functional core of a $30 lip scrub is two ingredients. Both are in your kitchen.
The 3-Ingredient DIY Vitamin C Serum That Actually Works (And Costs Under $5)
My DIY 50-Cent Lip Scrub: The Exact Recipe
Okay, here’s exactly what I make and use. This is the version I’ve tested and refined over six months — it’s simple, it works, and it genuinely costs about 50 cents per batch (probably less if you’re buying sugar and honey in bulk, which — do it, it’s so worth it).
🍯 The Basic Version (2 Ingredients)
Ingredients:
- 1 teaspoon granulated white sugar or raw brown sugar
- ½ teaspoon raw honey
Instructions:
Mix together in a small bowl or the palm of your hand. Apply to lips using your fingertip in gentle circular motions for 60–90 seconds. Rinse off with warm water or wipe away with a damp cloth. Follow with lip balm or lip oil. Done.
Cost per batch: Approximately $0.40–$0.60
🌿 The Upgraded Version (4 Ingredients, Extra Luxurious)
If you want to get a little fancier — and honestly this version rivals any $30 product I’ve ever tried — add these two extras:
Ingredients:
- 1 teaspoon raw brown sugar (slightly more textured than white — better for exfoliation)
- ½ teaspoon raw honey
- ¼ teaspoon coconut oil or olive oil (adds slip and extra moisture)
- 1 small drop of vanilla extract (optional — just for the scent experience)
Instructions:
Mix all ingredients together until combined. Apply and massage into lips for 60–90 seconds. Rinse or wipe away. Follow immediately with your favorite lip balm.
Cost per batch: Approximately $0.75–$1.00
💡 Pro Tips for Maximum Results:
- Use brown sugar over white when possible — the slightly larger, coarser granules do a better job on seriously chapped or rough lips
- Apply to dry lips, not wet — the exfoliation is more effective on dry skin
- Don’t scrub too hard — your lips are delicate. Gentle circular pressure for 60 seconds is enough; you’re not trying to sand a deck
- Always follow with a lip balm or oil — exfoliation removes the dead skin layer, leaving fresh skin that’s ready to absorb moisture. Lock it in immediately
- Use 1–2 times per week max — over-exfoliating can cause irritation and sensitivity. More is not more when it comes to scrubbing
5 Banana Peel Beauty Hacks for Glowing Skin (The $0.00 Glow)
Full Comparison: $30 Sephora Scrub vs. 50-Cent Kitchen Hack
I did a side-by-side test over eight weeks — alternating between my old Sephora lip scrub and my DIY version — and tracked results carefully. Here’s the honest breakdown:
👄 Immediate Softness After Use
$30 Sephora Scrub: Lips feel incredibly smooth and soft. The added oils in the formula give a slightly more luxurious texture during application.
50-Cent DIY Scrub: Lips feel genuinely just as smooth and soft. The results are almost indistinguishable in terms of the actual outcome. The texture during application is slightly less refined — a little more rustic — but the end result is the same.
💧 Hydration Level After Rinsing
$30 Sephora Scrub: Lips feel hydrated and plump after rinsing, especially if you follow with a balm.
50-Cent DIY Scrub: Same hydration level — honey is one of the best natural humectants that exists, so your lips drink it up.
⏳ How Long Results Last
$30 Sephora Scrub: Smooth lips that last 2–3 days before needing another scrub.
50-Cent DIY Scrub: Identical. My lips stay smooth for 2–3 days consistently.
🌸 Sensory Experience (Scent, Texture, Feel)
$30 Sephora Scrub: This is where the luxury version genuinely wins. The scent is beautifully developed, the texture is perfectly calibrated, and the overall experience feels indulgent and spa-like. If the sensory experience of your skincare routine matters deeply to you, this is real.
50-Cent DIY Scrub: Smells like honey and sugar — which is actually really nice, just more natural and less perfumey. The texture is slightly rougher and more homemade. If you add the vanilla extract it gets closer to that bakery-dessert vibe.
💰 Cost Per Use Breakdown
| $30 Sephora Scrub | 50-Cent DIY Scrub | |
|---|---|---|
| Cost Per Use | ~$5–$7 | ~$0.50 |
| Uses Per Purchase | ~4–6 | Unlimited batches |
| Monthly Cost (2x/week) | ~$20–$28 | ~$2–$4 |
| Annual Cost | ~$240–$336 | ~$24–$48 |
| Results | Excellent | Excellent |
That annual cost comparison is the one that should really make you pause. We’re talking about a difference of up to $288 per year for results that are functionally the same.
DIY Flaxseed Gel: The $1 Natural Alternative to Expensive Curling Creams
How to Get the Softest Lips of Your Life: My Full Routine
The scrub is the foundation, but if you want truly next-level soft lips consistently, here’s the full routine I follow:
Nightly:
Apply a thick layer of a good lip balm before bed every single night. I use the Aquaphor Healing Ointment (about $6 at Target) — it’s an occlusive that creates a barrier over your lips while you sleep, locking in moisture and letting your lips heal and regenerate overnight. Wake up to noticeably softer lips within a week.
2–3 Times Per Week:
Use your DIY lip scrub before bed. Apply, massage, rinse, then immediately follow with Aquaphor or your preferred lip treatment. This combo — exfoliate then deeply moisturize — is genuinely the whole secret.
Daytime:
Always have a tinted lip balm or a nourishing lip oil with SPF in your bag. Lips have no melanin and no sebaceous glands, which means they don’t produce their own moisture and they have zero natural UV protection. They’re one of the most vulnerable areas of your face to sun damage and dryness. A $6 tinted SPF lip balm handles both problems.
Weekly:
Once a week, try a lip mask overnight treatment. Apply a generous layer of pure shea butter, castor oil, or a dedicated lip sleeping mask and let it work while you sleep. Your lips will be absolutely baby-soft by morning.
Drink More Water:
I know, I know — you’ve heard it a thousand times. But chronically dehydrated lips cannot be fixed by any topical product alone. If your lips are constantly chapped and peeling no matter what you put on them, look at your water intake first.
Six Months Later: Honest Lips Update
I switched to the DIY scrub six months ago and I want to give you the real, unfiltered update — not just the excitement of the initial discovery.
What genuinely improved: My lips are consistently softer and smoother than they’ve ever been — and I think the main reason is frequency. Because the scrub costs basically nothing to make, I use it more regularly and more liberally. Consistent exfoliation + consistent moisture is the formula that works, and the budget version made it easier to actually stick to.
What I sometimes miss: The Sephora scrub smelled absolutely divine and the experience of using it felt genuinely luxurious. If you’re someone for whom the ritual and sensory experience of your beauty routine is important to your mental health and self-care practice — that’s a real and valid thing, and I’m not going to dismiss it.
My current setup: I make a small batch of the DIY scrub about once a week. I store it in a tiny glass jar in my bathroom. Total monthly spend on lip care is now under $3 — and my lips genuinely look better than they did when I was spending $30+ every few months.
Budget Lip Care Myths We Need to Cancel
Myth #1: “You need a specialized lip scrub product for exfoliation.”
Your lips don’t know the difference between a $30 branded scrub and sugar from your kitchen. They respond to the mechanical exfoliation and the moisturizing ingredients — both of which the DIY version delivers completely.
Myth #2: “Natural ingredients aren’t as effective as lab-formulated ones.”
Honey has been used for skin care for literally thousands of years. It’s a clinically studied humectant with documented antibacterial properties. Sugar is a proven physical exfoliant. These aren’t folk remedies — they’re ingredients that the beauty industry borrowed from nature and put in fancy packaging.
Myth #3: “DIY skincare is unsafe.”
For a simple lip scrub made from food-grade ingredients? Completely safe for the vast majority of people. You’re literally using ingredients you’d eat. The main caution is for people with known allergies — if you’re allergic to honey, obviously don’t put it on your face.
Myth #4: “Expensive lip scrubs have secret ingredients that make them work better.”
Read the label. The first two ingredients are almost always some form of sugar and some form of oil or humectant. The “secret” ingredients are usually just fragrance compounds and preservatives that make the product shelf-stable and smell amazing.
Who Will Love This Hack (And Who Should Skip It)
✅ This hack is for you if…
- Your lips are dry, chapped, or flaky and you want an easy fix
- You’re on a tight budget and can’t justify $30 on a lip scrub
- You love DIY beauty and the satisfaction of making your own products
- You’re trying to simplify your beauty routine and cut out unnecessary spending
- You’re a college student, recent grad, or just in a money-conscious season of life
- You care about knowing exactly what ingredients are on your skin
❌ You might want to skip or modify if…
- You have a known honey allergy — substitute with a small amount of coconut oil or olive oil instead
- You have open cuts, cold sores, or severely cracked lips — do not exfoliate broken skin. Let it heal first.
- You have extremely sensitive skin that reacts to new products — do a small patch test on the inside of your wrist first
- The sensory ritual of a beautifully formulated, perfectly scented product genuinely matters to your self-care routine — and there’s absolutely no shame in that
The Frugal Glow Verdict
Six months in, the verdict is crystal clear: the 50-cent kitchen hack wins on every metric that actually matters.
The results are functionally identical to my $30 Sephora lip scrub. The ingredients are cleaner and simpler. The cost difference over a year is nearly $300. And because it’s so cheap and easy to make, I actually use it more consistently — which means my lips are in better shape now than they ever were during my expensive lip scrub era.
Is the Sephora lip scrub a bad product? Absolutely not. It’s genuinely great. But great at the same job that two ingredients from your kitchen can do just as well is a hard thing to keep justifying at $30 a pop.
This is exactly the kind of swap that The Frugal Glow exists to help you find. Not about depriving yourself. Not about settling for less. It’s about being smart enough to know when you’re paying for performance versus when you’re paying for a pretty pot and a good smell — and making the choice that actually serves your real life and your real budget.
Your lips deserve to be soft and smooth. And they absolutely do not need to cost you $30 every few months to get there.
Glow on. 💋
FAQ — 12 Questions People Are Actually Googling {#faq}
1. Can I use sugar as a lip scrub?
Yes — and it’s one of the most effective lip scrubs you can use. Granulated sugar is a physical exfoliant with the perfect particle size to gently buff away dead skin cells from the delicate lip area without causing micro-tears or irritation. It’s the primary active ingredient in the majority of commercial lip scrubs, including luxury ones. White granulated sugar is slightly finer and gentler, while raw brown sugar has a coarser texture that works well for more stubborn dryness. Either works — choose based on how sensitive your lips are.
2. Is honey good for your lips?
Honey is genuinely one of the best ingredients you can put on your lips. It’s a natural humectant, meaning it draws moisture from the environment into the skin, which helps lips stay hydrated and plump. It also has natural antibacterial and anti-inflammatory properties, which can help with minor irritation or small cracks. Raw honey has the highest concentration of beneficial enzymes and antioxidants, but regular grocery store honey works well too. Just be aware that if you have a honey allergy, you should substitute it with another moisturizing ingredient like coconut oil.
3. How do I get rid of chapped lips fast?
The fastest way to get rid of chapped lips is a two-step process: first, exfoliate gently with a sugar-based scrub (DIY or store-bought) to remove the dead, flaky skin sitting on top. Second, immediately apply a thick, occlusive moisturizer — Aquaphor, pure shea butter, or a dedicated lip treatment — to seal moisture into the fresh skin underneath. Do this before bed and you’ll wake up with noticeably softer lips. Repeat for 2–3 nights and the chapping should be significantly improved. Also make sure you’re drinking enough water, as dehydration is one of the leading causes of chronically chapped lips.
4. What is the best homemade lip scrub recipe?
The most effective basic homemade lip scrub is simply 1 teaspoon of sugar mixed with ½ teaspoon of honey. For a more luxurious version, add ¼ teaspoon of coconut oil and a drop of vanilla extract. Mix, apply in gentle circles for 60–90 seconds, then rinse and immediately follow with a lip balm. For extra brightening, you can add a tiny squeeze of fresh lemon juice — the citric acid has gentle brightening properties, though skip this if your lips are cracked or sensitive.
5. How often should you exfoliate your lips?
For most people, 1–2 times per week is the ideal frequency for lip exfoliation. More than that can actually strip away healthy skin cells and cause sensitivity, redness, and even more dryness than you started with. If your lips are severely chapped, start with once a week until they’ve healed, then maintain with twice weekly. Signs you’re over-exfoliating include persistent redness, a burning sensation during application, or lips that feel raw and tight after use — if any of these happen, pull back to once every 10 days.
6. Does lip scrubbing make lips bigger?
Exfoliating your lips does not permanently increase their size, but it can make them appear fuller temporarily. When you scrub away the layer of dead, dry skin, you reveal the fresher, smoother skin underneath — which reflects light better and has a more even texture. This can create a subtle plumping visual effect. Additionally, the gentle massage motion of applying a scrub increases blood circulation to the lip area, which can create a temporarily fuller appearance that lasts for a few hours. For a more noticeable plumping effect, follow your scrub with a lip-plumping balm containing ingredients like peppermint oil or hyaluronic acid.
7. What can I use instead of a lip scrub?
If you don’t want to make a DIY scrub or buy one, there are a few effective alternatives. A soft toothbrush used in gentle circular motions on damp lips is one of the most classic methods — it provides light physical exfoliation and costs nothing extra. A warm damp washcloth pressed against your lips and moved in gentle circles also works well for light exfoliation. In a pinch, even a clean fingertip with a tiny bit of sugar rubbed directly on damp lips gets the job done. The key in all cases is to be gentle, follow with moisture, and not overdo the frequency.
8. Is Vaseline or Aquaphor better for lips?
Both are excellent occlusive lip treatments, but most dermatologists and beauty experts favor Aquaphor slightly over plain Vaseline for lips. While Vaseline (petroleum jelly) creates a nearly impenetrable occlusive barrier that prevents moisture loss, Aquaphor contains the same petroleum jelly base plus additional ingredients including panthenol (pro-vitamin B5), bisabolol, and glycerin — which actively attract and support moisture rather than just sealing it in. Both are affordable, fragrance-free, and available everywhere. Aquaphor tends to have a slightly less thick, more comfortable texture on the lips as well.
9. Can you use olive oil on your lips?
Yes — olive oil is a great natural option for moisturizing lips. It’s rich in oleic acid and squalene, which have excellent skin-softening properties, and it contains vitamin E and polyphenol antioxidants that can help protect and nourish delicate lip skin. It’s especially useful as an add-in to your DIY lip scrub in place of or in addition to honey, or as a standalone overnight lip treatment. The one downside is that it’s not an occlusive — it doesn’t create a strong barrier the way petroleum jelly or shea butter does — so it works best layered under a thicker balm rather than used alone in very dry conditions.
10. Why are my lips always dry no matter what I put on them?
Chronically dry lips despite consistent product use usually points to one or more underlying factors. Dehydration is the most common — lips have no oil glands and rely entirely on water intake and topical products for moisture. Breathing through your mouth, especially at night, is another major culprit that dries lips out faster than almost anything else. Some people are unknowingly allergic or sensitive to an ingredient in their lip products — fragrances, flavors, and certain preservatives can cause an irritation cycle that mimics extreme dryness. Vitamin deficiencies (especially B vitamins and iron) can also manifest as persistent lip issues. If the problem is severe or doesn’t respond to consistent care, it’s worth mentioning to a dermatologist.
11. What do dermatologists recommend for dry lips?
Dermatologists consistently recommend a few key principles for managing dry lips. First, avoid licking your lips — saliva evaporates quickly and leaves lips drier than before. Second, use fragrance-free lip products whenever possible, as fragrance is a common irritant. Third, apply lip balm before it’s needed — preventive application keeps lips from ever getting to the severely chapped stage. Fourth, use an occlusive treatment (like Aquaphor or plain Vaseline) at night for intensive overnight repair. And fifth, wear SPF on your lips daily — sun damage is a leading contributor to chronic dryness and thinning of the lip skin over time.
12. Are DIY lip scrubs safe?
For the vast majority of people, DIY lip scrubs made from food-grade ingredients are completely safe. Since the ingredients you’re using — sugar, honey, coconut oil — are things you’d consume in food, the risk profile is very low. The main precautions to keep in mind: don’t use DIY scrubs on broken or cracked skin (open skin is vulnerable to irritation); patch test if you have sensitive skin or known food sensitivities; avoid honey if you have a bee or honey allergy; and make your batches fresh each time rather than storing them long-term, as homemade products without preservatives can grow bacteria over time. Make a small batch, use it, done — it takes literally two minutes.
Ready to keep saving money without sacrificing an inch of your glow? That’s exactly what we’re here for. At The Frugal Glow, we dig through the beauty noise, test the budget swaps, and give you the honest truth about what actually works — so you can look and feel incredible without quietly panicking every time you open your bank app. Bookmark us, share this with your girls, and come back for more real-talk beauty intel that keeps your wallet just as happy as your skin.