
How to Fix a Stretched-Out Hair Scrunchie or Headband in Under 5 Minutes
You know the moment: you reach for your favorite scrunchie, wrap it around your ponytail, and it slides straight down. Or you put on a headband that used to hold perfectly, and it creeps back off your head within the hour. Hair accessories that lose their grip are one of the most common (and most annoying) small wardrobe failures, and most people toss them or shove them to the back of a drawer.
You don’t have to. Nearly every stretched-out scrunchie or headband can be fixed, and several of the fixes take under five minutes and need no sewing at all. This guide covers quick, no-sew tricks for when you’re in a hurry, a simple permanent repair that restores a scrunchie’s grip for a few dollars, and separate fixes for fabric, jersey, and plastic headbands. Where a fix takes longer than five minutes, we’ll say so honestly, so you know what to expect.
Jump Links
- Why Scrunchies and Headbands Stretch Out
- Diagnose the Problem First
- Quick Fixes for Scrunchies (Under 5 Minutes)
- Permanent Scrunchie Repairs
- Fixes for Stretched Headbands
- Fix Comparison Table
- Which Fix Works for Which Fabric
- When the Elastic Is Beyond Repair
- How to Keep Them From Stretching Out Again
- Cost: Repair vs. Replace
- Common Mistakes to Avoid
- FAQ
- The Bottom Line
Why Scrunchies and Headbands Stretch Out
Most of the time, the fabric isn’t what’s failing. It’s the elastic inside. A scrunchie is essentially a loop of elastic wrapped in a tube of fabric, and a stretchy headband usually contains elastic too. Elastic wears out for a handful of reasons:
- Frequent use. Daily wear puts steady strain on the elastic, and every stretch weakens it slightly over time.
- Wrapping around thick hair. Pulling a scrunchie tightly around a lot of hair, or around several layers, stretches it further than it’s meant to go.
- Improper washing and care. Machine washing and harsh handling can damage both the fabric and the elastic.
- Heat. Hot water, dryers, and heat styling can degrade elastic fibers.
- Age. Even if you rarely wear it, elastic eventually loses its snap.
Understanding this helps you pick the right fix. If the elastic has only stretched a little, you can often tighten it. If it has lost its stretch entirely or is brittle, replacing it is the better move.
Diagnose the Problem First
Take thirty seconds to check what you’re dealing with:
| What you notice | What it likely means | Best approach |
|---|---|---|
| Scrunchie is loose but still springs back a bit | Mild stretching | Quick tricks or a hot-water tighten |
| Scrunchie is limp and has no spring | Elastic has lost its stretch | Replace the elastic |
| Scrunchie has a visible break or snapped elastic | Broken elastic | Replace the elastic |
| Fabric headband is loose all around | Stretched fabric or elastic | Add elastic or sew a tuck |
| Jersey headband is simply too big | Sized too large or stretched | Fold and sew, or add elastic |
| Plastic headband slides off | Band has spread out | Reshape with gentle heat, add grip |
Quick Fixes for Scrunchies (Under 5 Minutes)
These fixes need no sewing and no special supplies. They’re temporary or semi-temporary, but they work in a pinch.
Fix 1: The Hair Tie Hack (about 1 minute)
Slide a regular elastic hair tie into the center of the scrunchie, then wrap your hair with both together. The hair tie provides the grip, and the scrunchie provides the soft look.
How to do it:
- Take a standard elastic hair tie.
- Slip it through the center of the scrunchie so it sits inside the loop.
- Wrap both around your hair at the same time.
Best for: A quick fix when you’re getting dressed or heading out the door, and a good way to keep wearing a scrunchie while you decide whether to repair it.
Fix 2: Twist It Twice (about 30 seconds)
If your scrunchie is only a little loose, twist it before wrapping. Twisting it once or twice around itself creates a tighter loop without any materials.
How to do it:
- Hold the scrunchie in a loop.
- Twist it once or twice so it forms a figure-eight shape.
- Wrap the doubled loop around your hair.
Best for: Scrunchies that are only slightly stretched. It won’t help if the elastic is completely dead.
Fix 3: The Hot-Water Shrink (about 3 to 5 minutes)
This is one of the most popular hacks online, and it has a real basis: heat can cause elastic to contract temporarily. It’s also the one that comes with the most caveats, so read the cautions before trying it.
How to do it:
- Heat water until very hot (many sources use boiling water, but very hot water from a kettle or tap is gentler). Pour it into a heat-safe bowl instead of working over a stove.
- Using tongs, dip the scrunchie into the water. Some guides suggest a quick dip of about 10 to 20 seconds, while others soak for 10 to 15 minutes. Start with the short dip and check.
- Lift it out with the tongs, let it cool before touching it, and then press out the water gently.
- Let it air dry completely, and test how it grips.
What to expect: It won’t make the scrunchie brand new, but it can tighten it enough to be usable again. Results are typically temporary.
Cautions:
- Burn risk. Hot water can cause serious burns. Use tongs, keep the bowl on a stable surface, and keep it away from children.
- Delicate fabrics. Be cautious with silk, satin, and velvet, since very hot water can damage some materials. Heat can also damage glued or decorative parts.
- Color bleed. Dark or bright dyes can run. Test on an inexpensive scrunchie first if you’re unsure.
- Not a cure for dead elastic. If the elastic has no stretch left, heat won’t bring it back.
Fix 4: The Hair Dryer Method (about 2 minutes)
If you’d rather avoid hot water, some guides suggest using a hair dryer to apply heat to the elastic.
How to do it:
- Set a hair dryer to a medium-to-high heat setting.
- Hold the scrunchie a few inches from the nozzle and blow hot air over it for 30 to 60 seconds, gently stretching and releasing it.
- Let it cool completely, then test the grip.
Cautions: Keep the dryer moving so you don’t scorch the fabric, and avoid synthetic satins, which can melt or warp. Results, like the hot-water method, are generally temporary.
Permanent Scrunchie Repairs
The quick fixes above buy you time. If you want a scrunchie that grips like new, replacing or shortening the elastic is the real solution. It’s also surprisingly simple, and it takes about 10 to 15 minutes, which is longer than five minutes but well worth it for a scrunchie you love.
Fix 5: Knot the Elastic to Shorten It (about 5 to 10 minutes)
If the elastic still has some life but is simply too long, you can shorten it.
How to do it:
- Find the small seam or opening in the scrunchie where it was sewn closed.
- Use a seam ripper or small scissors to carefully open about an inch of the seam.
- Gently pull out the elastic, taking care not to let the ends slip back inside.
- Tie a small, tight knot in the elastic to shorten it, or overlap and re-sew the ends, then trim any extra length.
- Tuck the elastic back in, fold the fabric edges neatly, and sew the opening closed with a few small stitches.
Best for: Scrunchies where the elastic is intact but loose.
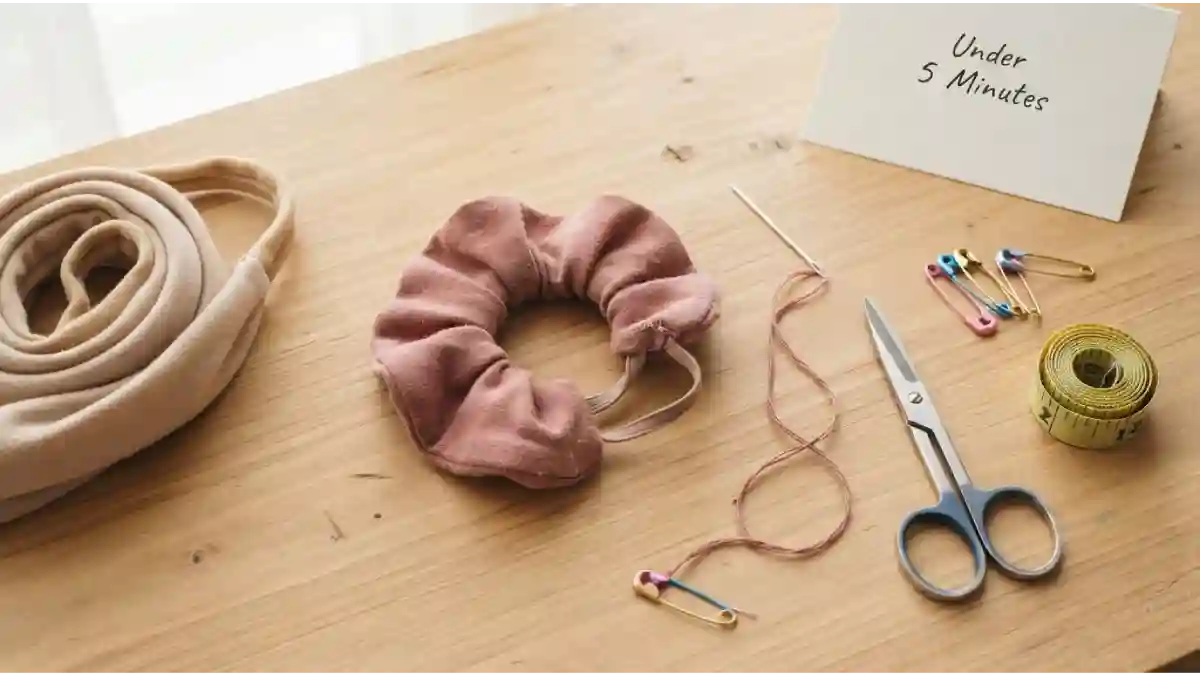
Fix 6: Replace the Elastic with a Safety Pin (about 10 to 15 minutes)
This is the most reliable permanent fix, and it’s how people restore scrunchies that have gone completely limp. If the elastic isn’t stretchy anymore, it likely just needs to be replaced.
What you need:
- About 8 to 9 inches of ¼-inch elastic (adjust for the size of your scrunchie)
- A safety pin
- Small scissors or a seam ripper
- A needle and thread
How to do it:
- Open the seam. Find the small gap where the scrunchie was closed, and open it up with a seam ripper if needed.
- Remove the old elastic. Cut it and pull it out of the fabric tube.
- Measure the new elastic. Decide how snug you want it. A common starting point is to wrap the elastic around a ponytail or your wrist to test the size, allowing a small overlap for sewing.
- Thread it through. Attach a safety pin to one end of the new elastic, and feed the pin through the fabric tube until it comes out the other side. Hold the other end so it doesn’t slip inside.
- Join the ends. Sew the two ends of the elastic together with a zigzag stitch or a few firm stitches, or tie a secure knot. Trim any extra.
- Close the scrunchie. Tuck the raw edges of the fabric inside, pin the gap closed, and sew it shut with a small straight stitch, catching all the layers.
- Fluff the fabric and give it a test wrap.
Best for: Any scrunchie with dead, broken, or badly stretched elastic.
Tip: If you’re replacing the elastic anyway, you can choose a slightly stronger or wider elastic if you have thick hair.
Fixes for Stretched Headbands
Headbands come in several styles, and the fix depends on the style.
Fix 7: Fold and Sew a Tuck (fabric or jersey headbands, 10 to 15 minutes)
If a fabric or jersey headband is just too big, you can take it in.
How to do it:
- Try on the headband and pinch the extra fabric at the back until it fits comfortably. Mark that spot.
- Turn the headband inside out, and fold the marked area to the inside.
- Sew along the fold by hand with small stitches (or with a machine, if you have one).
- Trim any excess fabric, turn the headband right side out, and test the fit.
Best for: Wide fabric and jersey headbands that have stretched or never fit quite right.
Fix 8: Add Elastic Inside (fabric headbands, 10 to 15 minutes)
Adding a short piece of elastic is one of the simplest ways to fix a headband that’s too big.
How to do it:
- Measure how long the section is that you want to tighten (usually the back portion).
- Cut a piece of elastic about 2 to 3 inches shorter than that measurement.
- Turn the headband inside out. Sew one end of the elastic to the inside at one end of the section.
- Stretch the elastic slightly as you sew it down the inside, so it’s evenly distributed, then sew the other end in place.
- Turn the headband right side out.
Best for: Fabric headbands where you can access the inside seam.
Fix 9: Add Hook-and-Loop Closure (adjustable fit, 10 minutes)
If you want a non-permanent, adjustable fix, a small piece of hook-and-loop fastener (Velcro) at the back lets you tighten or loosen the headband as needed. Sew or glue the pieces on in place, if the material allows it.
Best for: Wide headbands, spa headbands, and sports headbands you want to adjust.
Fix 10: Reshape a Plastic Headband (about 5 minutes)
Plastic headbands loosen when the band spreads outward, and the fix is to gently reshape it and add grip.
How to reshape:
- Wrap a rubber band around the ends of the headband to pull the curve back inward.
- Apply a small amount of low heat, such as warm air from a hair dryer, and let it cool completely while still held in the tighter shape. If you let go before it cools, it may spring back to its old shape.
- Test the fit. Don’t force it into a tight curve all at once, since plastic headbands can snap if you bend them too far.
How to add grip:
- Stick small foam pads inside the band, particularly at the ends and top.
- Add a strip of ribbon or velvet, secured with fabric glue or a small amount of hot glue.
- Use bobby pins to anchor the headband in your hair.
Best for: Hard plastic or thin metal headbands that slip off your head.
Fix Comparison Table
| Fix | Time | Permanent? | Best for | Main risk |
|---|---|---|---|---|
| Hair tie hack | ~1 min | No | Any loose scrunchie | None |
| Twist twice | ~30 sec | No | Slightly loose scrunchies | None |
| Hot-water shrink | ~3–5 min | No (temporary) | Mildly stretched scrunchies | Burns, fabric or dye damage |
| Hair dryer heat | ~2 min | No (temporary) | Mild stretching | Scorching fabric |
| Knot the elastic | ~5–10 min | Yes | Loose but intact elastic | Needs a small sewn seam |
| Replace the elastic | ~10–15 min | Yes | Dead or broken elastic | Takes a bit of sewing |
| Fold and sew a tuck | ~10–15 min | Yes | Oversized fabric or jersey headbands | Needs sewing |
| Add elastic to headband | ~10–15 min | Yes | Loose fabric headbands | Needs sewing |
| Hook-and-loop closure | ~10 min | Adjustable | Wide or sports headbands | Needs sewing or glue |
| Reshape plastic headband | ~5 min | Semi-permanent | Plastic headbands | Can snap if bent too far |
Which Fix Works for Which Fabric
| Fabric | Best quick fix | Best permanent fix | Cautions |
|---|---|---|---|
| Cotton | Hair tie hack, hot-water shrink | Replace elastic | Handles heat well, can shrink |
| Velvet | Hair tie hack, twist | Replace elastic | Avoid hot water, which can crush the pile |
| Satin or silk | Hair tie hack, twist | Replace elastic | Heat and water can damage the fabric |
| Jersey or knit | Twist, hair tie hack | Replace elastic or sew a tuck | Heat can distort the stretch |
| Polyester | Hair tie hack | Replace elastic | Dryer heat can warp or melt it |
| Scrunchies with embellishments | Hair tie hack | Replace elastic carefully | Heat can loosen glued parts |
When the Elastic Is Beyond Repair
Sometimes the elastic can’t be saved, and trying to tighten it will only waste your time. Signs the elastic is done:
- It’s brittle, cracking, or crumbling.
- It’s frayed or visibly thin.
- It has lost all of its stretch and stays limp when you pull it.
- It has snapped or has a visible break.
In those cases, skip the heat hacks and replace the elastic entirely. It’s often the cleanest, fastest, and most durable fix.
How to Keep Them From Stretching Out Again
A few small habits can extend the life of any scrunchie or headband:
- Rotate your accessories. Giving each one a break between wears lets the elastic recover instead of staying under constant tension.
- Don’t wrap too tightly. Avoid pulling a scrunchie around thick hair or multiple layers, since that stretches the elastic past its limit.
- Wash gently. Hand wash in cool or lukewarm water with mild detergent, then air dry. Avoid hot water and the dryer, which can damage elastic.
- Don’t store them stretched. Keep scrunchies loosely stored rather than stretched around a doorknob or a tight wrist band for long periods.
- Trim loose threads promptly. Snipping loose threads instead of pulling them keeps seams from opening up.
- Remove them before heat styling. Keep scrunchies and elastic headbands away from curling irons and flat irons.
Cost: Repair vs. Replace
| Option | Approx. cost | Time | Notes |
|---|---|---|---|
| Hair tie hack | Pennies | 1 min | Uses a hair tie you already have |
| Replacement elastic (a small pack) | ~$2–$4 | 10–15 min | Enough elastic for several scrunchies |
| Safety pin, needle, and thread | ~$2–$5 (often already owned) | Included | One-time supplies |
| Buying a new scrunchie | Roughly $1–$10 or more depending on the style | Shopping time | Designer or silk scrunchies cost more |
Prices are approximate and may change at any time depending on the store, brand, size, and current sales.
A small pack of elastic costs less than a single new scrunchie and can revive several of your favorites, which makes repairing the clear winner for pricier silk or velvet scrunchies.
Common Mistakes to Avoid
- Using boiling water carelessly. Burns are a real risk. Use tongs and a stable bowl.
- Soaking delicate fabrics. Silk, satin, and velvet can be damaged by very hot water.
- Expecting heat to revive dead elastic. If the elastic has no stretch left, replace it.
- Cutting the elastic too short. Too-tight elastic can hurt your head or snap quickly. Test the fit before sewing.
- Skipping the safety pin. Without it, the elastic can slip into the tube and be hard to retrieve.
- Forcing a plastic headband. Bending too far can snap it.
- Putting it away wet. Let everything dry fully to avoid mildew and weakened fibers.
📌 YOU MIGHT ALSO LIKE:
How to Polish Tarnished Silver-Plated Jewelry Using Only Baking Soda and Foil
7 Walmart Accessories That Look Like They Came Straight from a Nordstrom Catalog
FAQ
Can you really fix a stretched-out scrunchie in under 5 minutes?
Yes, with quick fixes. Sliding a regular hair tie inside the scrunchie, twisting it twice, or giving it a short hot-water dip can all work in a few minutes. Replacing the elastic is a more permanent solution and takes about 10 to 15 minutes.
Does the boiling water trick really work?
It can tighten a mildly stretched scrunchie enough to wear again, but it won’t make it brand new, and results are usually temporary. It also carries risks of burns and fabric damage, so use tongs and avoid it on delicate fabrics.
How much elastic do I need to replace the elastic in a scrunchie?
Many tutorials use about 8 to 9 inches of ¼-inch elastic for a standard scrunchie, but it depends on the size you want. Wrap the elastic around your ponytail or wrist to test the fit before you sew the ends together.
How do I fix a headband that’s too big?
For fabric or jersey headbands, you can add a short piece of elastic inside or fold and sew a small tuck at the back. For plastic headbands, gently reshape the band with a rubber band and low heat, or add foam pads or ribbon for grip.
Will a hair dryer shrink elastic?
Heat from a hair dryer can temporarily tighten some elastic, but results vary, and you need to keep the dryer moving to avoid scorching the fabric. It’s not a substitute for replacing elastic that has worn out.
How can I stop my scrunchies from stretching out so quickly?
Rotate through several scrunchies, avoid wrapping them tightly around thick hair, wash them gently in cool water, and let them air dry. Avoid heat, which can degrade the elastic over time.
The Bottom Line
A loose scrunchie or headband usually doesn’t need to be thrown away. For a quick rescue, slip a hair tie inside, twist the scrunchie twice, or try a careful, short hot-water tighten. For a lasting fix, replacing the elastic with a safety pin and a few stitches takes about 10 to 15 minutes and costs only a couple of dollars. Headbands can be tightened with a small tuck, a strip of elastic, or a gentle reshape and some grip. Match the fix to the fabric, be careful with heat, and your favorite accessories can stay in rotation for a long time.
For more budget-friendly wardrobe repair guides and easy fixes, check out more posts over at The Frugal Glow.
Sources: