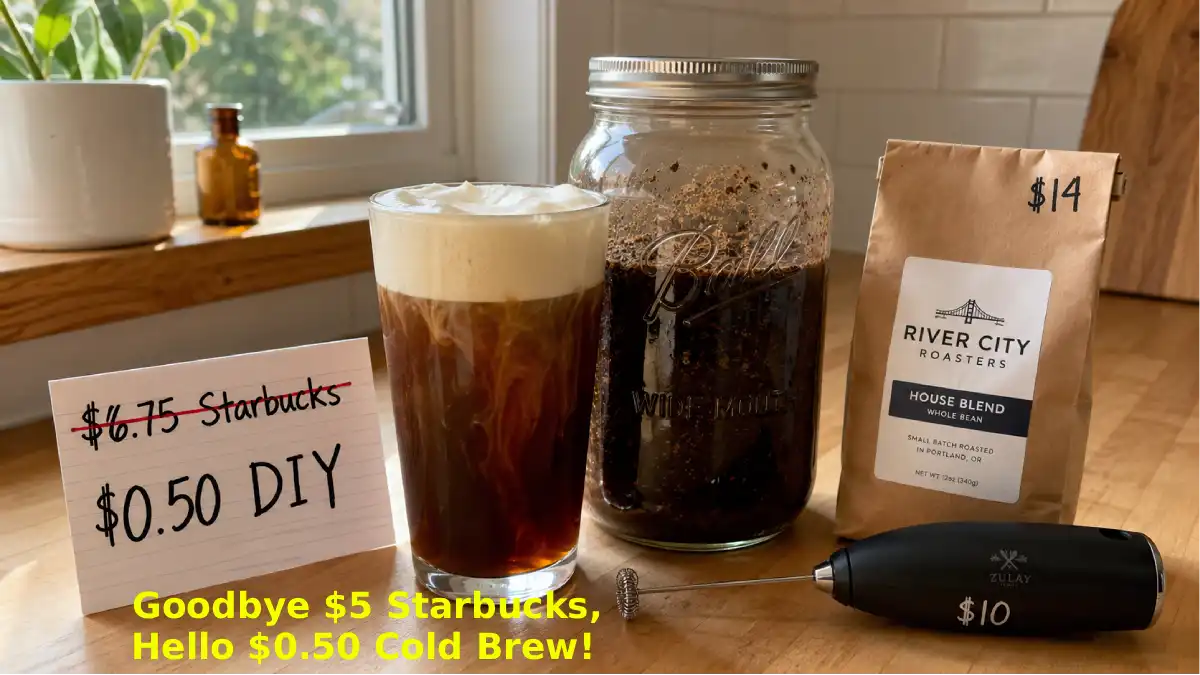
Why I Swapped My $5 Starbucks for a $0.50 ‘DIY Cold Brew’ (And It Tastes Better)
I need to tell you about the morning I finally lost it. I was sitting in the Starbucks drive-thru line, already late for work, watching the minutes tick by on my dashboard clock. The car in front of me was ordering for what sounded like an entire office. The total came to $47. I was next. I ordered my usual: a grande cold brew with oat milk and vanilla sweet cream cold foam. $6.12. Handed over my card. Didn’t think twice.
Then I got to work, took a sip, and realized it was wrong. They’d used regular milk, not oat. The foam was flat. The coffee was bitter. And I had paid six dollars for something I didn’t even enjoy.
That was the day I decided to figure out cold brew at home. Not the complicated kind with cheesecloth and fancy glass pitchers. The lazy, cheap, actually-works kind. The kind that costs fifty cents and tastes better than anything Starbucks has ever made.
I’ve been making my own cold brew for eight months now. I’ve perfected the recipe. I’ve done the math. And I’m never going back. Here’s everything I learned, including the mistakes that made me want to throw my coffee maker out the window.
Jump Links
- The $6 Mistake That Broke My Caffeine Loyalty
- What Even Is Cold Brew (And Why It’s So Expensive to Buy)
- The $0.50 DIY Recipe That Changed My Mornings
- The Simple Equipment You Need (Under $15 Total)
- The Math: What I Saved in One Year
- How to Make the ‘Starbucks Foam’ at Home (For Pennies)
- My Biggest Mistakes (So You Don’t Make Them)
- Flavor Variations That Make DIY Feel Fancy
- The Environmental Argument (Bonus Savings)
- Frequently Asked Questions (FAQ)
- Final Thoughts: Your Coffee Should Serve You, Not Your Wallet
The $6 Mistake That Broke My Caffeine Loyalty
I want to be clear about something. I wasn’t buying Starbucks because I thought it was the best coffee in the world. I was buying it because it was convenient, consistent (mostly), and part of my routine. The drive-thru. The familiar cup. The little moment of calm before a chaotic day.
But that morning, sitting in my car with a wrong order and a $6.12 charge, I realized something. I wasn’t getting convenience. I was getting a thirty-minute round trip, a daily expense I couldn’t justify, and a drink that I could probably make better at home.
So I went home that night and started researching cold brew. Not the fancy “artisanal” method that requires a PhD in coffee science. Just the basic, lazy-person method that anyone can do.
The first batch was bad. Really bad. I used the wrong ratio and ended up with coffee that tasted like mud. The second batch was drinkable but weak. The third batch was good. The fourth batch was better than Starbucks.
I’m on batch number sixty-something now. It takes me five minutes of active time. It costs me about fifty cents per 16-ounce serving. And every time I take a sip, I smile at the $5.62 I just saved.
What Even Is Cold Brew (And Why It’s So Expensive to Buy)
Before I give you the recipe, let me explain what cold brew actually is. Because most people confuse it with iced coffee. They are not the same thing.
Iced coffee: Hot brewed coffee that’s been cooled down and poured over ice. It’s often bitter because heat extracts more acids and oils.
Cold brew: Coffee grounds steeped in cold water for 12-24 hours, then strained. The slow, cold extraction results in a smoother, less acidic, naturally sweeter coffee.
That smoothness is why people love cold brew. It doesn’t need as much sugar or milk to taste good. And that’s why coffee shops charge $5-7 for it. They know it’s a premium product.
But here’s the secret. The process is not hard. It’s not expensive. You don’t need special equipment. You need coffee grounds, water, a container, and patience. That’s it.
The markup at Starbucks is astronomical. A pound of good coffee beans costs $10-15. That makes about 8-10 servings of cold brew concentrate. At $0.50-0.75 per serving for the coffee alone. Starbucks charges $5-7 for a single serving. They’re making a 1,000% profit margin on the coffee itself. And then they charge extra for milk and foam.
I’m not mad about it. They’re a business. But I’m also not paying it anymore.
The $0.50 DIY Recipe That Changed My Mornings
Here’s the exact recipe I’ve used for the past eight months. It’s cheap. It’s simple. It works.
Ingredients:
- 1 cup coarsely ground coffee beans (medium-dark roast works best)
- 4 cups cold water (filtered is better, tap is fine)
- Optional: milk of choice, sweetener, vanilla extract
Step 1: Combine
In a large jar or pitcher, combine the coffee grounds and cold water. Stir gently to make sure all grounds are saturated. Don’t stir aggressively – that adds bitterness.
Step 2: Steep
Cover and let sit at room temperature for 12-24 hours. I do 16 hours. Less than 12 and it’s weak. More than 24 and it starts to get bitter. Find your sweet spot.
Step 3: Strain
Pour the mixture through a fine-mesh strainer lined with a coffee filter or a thin kitchen towel (nut milk bags work great). This takes 5-10 minutes. Don’t rush it.
Step 4: Store
The resulting liquid is cold brew concentrate. It’s strong. You’ll dilute it 1:1 with water or milk. Store in the fridge for up to 2 weeks.
Step 5: Serve
Fill a glass with ice. Add equal parts cold brew concentrate and water (or milk). Sweeten if desired. Add vanilla cold foam if you’re feeling fancy (recipe below).
Total active time: 10 minutes
Total passive time: 12-24 hours (you’re sleeping or working)
Cost per 16oz serving: $0.45-0.60 depending on coffee beans
Compare that to Starbucks: $5-7 per serving.
The Simple Equipment You Need (Under $15 Total)
You don’t need a special cold brew maker. You don’t need a $40 glass pitcher with a built-in filter. You need things you probably already own.
Essential equipment (cost: $0 if you already own these):
- Large jar or pitcher (32 oz or larger) – a Mason jar, an old pasta sauce jar, a mixing bowl
- Fine-mesh strainer
- Coffee filters or a thin kitchen towel
- Something to hold the strainer (another bowl or pot)
Optional but helpful equipment (cost: under $15 total):
- Nut milk bag ($8 on Amazon) – Reusable, no paper filters needed, strains faster
- Cold brew maker with built-in filter ($15-20 at Target) – Convenient, but not necessary
- Coffee grinder (already have?) – Fresh-ground beans taste better, but pre-ground works fine
What I actually use: A 64 oz Mason jar ($12) plus a nut milk bag ($8). Total one-time investment: $20. I’ve used both for eight months. They’ve paid for themselves many times over.
What you should NOT buy: Fancy cold brew pitchers with metal filters that clog. Pre-made cold brew concentrates in cartons (more expensive than Starbucks). Single-use cold brew bags (wasteful and expensive per serving).
The Math: What I Saved in One Year
Let me break this down with actual numbers from my own coffee consumption.
Before (Starbucks):
| Item | Cost |
|---|---|
| Grande cold brew with oat milk | $5.25 |
| Vanilla sweet cream cold foam (add-on) | $1.00 |
| Tax (varies, ~8%) | $0.50 |
| Total per drink | $6.75 |
I was buying this 6 days per week. (Sunday was my “treat yourself” day at a local cafe.)
- Per week: $40.50
- Per month: $162
- Per year: $1,944
After (DIY):
| Item | Cost |
|---|---|
| Coffee beans (1 lb, makes ~10 servings of concentrate, each serving makes 2 drinks) | $14 |
| Oat milk (1 carton, lasts 1 week) | $5 |
| Vanilla syrup (1 bottle, lasts 3 months) | $8 |
| Filtered water | $0.01 |
| Cost per 16oz drink | $0.50 – $0.75 |
Let’s use $0.65 as the average.
- Per week (6 days): $3.90
- Per month: $15.60
- Per year: $187.20
Annual savings: $1,944 – $187.20 = $1,756.80
That’s not a typo. Seventeen hundred and fifty-six dollars. And eighty cents.
What I did with the savings:
- Paid off a credit card ($800)
- Bought a new coffee maker ($40)
- Donated $200 to my local food bank
- Put the rest ($716) into a vacation fund
One year. One simple swap. Nearly two thousand dollars back in my pocket.
How to Make the ‘Starbucks Foam’ at Home (For Pennies)
The vanilla sweet cream cold foam was my Starbucks weakness. That fluffy, sweet, cloud-like layer on top of the coffee. I assumed it required industrial equipment and secret recipes.
It doesn’t.
Homemade Vanilla Sweet Cream Cold Foam (cost: $0.15 per serving):
Ingredients:
- 2 tablespoons heavy cream (or oat cream for dairy-free)
- 1 tablespoon milk (or oat milk)
- 1 teaspoon vanilla syrup (or 1/4 tsp vanilla extract + 1/2 tsp sugar)
- Pinch of salt (trust me)
Instructions:
- Combine all ingredients in a small jar or a French press (if you have one)
- Use a handheld milk frother ($10 on Amazon) for 20-30 seconds, until doubled in size and fluffy
- No frother? Shake vigorously in a sealed jar for 60 seconds, or whisk vigorously in a small bowl
- Spoon or pour over your cold brew
Comparison:
- Starbucks foam add-on: $1.00
- DIY foam per serving: $0.15
Savings per year (if you add foam every day): $365
Now my daily cold brew with foam costs me $0.80 total. Still less than one-sixth of the Starbucks price.
My Biggest Mistakes (So You Don’t Make Them)
I messed up a lot. Learn from my failure.
Mistake #1: Using finely ground coffee
I used my regular drip coffee grounds. Big mistake. Fine grounds pass through the strainer, making the cold brew sludgy. They also extract faster, leading to bitterness. Use coarse grounds. If you don’t have a grinder, buy “cold brew” pre-ground or ask the coffee shop to grind it coarse for you.
Mistake #2: Steeping too long
My first batch, I left it for 36 hours because I forgot about it. It tasted like burnt tires. 12-24 hours is the window. 16-18 is the sweet spot. Set a timer on your phone.
Mistake #3: Using boiling water
Cold brew uses cold water. That’s the whole point. Someone online said to use hot water for faster extraction. That’s just iced coffee. Don’t do it.
Mistake #4: Not diluting the concentrate
The concentrate is strong. I drank it straight the first time and thought my heart would explode. Dilute 1:1 with water or milk. Adjust to your taste.
Mistake #5: Storing it for too long
Cold brew stays fresh in the fridge for up to two weeks. After that, it starts to taste stale. Don’t make more than you can drink in 14 days.
Mistake #6: Using cheap, stale beans
Cold brew is forgiving, but not that forgiving. Stale beans make stale-tasting coffee. Spend $12-15 on fresh beans from a local roaster or a good grocery store brand. It’s worth the extra $3-4.
Flavor Variations That Make DIY Feel Fancy
Once you master basic cold brew, experiment with flavors. These cost pennies and make you feel like a barista.
Vanilla Cinnamon:
Add 1/2 teaspoon vanilla extract and a cinnamon stick to the jar before steeping. Remove cinnamon stick before straining.
Chocolate Mint:
Add 1 tablespoon cacao nibs (not cocoa powder – it gets sludgy) and a few fresh mint leaves to the jar before steeping.
Brown Sugar Maple:
Stir 1 tablespoon brown sugar and 1/2 teaspoon maple extract into your finished drink. Warm the milk first to dissolve the sugar.
Coconut Cold Brew:
Replace half the water with unsweetened coconut water during brewing. Use coconut milk instead of regular milk.
Spiced Chai:
Add 2 chai tea bags to the jar during steeping. Remove before straining. The result is chai-cold brew hybrid. It’s incredible.
Salted Caramel:
Add 1 tablespoon caramel syrup and a pinch of sea salt to your finished drink. Stir well.
Each variation adds less than $0.10 to the cost. Compare that to Starbucks’ $1+ flavor add-ons.
The Environmental Argument (Bonus Savings)
I didn’t start making DIY cold brew for the environment. I started for my wallet. But the environmental savings are real.
Starbucks waste per drink:
- Plastic cup (some stores, depends on location)
- Plastic lid
- Cardboard sleeve
- Plastic straw (though many stores have paper straws now)
- Napkin
- Receipt
DIY waste per drink:
- Coffee grounds (compostable)
- Paper filter (compostable, if you use one)
- Glass jar (reused hundreds of times)
Over one year (6 drinks/week):
- Starbucks: ~312 cups, 312 lids, 312 straws, 312 napkins
- DIY: 0 single-use items
Some Starbucks locations have reusable cup programs. Some don’t. Most people don’t use them. The waste is enormous.
My city has a plastic bag ban and a composting program. My coffee grounds go into my compost bin. My paper filters go in too. My glass jar is the same one I’ve used for two years.
I’m not perfect. But I’m better. And I saved $1,756 doing it.
The 30g Protein Breakfast for Under $1.50: Ditch the Expensive Protein Shakes!
Frequently Asked Questions (FAQ)
1. How long does homemade cold brew last in the fridge?
Properly stored in an airtight container, cold brew concentrate stays fresh for up to 14 days. After that, it starts to oxidize and taste stale. Make smaller batches if you don’t drink it daily. I make a 4-cup batch every 5-6 days.
2. Can I use pre-ground coffee from the grocery store?
Yes, but buy it coarsely ground. Look for “cold brew grind” or “French press grind” on the bag. Regular drip grind is too fine and will make your cold brew sludgy. If you can only find fine grind, use a paper filter or a nut milk bag to strain – don’t rely on just a metal strainer.
3. Why is my homemade cold brew bitter?
Usually one of three reasons: steeping too long (over 24 hours), using water that’s too hot (should be cold), or using finely ground coffee. Also, cheap stale beans can taste bitter. Fix these and your brew will smooth out.
4. Do I need special equipment to make cold brew?
No. A large jar, a strainer, and a paper filter or kitchen towel are enough. A nut milk bag ($8 on Amazon) makes straining much easier and is reusable. That’s the only equipment I recommend buying.
5. Is cold brew stronger than regular coffee?
Yes and no. The concentrate is much stronger than drip coffee. But you dilute it 1:1 with water or milk, so the final drink ends up with similar caffeine to a regular coffee. A 16oz cold brew from Starbucks has about 200-300mg caffeine (depending on how many pumps of concentrate they use). My DIY version is comparable.
6. Can I make cold brew with decaf beans?
Yes. The process is identical. Use decaf beans, grind them coarse, steep for 12-24 hours. Decaf cold brew is harder to find in stores and more expensive. Making it at home is much cheaper.
7. How do I make dairy-free cold foam?
Replace heavy cream with full-fat oat cream (Oatly makes one, or use canned coconut cream). Use oat milk instead of dairy milk. The frothing process works the same. It won’t be quite as thick as dairy foam, but it’s close.
8. Is it really cheaper to make cold brew at home?
Let me give you the math again. A 12oz bag of good coffee beans costs $12-15. That makes about 8-10 servings of concentrate. Each serving of concentrate makes 2-3 drinks (depending on how strong you like it). So you’re getting 20-30 drinks from a $15 bag of beans. That’s $0.50-0.75 per drink. Add milk and foam, and you’re at $0.65-1.00 per drink. Starbucks charges $5-7 for the same drink. Yes. It is really that much cheaper.
Final Thoughts: Your Coffee Should Serve You, Not Your Wallet
Here’s what I want you to take away.
I still go to coffee shops. Not every day. But on weekends, with friends, as a treat. When I do, I enjoy it. I don’t feel guilty. I don’t do the math in my head. I just enjoy the experience.
But on a random Tuesday morning, when I’m rushing to get out the door and I just need caffeine? I’m making my own. It takes five minutes of active time. It costs fifty cents. It tastes better than anything I can buy.
The “latte factor” isn’t about deprivation. It’s about awareness. Once you know that you’re spending $6 on something you could make for $0.50, you can make an informed choice. Maybe you keep buying Starbucks because you love the ritual. Maybe you switch to DIY because you love the savings. Maybe you do both.
For me, DIY cold brew has been one of the highest-ROI habits I’ve ever adopted. A few minutes of effort. Almost two thousand dollars saved. And coffee that actually tastes the way I want it to.
That’s not cheap. That’s smart.
Now go brew something. ☕💛
For more everyday money-saving swaps, DIY tutorials, and frugal living tips, visit The Frugal Glow.