It’s 2:15 in the afternoon. You look in the bathroom mirror at work and there it is again: the shine. Your forehead is glowing, your nose is practically reflecting the overhead lights, and your concealer has quietly slid south. You think, I need something strong. Something that pulls every last drop of oil out of my face.
I’ve been there, and I want to gently talk you out of the “strong” mindset. Because the surest way to make oily skin more miserable is to treat it like an enemy. Scrub it, strip it, and it tends to answer back with irritation, tightness, and more shine than before.
There’s a smarter way to use a bag of green clay, and it costs less than your morning coffee. But before I give you the recipe, I owe you a couple of honest clarifications about the title.
Jump Links
- What “$2” and “Detox” Really Mean (Read This First)
- What Green Clay Actually Does for Oily Skin
- Why Your Skin Barrier Is the Whole Game
- Green Clay vs. Bentonite vs. Kaolin
- The Real Cost, Line by Line
- The Gentle Green Clay Mask Recipe
- Step-by-Step Application
- How Often, and for How Long
- The Barrier-Friendly Routine Around Your Mask
- Add-Ins to Use and Add-Ins to Skip
- Signs You’ve Overdone It (and a 7-Day Reset)
- Who Should Skip This Mask
- FAQ
- Final Thoughts
What “$2” and “Detox” Really Mean (Read This First)
The “$2” is a ceiling, not the sticker price of the first mask. A one-pound bag of French green clay powder was listed around $9.99 at Walmart in 2026, and that bag makes dozens of masks. Once you own it, a single mask costs roughly 30 to 50 cents, even with a few simple add-ins. So the honest version is: about $10 upfront, then pennies per session. I’m using “$2” as the most you should ever need to spend on one full mask session, including a little something extra.
“Detox” is a marketing word, not a medical one. There’s no good medical evidence that a clay mask pulls toxins out of your body. What clay does well is absorb excess oil and residue from the surface of your skin and leave a temporary matte, deep-cleaned feeling. That’s a perfectly good benefit. It’s just not detoxification.
Clay won’t permanently shrink pores or cure acne. Pore size is largely genetic, and acne is a medical condition that sometimes needs a bigger plan. A mask can help manage shine and the look of congestion, and that’s about where its job ends.
“Without stripping your barrier” is the real goal. The whole approach below is built around protecting your skin barrier: a thin layer, a short time, a modest frequency, and moisturizer afterward.
I’m not a dermatologist. This is general information, not medical advice. If you have a skin condition, persistent acne, or reactive skin, check with a board-certified dermatologist.
With that out of the way, let’s talk about what clay is actually doing on your face.
What Green Clay Actually Does for Oily Skin
Clay masks are a classic for good reason. Board-certified dermatologist Viktoryia Kazlouskaya explains that clay masks are known for their oil-absorbing qualities, which helps remove excess grease from the skin’s surface and leaves a matte texture. She also notes that clays may have an anti-inflammatory effect and can be used for acne-prone skin.
Here’s what a good clay mask can reasonably do:
Absorb surface oil. This is the headline benefit. Clay is porous and mineral-rich, so it grabs onto oil and residue on your skin like a sponge.
Leave a matte finish. Many people with oily skin love the smooth, shine-free look for several hours afterward. Keep in mind the effect is temporary.
Give you a “deep-cleaned” feeling. That clean, slightly tight sensation is partly the clay drying on your skin.
Help the look of congestion. By lifting oil and surface buildup, a mask may make pores look a little clearer for a while.
And here’s what it can’t do:
It can’t remove toxins from your body. Your liver and kidneys handle that job.
It can’t change how much oil your skin makes. Oil production is influenced by genetics and hormones. As one skincare writer put it, the goal with oily skin is management, not elimination.
It can’t fix everything on its own. A mask is a once-or-twice-a-week treat, not the foundation of your routine.
There’s one more misconception worth clearing up: tightness doesn’t mean it’s working better. That tight feeling usually comes from the mask drying and your skin losing a bit of surface water. Too much tightness can actually mean the product is too harsh or has been left on too long.
Why Your Skin Barrier Is the Whole Game
Think of your skin barrier as the outer wall of your skin. It’s made of skin cells and fats that work together to keep moisture in and irritants out. When it’s healthy, your skin feels comfortable, looks even, and handles products without drama.
When the barrier gets stressed, you might notice:
- A tight, dry, or “squeaky” feeling after cleansing
- Flaking or rough patches
- Redness or stinging when you apply products
- Breakouts that seem to pop up out of nowhere
- Oily shine in some areas with dryness in others
Clay masks can cause trouble when they’re used too often, left on too long, or paired with other drying products. The most common side effects are dryness, tightness, flaking, redness, and temporary irritation. And here’s a tricky part: people sometimes mistake irritation for proof the mask is “drawing out impurities,” when discomfort is really a sign the barrier is being stressed.
Some dermatologists also point out that over-drying can lead to rebound oiliness and inflammation, which means the skin can look shinier and feel worse after a harsh routine. That’s not a guaranteed outcome for everyone, but it’s a good reason to be gentle.
The American Academy of Dermatology’s oily skin guidance echoes the same philosophy. It recommends a mild, gentle face wash, advises against oil-based or alcohol-based cleansers because they can irritate your skin, and says to apply moisturizer after cleansing. Even oily skin needs hydration, and a good routine supports the barrier instead of fighting it.
So here’s the game plan: use the clay for what it’s good at, absorbing surface oil, while protecting the barrier with short contact time, low frequency, and a good moisturizer afterward.
Green Clay vs. Bentonite vs. Kaolin
Not all clays are created equal. Here’s a quick guide.
| Clay Type | Strength | Best For | Barrier Risk | Approx. 2026 Price |
|---|---|---|---|---|
| French green clay | Highly absorbent | Oily, acne-prone, or congested skin | Moderate to high if overused | ~$10 per 1 lb |
| Bentonite clay | Highly absorbent, swells with water | Oily skin | Moderate to high if overused | ~$12 to $15 per 1 lb |
| Kaolin clay | Mild, gentle | Normal, combination, sensitive, or dry skin | Low | ~$16 for 2 lb |
A few takeaways.
French green clay is a great fit for oily skin because it’s strongly absorbent. That’s also why it needs a gentle hand. Stronger doesn’t mean better.
Bentonite is similar in strength. Popular products like Aztec Secret’s Indian Healing Clay are bentonite, and a one-pound container ran around $15 at Walmart. If you already own some, you can use it with the same cautions.
Kaolin is the gentle option. If your skin is combination, sensitive, or prone to dryness, kaolin is a friendlier choice, and you can also blend it with green clay to soften the effect. Try a half-and-half mix if you’re nervous.
Prices vary by seller and size, so shop around. Tiny jars of “beauty-grade” clay can cost far more per ounce than a one-pound bag of the same ingredient, so check the unit price.
The Real Cost, Line by Line
Let’s do the honest math, since the whole point is saving money.
| Item | Amount Per Mask | Approx. Cost Per Mask | Notes |
|---|---|---|---|
| French green clay powder | 1 tablespoon | ~$0.22 | From a $9.99, 1-lb bag (roughly 40+ tablespoons; my estimate) |
| Liquid (water, cooled green tea, rose water, or pure aloe gel) | 1 to 1½ tablespoons | ~$0.05 to $0.15 | Plain water is free |
| Honey (optional) | ½ to 1 teaspoon | ~$0.05 to $0.10 | A common humectant add-in |
| Total per mask | ~$0.30 to $0.50 | ||
| Upfront cost for a bag of clay | 1 lb | ~$10 | One-time |
For comparison, popular store-bought clay masks run from roughly $20 at the drugstore to about $33 for a tube of a drugstore-brand favorite, according to recent roundups. Those can be perfectly good products, especially if you want a gentler, pre-formulated mask. But the DIY route costs a small fraction of that.
Even if you add a $2 bottle of aloe gel or a new moisturizer, the full experience stays at or near the “$2” ceiling in the title. That’s the idea.
The Gentle Green Clay Mask Recipe
This recipe is designed to be effective but kind to your barrier.
Ingredients (for one mask)
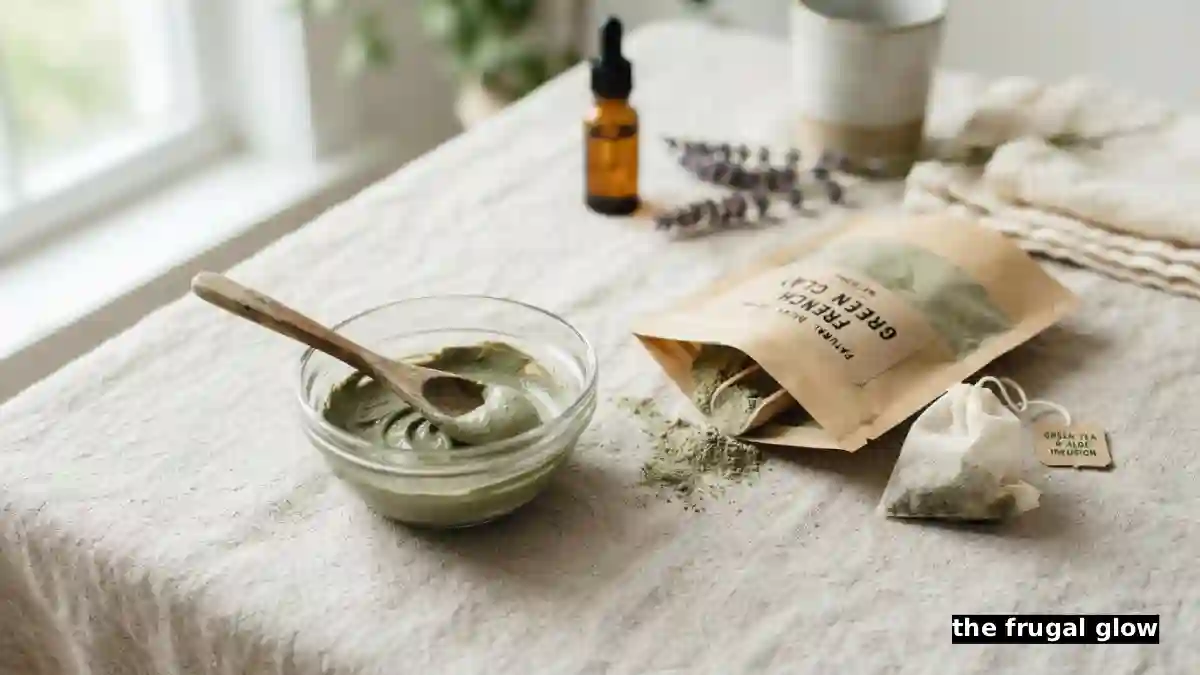
- 1 tablespoon French green clay powder
- 1 to 1½ tablespoons liquid: plain water, cooled green tea, rose water, or pure aloe vera gel
- ½ to 1 teaspoon honey (optional, for a little extra comfort)
Tools
- A small glass, ceramic, or plastic bowl (the traditional recommendation is to avoid metal bowls and spoons with clay, so use a wooden or plastic spoon)
- A clean wooden or plastic spoon
- A clean washcloth
- A timer (this is not optional, I promise)
Notes on the Recipe
- Start with less liquid, then add. Mix the clay and liquid slowly, adding a few drops at a time, until you get a smooth, spreadable paste, about the consistency of Greek yogurt. If it’s too thick, it’ll be harder to spread. If it’s too runny, it’ll drip.
- Aloe or green tea instead of plain water adds a little soothing power. Use pure aloe gel without added fragrance or alcohol if you can.
- I’m leaving out apple cider vinegar on purpose. Some DIY recipes call for it, but it’s acidic and many people find it irritating. If your goal is protecting your barrier, skip it. That’s my own cautious take, not a rule.
- Mix fresh each time. Don’t store leftover wet mask. Mix only what you need and toss the extra.
Step-by-Step Application
Step 1: Patch test (the first time only)
Before putting a new product on your whole face, apply a small amount of the mask to a discreet spot, like behind your ear or along your jawline. Wait 24 hours and watch for redness, itching, or irritation. If you react, don’t use it on your face.
Step 2: Cleanse gently
Wash your face with a mild, gentle cleanser and lukewarm water. As the AAD suggests, avoid harsh, alcohol-based, or oil-based cleansers. Pat your skin dry with a clean towel.
Step 3: Apply a thin layer
Use clean fingers or a clean brush to spread a thin, even layer over your oily areas. For most people, that means the T-zone: forehead, nose, and chin. If your cheeks are dry or sensitive, leave them bare. You don’t need to slather it on. A thin layer works just as well as a thick one.
Avoid your eyes, lips, and the delicate skin around your eyes.
Step 4: Set a timer for 8 to 10 minutes
Most clay mask guidelines suggest around 10 to 15 minutes for commercial products, but with a homemade mask that has no buffering ingredients, I’d stay on the shorter side, especially at first. Start at 5 to 8 minutes the first time and work up to 10 if your skin handles it well.
Step 5: Rinse before the mask is fully dry and cracked
This is the most important barrier-protecting step. Letting clay dry until it’s pale, stiff, and cracking isn’t necessary, and it may increase irritation. When the mask looks mostly set but still slightly damp (usually darker at the edges), it’s time to rinse. If it starts drying too fast, mist your face with a little water or hydrating spray.
Step 6: Rinse with lukewarm water
Use your fingertips and a soft washcloth, and gently wipe the mask away. Skip the scrubbing. Rinse until all the clay is gone, then pat dry.
Step 7: Moisturize right away
Apply a lightweight, non-comedogenic moisturizer while your skin is still slightly damp. This step matters. The minutes right after rinsing a clay mask are when your skin is most in need of hydration, and skipping moisturizer is one of the most common mistakes.
Step 8: Sunscreen in the morning
If you use the mask at night, great. Wear sunscreen the next morning as you normally would. If you use it during the day, apply sunscreen before heading out.
How Often, and for How Long
Frequency is the biggest lever you have for protecting your barrier. Here’s a simple guide.
| Skin Type | Starting Frequency | Maximum Frequency | Time on Skin | Where to Apply |
|---|---|---|---|---|
| Oily, tolerant | Once a week | Twice a week | 8 to 10 minutes | T-zone or full face |
| Combination | Once a week | Once or twice a week | 5 to 8 minutes | T-zone only |
| Acne-prone and not irritated | Once a week | Twice a week | 5 to 8 minutes | Oily areas |
| Sensitive or dry | Every other week to once a week | Once a week | 5 minutes (or skip) | Spot-treat only |
Dermatologist Michelle Farber, speaking with Skincare.com, notes that oily skin will generally tolerate masking about twice a week, while it’s better to stick to once a week for sensitive skin types. She also advises moisturizing after clay masking and avoiding piling on too many other products if your skin is sensitive, to prevent irritation.
Some beauty brands recommend more frequent use, such as two to three times a week. That’s not unreasonable for some oily skin, but if you’re prioritizing your barrier, I’d start at once a week and only go up if your skin looks and feels great.
A good rule of thumb: If you’re wondering whether you should mask today, you probably shouldn’t. Wait another day or two.
The Barrier-Friendly Routine Around Your Mask
The mask is just one part of the picture. A gentle daily routine does most of the work.
Morning:
- Rinse with lukewarm water, or use a gentle cleanser if you’re oily or sweaty.
- Apply a light, oil-free, non-comedogenic moisturizer.
- Apply sunscreen.
Evening:
- Gentle cleanser. The AAD advises avoiding oil-based or alcohol-based cleansers, which can irritate.
- Moisturizer.
Mask days (once or twice a week):
- Gentle cleanser.
- Mask for 8 to 10 minutes.
- Rinse with lukewarm water.
- Moisturizer right away.
Other tips from dermatologists:
- Don’t touch your face throughout the day. It can spread oil, dirt, and bacteria from your hands.
- Wash your face after sweating from exercise, then apply a light layer of moisturizer.
- Skip harsh scrubs. Scrubbing can damage your barrier and makes oily skin cranky.
- Don’t layer a mask on top of strong active ingredients (like exfoliating acids or retinoids) on the same night unless a dermatologist tells you to.
And don’t skip moisturizer. This surprises a lot of people with oily skin, but hydration is not the same as oil. Even oily skin needs water, and a lightweight moisturizer helps keep it balanced.
Add-Ins to Use and Add-Ins to Skip
DIY masks are popular because you can customize them, but some add-ins help and some cause trouble. Here’s my cautious guide.
| Add-In | Verdict | Why |
|---|---|---|
| Plain water | Use | Simple and free |
| Cooled green tea | Use | Gentle, and a common soothing add-in |
| Pure aloe vera gel | Use | Soothing and hydrating, a good buffer for the clay |
| Rose water | Use | Gentle and light, fine if fragrance doesn’t bother you |
| Honey | Optional | A common humectant that adds a little comfort |
| Plain oatmeal (finely ground) | Optional | Can be soothing, but may make the mask clumpy |
| Apple cider vinegar | Skip (my caution) | Acidic and irritating for many people |
| Lemon juice | Skip | Acidic and can cause irritation, plus sun sensitivity |
| Baking soda | Skip | Very alkaline and can disrupt the skin’s natural balance |
| Essential oils | Skip | Common sources of irritation and allergic reactions |
| Cinnamon or other spices | Skip | Can cause burning and redness |
The less you add, the easier it is to figure out what your skin likes. Start with clay and water or clay and aloe, and add only one new ingredient at a time.
Signs You’ve Overdone It (and a 7-Day Reset)
Even careful people overdo it sometimes. Here’s how to tell, and what to do.
Signs your barrier needs a break
- Skin feels tight or stings after cleansing, even without a mask
- Flaking, rough patches, or visible dryness
- Redness that lingers after rinsing
- Burning or stinging when you apply moisturizer
- New breakouts or bumps in unusual places
- Skin that looks shiny but feels dry or uncomfortable
The 7-Day Reset
- Stop the mask. Take a full break from clay and any other strong products, including exfoliating acids, scrubs, and retinoids, unless a dermatologist has told you otherwise.
- Simplify to the basics. Gentle cleanser, a plain moisturizer, and sunscreen in the morning. That’s it.
- Use lukewarm water. Hot water can make irritated skin worse.
- Moisturize more often if skin feels tight. A thin layer morning and night, plus a touch more on dry spots.
- Don’t pick or scrub. Hands off.
- Reintroduce slowly. After a week or two, once your skin feels calm, try the mask once, for a shorter time, on just the oiliest area.
- Get help if it doesn’t settle. Persistent irritation is worth a visit to a dermatologist.
If you ever get severe burning, swelling, blistering, or signs of an allergic reaction, wash the product off immediately and seek medical care.
Who Should Skip This Mask
Clay masks aren’t right for everyone. Be cautious or check with a dermatologist first if:
- You have eczema, rosacea, or very sensitive skin
- You have an active rash, open wounds, sunburn, or broken skin
- Your skin is already dry, flaky, or irritated
- You use prescription acne treatments or strong actives such as retinoids, or you’re on isotretinoin
- You have known allergies to any ingredient in the mask
- You’re pregnant or have a medical condition and aren’t sure what’s safe for you
People with eczema, rosacea, very sensitive skin, or active rashes should be especially careful, since drying products can worsen those conditions. If you’re not sure, a quick check with a dermatologist can save you a lot of trouble.
📌 YOU MIGHT ALSO LIKE:
FAQ
1. Does a green clay mask really detox your skin?
Not in a medical sense. There’s no good evidence that clay pulls toxins out of the body. What it does is absorb excess surface oil and residue, which can leave skin looking matte and feeling clean for a while.
2. How often should I use a clay mask on oily skin?
Many dermatologists suggest oily skin can tolerate masking about twice a week, while sensitive skin does better with once a week. If you’re protecting your barrier, start with once a week and increase only if your skin stays comfortable.
3. How long should I leave the mask on?
About 8 to 10 minutes is a good range for most people, and 5 to 8 minutes is smart the first few times. Rinse when the mask is mostly set but still slightly damp, rather than letting it dry until it cracks.
4. Why does my skin feel tight after a clay mask? Is that good?
Tightness usually comes from the mask drying and temporary water loss from your skin. It isn’t proof of deeper cleansing, and a lot of tightness can mean the mask is too harsh or was left on too long. Moisturize right after rinsing.
5. Can I use a clay mask if I have acne?
Clay can help absorb oil and may be used on acne-prone skin, but it won’t cure acne on its own. If you have persistent or severe acne, see a dermatologist for an evidence-based treatment plan.
6. What’s the best clay for oily skin?
French green clay and bentonite are both strongly absorbent and popular for oily skin. Kaolin is gentler and better for combination or sensitive skin. Whichever you choose, patch test first and keep your frequency low.
Final Thoughts
So, can a $2 green clay mask detox oily skin without stripping your barrier? The honest answer is that it won’t detox anything in the medical sense, and the “$2” is a ceiling rather than the first-mask price. But for about $10 upfront and pennies per use, it can help absorb excess oil, give you a matte finish, and make your skin feel fresh, as long as you keep it gentle.
The formula for protecting your barrier is simple: thin layer, short time, low frequency, and moisturizer right afterward. Stay patient with your skin, skip the harsh add-ins, and treat tightness as a warning sign rather than a badge of honor.
If your skin ever feels irritated, tight, or just wrong, take a break. Your barrier will thank you. And if something isn’t improving, a dermatologist can help you build a plan that fits your skin.
If you enjoy practical, budget-friendly beauty and wellness tips that work in real life, there’s plenty more waiting for you at The Frugal Glow, where we focus on smart, affordable ways to look and feel good without the fluff.
If you have a skin condition, persistent acne, or reactive skin, or you’re pregnant, talk with a board-certified dermatologist before trying a new skincare product or DIY mask.*
Sources
- For dermatologist-backed tips on gentle cleansing and moisturizing for oily skin, you can read the American Academy of Dermatology’s guide on how to control oily skin.
- To see how often a dermatologist recommends clay masking for different skin types and why moisturizing afterward matters, check out Skincare.com’s interview on how often to use clay masks.
- For a clear-eyed look at what clay masks can and can’t do, including the myths about toxins, tightness, and overuse, Acibadem’s overview of clay mask benefits, limits, and side effects is a useful read.